Sunday, March 30, 2014

Matcha Dorayaki

Hubby was away in Indonesia for biz trip last week and I was alone at home for one night before I went to stay at Mum's place for the next three. I had a slight craving for something matcha flavour, so I made some matcha flavoured dorayaki for breakfast the next day.

Now, I used to buy bakeable green tea powder from Phoon Huat for my bakes, but ever since I got my hand on a mini can of matcha powder from the Japanese section found in NTUC Finest, there is no turning back for me again. Costly for a mini can but well worth the price. Phoon Huat's bakeable green tea powder pales in comparison.


This small can costs slightly over 7 bucks.


I made Dorayaki several times before and came up with the following recipe I thought works the best for me.


Matcha Dorayaki (Makes 4 sets)
2 large eggs
60g caster sugar
80g plain flour + 1/2 tsp baking powder (sieved)
1 tbsp honey
1 tbsp oil
1-2 tbsp water
2 tsp matcha powder

Fillings - Azuki bean paste or Nutella chocolate jam

1. Combine eggs, sugar and honey in a mixing bowl and whisk till fluffy.
2. Add in sieved flour mixture into batter and mix till well blended. Cover with clingwrap and leave in fridge to rest for about 10 minutes.
3. Add water into batter and mix well. Batter should be slightly thicker than pancake batter. Too thin a batter will result in flat pancakes.
4. Heat a non-stick pan over low heat. Lightly oil the pan with oil. Too much oil will result in unsightly pancake surface.

Pan brushed with too much oil here!
Ugly pancake surface.

5. Using a ladle that holds about 2 tbsp of batter, drop batter into pan to form an even and round diameter. When you see bubbles forming on batter surface, flip using a spatula to cook other side of pancake. Transfer cooked pancakes to plate covered with clingwrap to prevent drying. Repeat till batter is used up.


Bubbles start to form and it is time to flip and cook the other side.

Lightly oil pan and you get this nice pancake surface.


6. Sandwich pancake with azuki bean paste or nutella jam. Wrap dorayaki with clingwrap until ready to serve.

Saturday, March 29, 2014

Pandan chiffon cake

Chiffon cake is one of my Mum's favourite cake. How can anyone not like the light and sheer sweetness of a chiffon? One piece is never enough for me.

Mum requested for a pandan chiffon cake last weekend, and so she gets it when she asked! Yes, it's that simple.  All because it's my Mama.


As per the norm, I blended the pandan leaves with some water and squeeze it through a strainer to get the wonderful green juice. Keep it into an airtight container and left it in the fridge overnight. You get concentrated pandan sediments the next day. Of cuz at times when I get lazy and just wanna bake it rightaway, I use the pandan juice right after it goes through the strainer, but I find that using the concentrated pandan sediments makes the final product more fragrant.

Egg whites and yolks must be separated well, no yolk, water, oil must be present in white portion otherwise it will be difficult to attain stiff peak stage.

Ready to go into the oven!


I have tried several chiffon recipes but still prefers Cherry Potato's. Simple and straight forward, good results for me all this while.

Inverted and cooled, ready for unmoulding.

Unmoulded!


Pandan Chiffon cake
Recipe by Cherry Potato

A.
5 egg yolks
30ml pandan juice
120ml coconut milk
80ml corn oil
2 tbsp water

B.
120g cake flour (Plain flour and Hong Kong flour works well too)
60g sugar (I used 50g)

C.
5 egg whites
1 tsp cream of tartar
60g sugar (I used 50g)

1. Mix all ingredients A into a bowl till well blended.
2. Fold in sifted flour and sugar, and mix well. Set aside.
3. Using a clean and dry whisk, whisk egg whites and cream of tartat till frothy. (Must use clean and dry whisk here to whisk egg whites otherwise you will not be able to get the stiff peaks)
4. Gradually add in sugar and continue to whisk till stiff peaks form. (I add sugar into the whites in 3 additions)
5. Fold egg white into egg yolk mixture till well with a spatula. (I fold in the egg whites in 3 additions for easier folding and evenly blended)
6. Pour batter into a 9-inch ungreased chiffon tube pan. (Tap chiffon pan on tabletop 2 to 3 times to let out air pockets trapped in the batter)
7. Bake at prehwated oven at 170deg for 50-55 minutes or till done.
8. Remove from oven and invert cake to cool. (Inverting the cake is a must so that cake will not shrink away from sides and fall.)
9. Run a sharp knife around side and centre of tube pan and unmould cool chiffon cake carefully.


Friday, March 28, 2014

Pandan bread with red bean filling (Sponge dough starter method)

All these while, I have been doing loaf bread, assorted sweet and savoury buns, but rarely pull apart buns with fillings, so here it is, this round I am up for some pandan pull apart bread with red bean filling.


To me, it is quite the old school bread cuz I used to have them when I was a kiddo. Not very into them nowadays though!

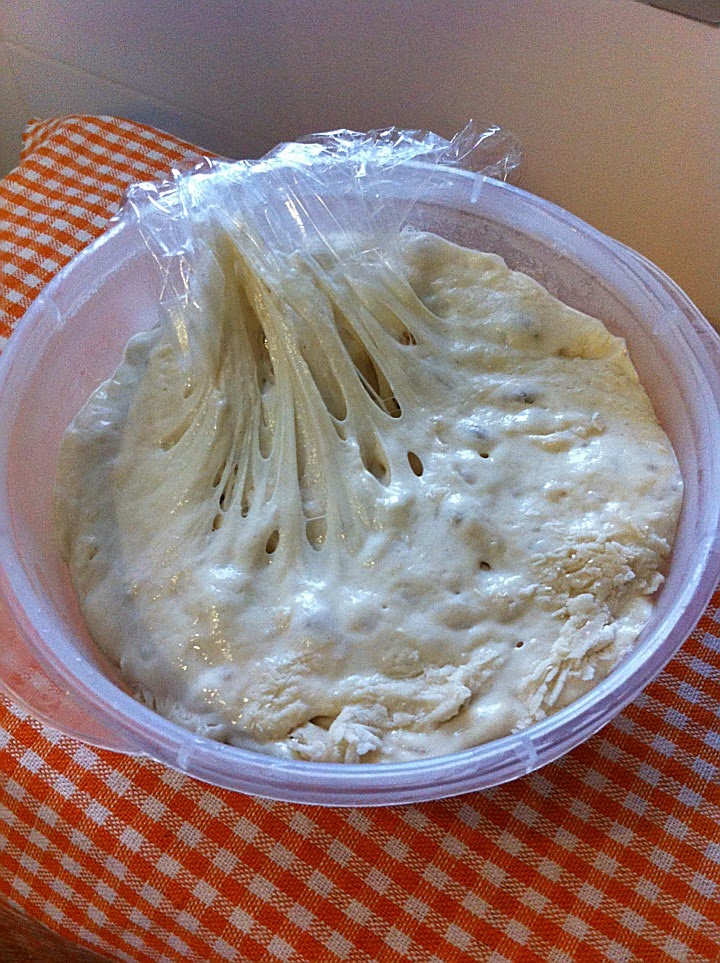
I made these pull apart buns using the sponge dough starter method, which calls for bread flour, water and yeast to be mixed and left aside for at least 1.5 hour before use (I left it overnight for about 16 hours).

Here is the rough dough mixture from bread flour, water and yeast mixed well together with a spatula. 

I covered the top of the container loosely with a clingwrap and put it in the fridge.

This was what I got after leaving this sponge dough in the fridge after 16 hours. It was a soft and sticky pool of mixture, with bubbles forming.  Look at that stretchy stringy part when I tried to pull out the clingwrap that got stuck to the surface of the sponge dough!

This is good stuff!
This is the reason for the end product - soft and fluffy bread.

Now I normally leave the sponge dough aside for about 10 minutes to bring it to room temperature while I gather all the other ingredients. 

While some people detest the wait to bake bread using this method, I, for one am for it. I plan my bakes ahead, so it is no fussy wait for me to do the starter a day ahead and only get to get down to real actions the next day. I prefer the wonderful end products. I enjoy the anticipation :)

Now not to digress further, I did these buns using the sponge dough recipe by Kimmy-Cooking Pleasure

Buns using Sponge dough method

Step 1 - Sponge dough preparation
2 tsp instant yeast
160ml-170ml water 
230g bread flour

1. Mix yeast with water in mixing bowl, then add in flour. Knead to form a smooth dough. (I mixed using a spatula, and did not knead by hand to get smooth dough)
2. Cover and leave to proof for 1 to 1.5 hour or double in size.  (I covered top loosely with a clingwrap and left it in the fridge for up to 16 hours till use)

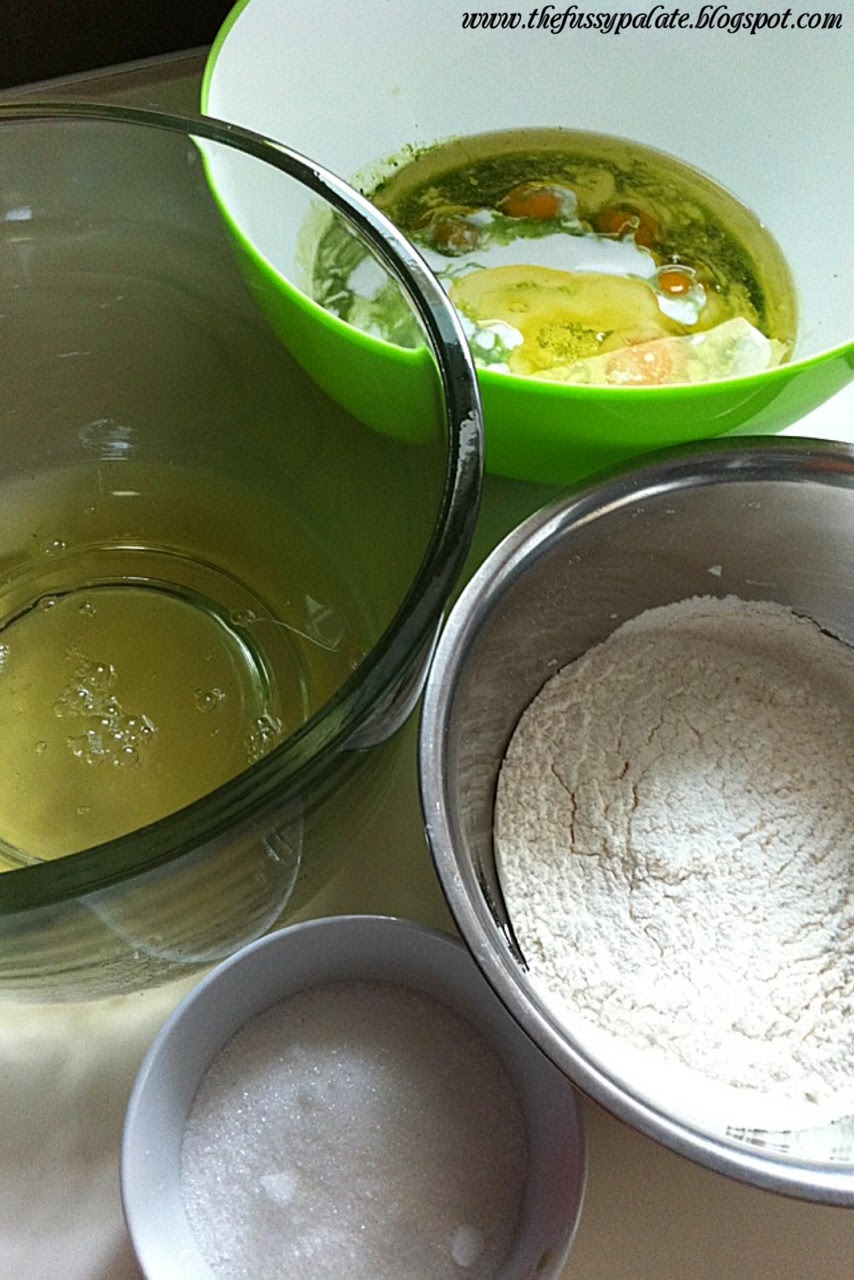
Step 2 - Ingredients
60g sugar
1/4 tsp salt
1/2 tsp yeast
1small egg
25 ml water (I used 25ml of pandan juice)
100g bread flour
30g butter (softened at room temperature)
Filling - red bean filling + sesame seeds for topping

1. Add all Step 2 ingredients (except for butter) to sponge dough from Step 1.  (I let my BM does the mixing work for me, so I put in all wet stuff first, which are the slightly beaten egg, pandan juice and sponge dough, then top with bread flour, made a small dent in the bread flour, put in the yeast and cover it aith the bread flour. Salt and sugar to be placed at opposite sides away from the yeast. Start BM and let it mix. The rest of the stages follows on below but are then done by hands already for kneading part.)
2. Continue to knead on medium speed until dough is soft and smooth (takes about 7-10 minutes).  Add in softened butter and continue to knead till dough is soft and elastic (window pane stage).

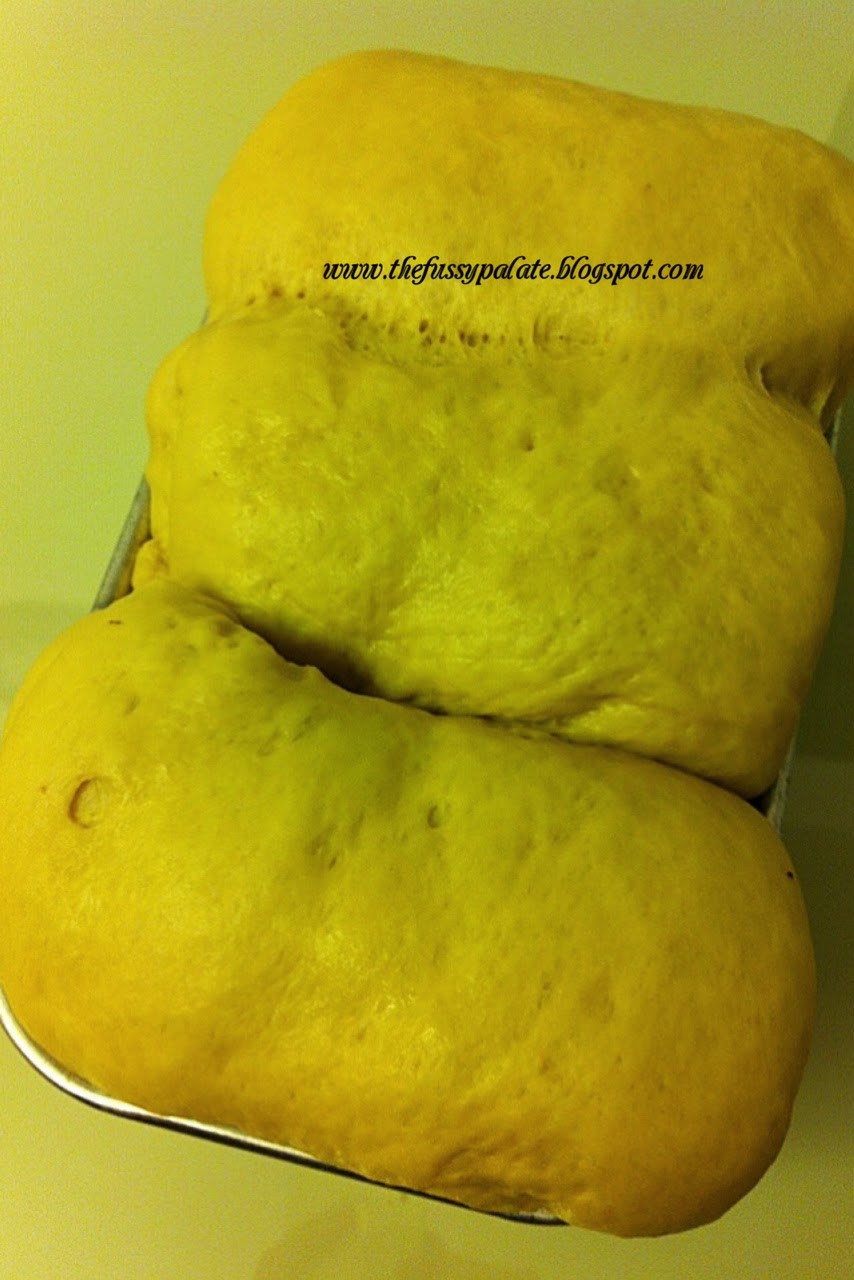
Window pane stage achieved and left to proof.

Dough proof till double sized and ready for punch down.

3.  Shape dough into ball and cover. Leave aside to proof for 15 minutes.4.  Punch down dough and divide into 60g per portion or into any portion required.

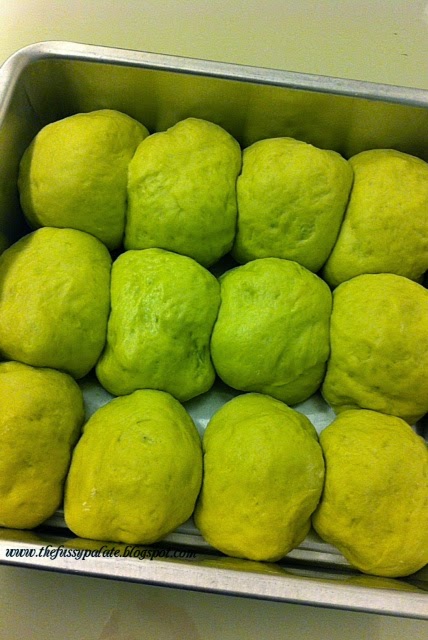
Dough shaped and filled with a tablespoon of red bean 


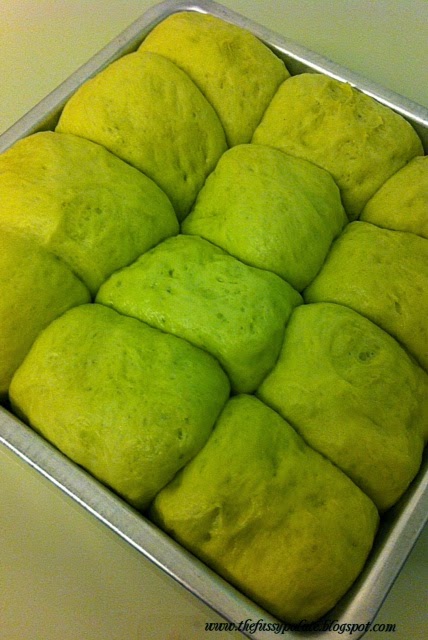
4.  Shape dough into any shapes with fillings.  Leave to rise for 30 to 40 minutes or until double in size. Brush with egg or milk glaze. (Sprinkle the top of the buns with some sesame seeds)
5. Bake in preheated oven at 190 degrees for 12 to 15 minutes. 

Here you go! Pillowy soft buns for breakfast :)


Thursday, March 20, 2014

Lo Mai Gai

Health hasn't been too well lately. Bad nose, bad throat, and as if not bad enough, doctor had to tell me that I have signs of slight bronchitis showing when I went back to see him the 2nd time.  Yes, tight and heavy breathing, slight wheezing and coughing, I had them. Hate the haze!  Thank God the rain came in time and haze stayed away, for now.  I want to be well soon!

Last weekend, I got down to do some glutinous rice with chicken (Lo Mai Gai, 糯米鸡), one thing that my hubby enjoys eating. He used to stock some of these from the supermarket and heat them up to eat for breakfast, and I did not like that!  So, I tried my hand at it, for the man, my greatest supporter :)


Followed Happy Flour recipe closely and I thought the end results was not too bad for a 1st try but I could do better :)

Ingredients: (yield 5 bowls)
1 chicken thigh (boneless and skinless, cut into chunk)
3 dried mushroom room (soaked, remove stalk and cut into 2pcs)

Seasoning (A): (adjust seasoning according to your taste)
1/2tbsp oyster sauce
1/2tsp black soy sauce
1tsp soy sauce
1/4tsp salt
1/2tsp ginger juice
1/2tsp sugar
dash of pepper
dash of sesame oil

300g glutinous rice (soak overnight)

Seasoning (B): (adjust seasoning according to your taste) 
1tbsp oyster sauce
2tsp soy sauce
1/2tsp salt
1/2tsp sugar
2tbsp chicken stock/ water
1/2tsp sesame oil
(I will prepare more of this seasoning for the rice the next round as hubby said sauce was not quite enough, so rice was a little bland.)

1/2 Chinese sausage (sliced)

Step:
1. Marinate chicken and mushroom with Seasoning (A), set aside for an hour.
2. Grease mould and set aside.
3. Drain glutinous rice, spread rice on tray and sprinkle some water on surface.
4. Steam glutinous rice in a preheated steamer at high heat for 20 min.
5. Remove lid, sprinkle some water on glutinous rice and continue to steam for another 20 min.
6. Remove cooked glutinous rice from steamer and fluffy rice with a pair of chopstick. 
7. Mix Seasoning (B) together and pour it into cooked glutinous rice.
8. Mix well with a pair of chopstick.
9. Arrange chicken, mushroom and Chinese sausage at the base of mould.
10.Fill with glutinous rice and press firmly.
11.Place it in preheated steamer and steam at high heat for 25 min.
12.Dish out and serve.

Wednesday, March 19, 2014

Coffee Walnut Loaf (Sponge dough starter method)

Breadmaking during weekday has become quite a routine now that I have a BM.  Saves me the time of mixing the ingredients, while I get to eat my dinner.

Last week, I came across a coffee loaf recipe by Kimmy-cookingpleasure and decided to give it a try.  It was a loaf using the sponge dough method.  I prepped the sponge dough starter a night before, and left it in the fridge till when I was ready to bake the following day.


More than double the size it got after just 30 min of proofing!

A few hours later, a loaf of nice smelling and wonderfully soft loaf of bread emerged. Hubby gave a thumbs up :) This recipe is really a keeper!


The soft and pillowy texture lasted 2 days and was all gone by then.


Recipe by Kimmy-cookingpleasure
Coffee Loaf (Sponge dough method)

Ingredients for Sponge Dough
150 gm bread flour
150 gm plain flour
3.5 tsp instant yeast 
200 ml water
  • Mix all ingredients into a soft rough dough.  Cover and leave to proof for at least 1-2 hours or put in plastic bag, tied up without proofing and keep in fridge for at least 4 hours.  Thaw for 15 minutes before adding bread dough ingredients.
Ingredients for Bread Dough
270 gm bread flour
30 gm cocoa powder 
1 tbsp skimmed milk powder
3 tbsp sugar
1.5 tsp  salt
1 large egg
3 tsp instant coffee granules dissolved in 130 ml hot water
60 gm butter 
I added some chopped walnuts for the extra bite
  • Add all the ingredients [except butter] to the sponge dough.  Knead until well combined and dough is soft for about 10 minutes then add in butter.  Continue kneading until soft, smooth and elastic.   Knead a further 10 minutes and dough does not stick to the fingers.
  • Shape into a ball and cover with a clean cloth to proof for 15 minutes or until double in size.    Punch down dough.
  • Divide dough into 2 equal portions.  Roll and fold each portion into thirds, then roll swiss roll style into a log (I spread the chopped walnuts across the rolled out dough and then roll it up swiss roll style).  Place in baking tin [Pullman's tin] and leave to proof in oven for more than an hour or until double in size.  [You can divide dough into any number of equal portions to make smaller loaves within 1 Pullman's tin ].
  • Bake in preheated oven at 180 degrees C for 25 minutes.  Remove to cool on rack immediately after baking.


Tuesday, March 18, 2014

Pumpkin Anpans & Spicy Tuna Buns

I love making bread.  I own a bread machine but rarely use it to bake bread with it.  BM does the inital messy mixing work and then I take over from the kneading part onwards.  Let's just say that dough kneading is really
therapeutic :)

I normally make about 8 to 10 buns for my hubby and I to eat for breakfast over 2 days.  This time, pumpkin anpan and spicy tuna buns were on my to-bake list.


The sweet buns were made using Alex Goh's gelatinized sweet bun recipe from the Magic Bread book.  I halved the whole recipe and yield about 480g dough.

Gelatinized dough
100g bread flour
70ml boiling water

1. Place flour in a mixing bowl.
2. Add hot boiling water and mix with wooden spoon to form a rough dough.
3. Cover bowl with cling film and leave dough to cool in the fridge for at
least 1 hour, and up to 48 hours.


Basic sweet bread dough
(Yield 1000g to 1100g dough)

300g bread flour
100g plain flour
80g sugar
20g milk powder
1 tbsp instant yeast
½ tsp salt
175ml cold water
1 cold egg (about 60g)
60g cold butter, cubed (Since I halved the recipe, the balance egg were kept for egg wash for the buns)

1. Combine flour, sugar, milk powder, yeast and salt together in a mixing bowl.
2. Tear the gelatinized dough into pieces and add to the bowl along with the eggs
3. Using a stand electric mixer, mix on low speed, adding cold water gradually.
4. Mix until dough is well combined and leave the side of bowl.
5. Add in the cold butter cubes and mix on medium speed until dough is smooth.
6. Shape dough into a ball, leave to proof for 40 min or until doubled.
7. Punch down dough and divide into 60g ball, leave aside for 5 min for easier shaping. (I divided it into 40g this time to get small and cuter buns!)
8. Roll out each ball and fill with desired fillings.  Seal up and place sealed sides facing down on greased baking tray and let proof for 45 min or till double in size.
9. Brush top of buns with egg wash and decorate as desired.
10. Bake in preheated oven at 180 deg for 15-20 min.  Remove to cool on rack.


Pumpkin Anpan fillings
200g pumpkin (centre removed and deseeded)
60g caster sugar
15g softened butter (room temperature)

*Egg wash and pumpkin seeds for decorations

1.  Remove the skin and centre of pumpkin, cut into small cubes and put it
to steam on medium high heat for about 10 minutes (or till soft).
2.  Mash pumpkin while it is still hot.
3.  Add in sugar and butter and mix it well.
4.  If filling is too soft and wet, put over low heat and stir constantly.
5.  Leave aside to cool before use.

Spicy tuna fillings
1 can of spicy tuna (or any flavour of your choice) - remove chilli and
spoon off excess oil
1 medium onion (chopped till small pieces)

You may fry tuna flakes and onion over small fire till slightly dry OR just mix chopped onions with tuna flakes and use as it is.

Monday, March 17, 2014

Kueh Lapis

After hesitating for the longest time, I finally decided to pick up blogging again, but this time a makan blog! By jotting down all recipes and notes of food I cook and bake for my love ones, I hope to open up a channel for me to share with others, as well as learn more from all the other good cooks and bakers out there.

I have always had the interest in cooking and baking since my secondary school days, but I never really got to do much till when I got married 2 years back (and finally had my humble little kitchen!)

Start of January this year was a busy month for the hubby and me, and as if the spring cleaning wasn't enough to bog us down, I had to squeeze in the few CNY bakes.

My Dad loves Kueh Lapis, so naturally it was 1 of the must-bake on my CNY Bake list. The Kueh Lapis recipe by Mad Baker is a keeper. I followed this recipe closely last year and make a moist and wonderful lapis. This year, to play it safe I decided to use the same recipe, tweaking it abit and turned it into a Pandan Lapis.


Kueh Lapis
(Recipe by Mad Baker )

20 egg yolks
4 egg whites
500g salted butter (*I used Lurpak butter block)
3 tbsp condensed milk
340g sugar (*I used 320g)
200g plain flour
2 tsp ground mixed spices (*I left this out)
2 tsp vanilla essence (*I used 1 tsp for the vanilla portion and 1 tsp concentrated pandan juice)
3 tbsp rum or brandy
90g pitted prunes, sliced into thin strips (optional) (*I left them out) 

Method
1. Butter the base of an 8″ X 8″ X 2.5″ pan and line with baking parchment.
2. Pre-heat your oven, selecting the grill function.
3. Sift the plain flour and mixed spices together.
4. Beat the egg yolks and sugar together until pale yellow, thick and creamy
5. Cream the butter and condensed milk together until soft and fluffy. Add the creamed butter to the egg yolk mixture and mix until combined.
6. Beat the egg whites until medium firm peaks.
7. Fold in the egg whites, followed by the flour mixture into the rest of the batter.
 8. Stir in the vanilla essence and rum until well-combined. (I added just the rum at this stage till well combined. Spooned out 10-12 tbsp of batter and mix in pandan juice for the pandan layers)
9. Spread a thin layer of batter onto the parchment paper.
10. Grill for 7 - 8 mins on the lowest rack in your oven or until lightly golden brown.
11. Remove cake pan from oven and press the baked layer down lightly with a metal fondant smoother. Prick all over the layer of cake with a toothpick.
12. Repeat steps 9 to 11 for each layer. (Optional: Add prunes on every second or third layer). (I alternated between 2 to 3 layers of the vanilla with pandan)
13. For the last layer, turn the oven down to 180 degrees C and bake on middle rack for 15 minutes or until golden brown.
14. Remove from oven and run a paring knife along the edges of the cake pan.
15. Turn the kueh lapis out of the pan and remove the baking parchment.
16. Flip cake back upright and let cool.


How to make fresh pandan juice? 
I normally cut up about 5 to 6 washed and cleaned pandan leaves into the blender, add in 1 tablespoon of water and blend till fine. Remove, squeeze and strain using strainer. You may use the juice right away or keep it in airtight container and refrigerate it and use the concentrate part that sits at bottom to get more intense pandan flavour.