Friday, October 31, 2014

Luo Han Guo & Chrysanthemum Tea


Weather has been scorching hot these day and what is simple and good to make at home to help ease the heatiness in us?  It has got to be arhat fruit chrysanthemum tea drink.

Arhat fruit is also known as luo han guo in mandarin.
 This fruit has got amazing health benefits - helps to ease cough and moisten lungs, rich in Vitamin C, helps in anti-aging, anti-Cancer, weight loss and colon cleansing.  Also, it is a natural sweetener which in turn makes it a good sugar substitute for diabetic patients. One can drink it everyday without worrying it to be too cooling to our bodies.

With the impending cough that hubby and I are having, this drink really helps ease our bad throat especially with the addition of chrysanthemum in it.  The combination of luo han guo chrysanthemum drink is said to work doubly well on cough and bad throat.

Luo Han Guo & Chrysanthemum Tea

2 luo han guo (briefly scrub and wash exterior of fruit)
A handful of dried chrysanthemum flowers (briefly rinse and drained)
1.5 to 2 litres of water

1. Using the back of a knife or spoon, gently crack open the washed luo han guo to expose the insides.
2. Place luo han guo and water in a pot and bring to boil on high heat.
3. Bring down to low heat and let simmer for another 15 min.
4. Place chrysanthemum flowers into pot and cover. Turn off fire and let it heat for 15 to 30 min. Strain and serve.

Note:
Choosing and buying luo han guo - pick one of the fruit and give it a gentle shake. If you can feel and hear the seeds moving - the fruit is not fresh and would not give off much taste and benefits.

Thursday, October 30, 2014

Japanese Cheesecake (again!)

3 years ago on this day, we got married.

All these years from our courtship days to dating days, and now as a married couple, you never fail to treat me sweetly.

You aren't a sweet talker.  You show me your love with actions.  You support me in whatever decisions I make and in all things I do.  Thank you Hubby!

I am blessed to have a loving hubby who helps out with the housework. On days that he knows I am burnt out, he will take over all housework and ask me to rest or just concentrate on my baking and cooking.

I am glad that I've got him - A friend, a hubby and a soulmate who willingly listen to whatever I have to say, always being my guinea pig to test and try all food I churn out in the kitchen, and enduring my naggings!

If I could have 1 wish, I wish for many more wonderful anniversary celebrations with this man.

To celebrate our day, I baked this cake that hubby likes alot - the Japanese Cheesecake.


I wanted a reliable recipe so I stuck by Rasa Malaysia's which I used in my other 2 cheesecakes posts.

Japanese Cheesecake
(Makes an 8" or 9" cake)

140g/5 oz. fine granulated sugar
6 egg whites
6 egg yolks
1/4 teaspoon cream of tartar
50g/2 oz. unsalted butter (I used salted butter)
250g/9 oz. cream cheese
100 ml/3 fluid oz. fresh milk
1 tablespoon lemon juice
60g/2 oz. cake flour /superfine flour
20g/1 oz. cornflour (cornstarch)
1/4 teaspoon salt (I did not use this as I used salted butter)

1. Melt cream cheese, butter and milk over a double boiler. Cool the mixture. Fold in the flour, the cornflour, salt, egg yolks, lemon juice and mix well. After folding this, I put the mixture through a sieve to get a smooth and lump-free mixture.


Fold in.

Pour mixture over a sieve and let it run through with the help of a spoon or spatula to get a smooth mixture.

Smooth lump-free mixture without creamcheese and flour bits.

2. Make the meringue by whisking egg whites with cream of tartar until foamy. You can beat with a stand mixer or handheld mixer. Add in the sugar and whisk until soft peaks form.

3. Take 1/3 meringue and fold into the cheese mixture, then fold in another 1/3 of meringue. After incorporated, pour the batter back to the remaining 1/3 meringue and fold. FOLD GENTLY. (I scooped out 2 tbsp of mixture and added 1 tbsp of cocoa to make some chocolate mixture and scoop into a piping bag) Pour the mixture into a 8-inch round cake pan (lightly grease and line the bottom and sides of the pan with grease-proof baking paper or parchment paper). Snip off abit at the tip of the cocoa mixture filled piping bag. Try piping out on a piece of kitchen towel to test the flow before piping out your desired design on the cake.)


I painstakingly piped this out with reference from the internet. PHEW~!

4. Bake cheesecake in a water bath for 1 hours 10 minutes or until set and golden brown at 160 degrees C (325 degrees F). (Dr Leslie Tay's baking direction: Preheat to 200C (I used 220C for 30min as my oven temp is slightly lower than other oven) non fan forced. Bake for 20min. Lower temperature to 160C and bake for 10min (I did mine at 180C 20min). Turn off oven, and leave cake in oven with door closed for 30min. Open oven door slightly ajar and leave cake to cool inside for 20min. Finally, take cake out of pan and cool on rack)


Ta-daah!
Made specially for my dearest hubby.


Some Notes with reference from Rasa Malaysia:
1. I used an 8″ pan, and I lined the sides of the pan with parchment paper with the paper extending slightly higher than the cake tin by about 1.5”.


2. I left the cake to cool down in the oven with the oven door open, about an hour. This is to prevent sudden change of temperature that may cause the cake to shrink drastically. It’s normal that the cake will shrink about ½ inch to 1 inch after cooling, it’s normal. If the cake shrinks a lot, the main reason is over mixing the egg white mixture with the cheese mixture. Beat the egg whites until soft peaks form, FOLD VERY GENTLY, do not stir or blend.


Pardon the lousy photo with bad lightings.
I just wanted to show the slight shrinkage of the cake when cooled slowly.

3. Refrigerate the cake (with or without the cake tin) for at least 4 hours or overnight.

Tuesday, October 28, 2014

Claypot Mee Tai Bak

Weather has been humid and hot of late, and I got real lazy to cook and do anything. Decided to just be lazy and cook a one-dish claypot mee tai bak and have it for dinner.  Easy to cook, little to wash and more time for rest - a mantra for myself whenever the weather gets a little too unbearable.

As if it isn't bad enough, I am having a bad throat now as I write, on the verge of losing my voice and coughing incessantly. Sad! Hubby and I have set an evening out some 2 days later for a mini celebration and I hope to be okay by then :(

A lazy post this time. Please bear with me :)


Claypot Mee Tai Bak
(Serves 2)

1 pack of mee tai bak (bought from supermarket's noodles section)
8 button mushrooms, sliced
10 prawns, deshell & de-vein
6 dried mushrooms, soak & remove stalks, cut into thin strips (reserve mushroom water for use)
3-4 tbsp minced meat, mixed with 1 tbsp water to loosen up meat
6 pieces meat balls, cut into quarters
2 eggs
2-3 pieces small red chilli, washed & cut into smaller pieces (optional)
4 pieces garlic, minced
2 tbsp oil
200ml water (more if you like)
2 tsp Cornstarch

Seasoning
2 tbsp black soya sauce
1.5 tbsp oyster/ abalone sauce
1 tsp light soy sauce
1 tsp sugar
1/2 tsp sesame oil
2 tsp chinese cooking wine (Hua diao chiew)
A dash of pepper

Garnish
Spring onions

1. Put a pot of water to boil. Remove mee tai bak from packaging and blanch it in the boiling water for about 30 seconds to remove oil and loosen them up.
2. Put mee tai bak under running water to cool it abit, drain off water and set aside.
3. Heat up 2 tbsp oil in claypot on medium heat.  Add in garlic and fry till fragrant.
4. Add in dried mushrooms and fry till fragrant.
5. Stir in minced meat and stir fry till half cooked, then add in prawns to cook till half done as well.
6. Add in meat balls and blanched mee tai bak and stir well.  Add in seasoning and mix well.
7. Add water and leftover mushroom water and stir till well mixed.  Cover and bring to a simmering boil.
8. Mix cornstarch with some water and stir into simmering pot to thicken the sauce. Crack 2 eggs and drop them into the pot of noodles, cover and let it heat further for 30 seconds or until you can see the whites of the eggs.  Garnish & serve immediately.

Garnish with spring onions and serve (with some chilli if preferred).

Thursday, October 23, 2014

Sushi Sandwiches

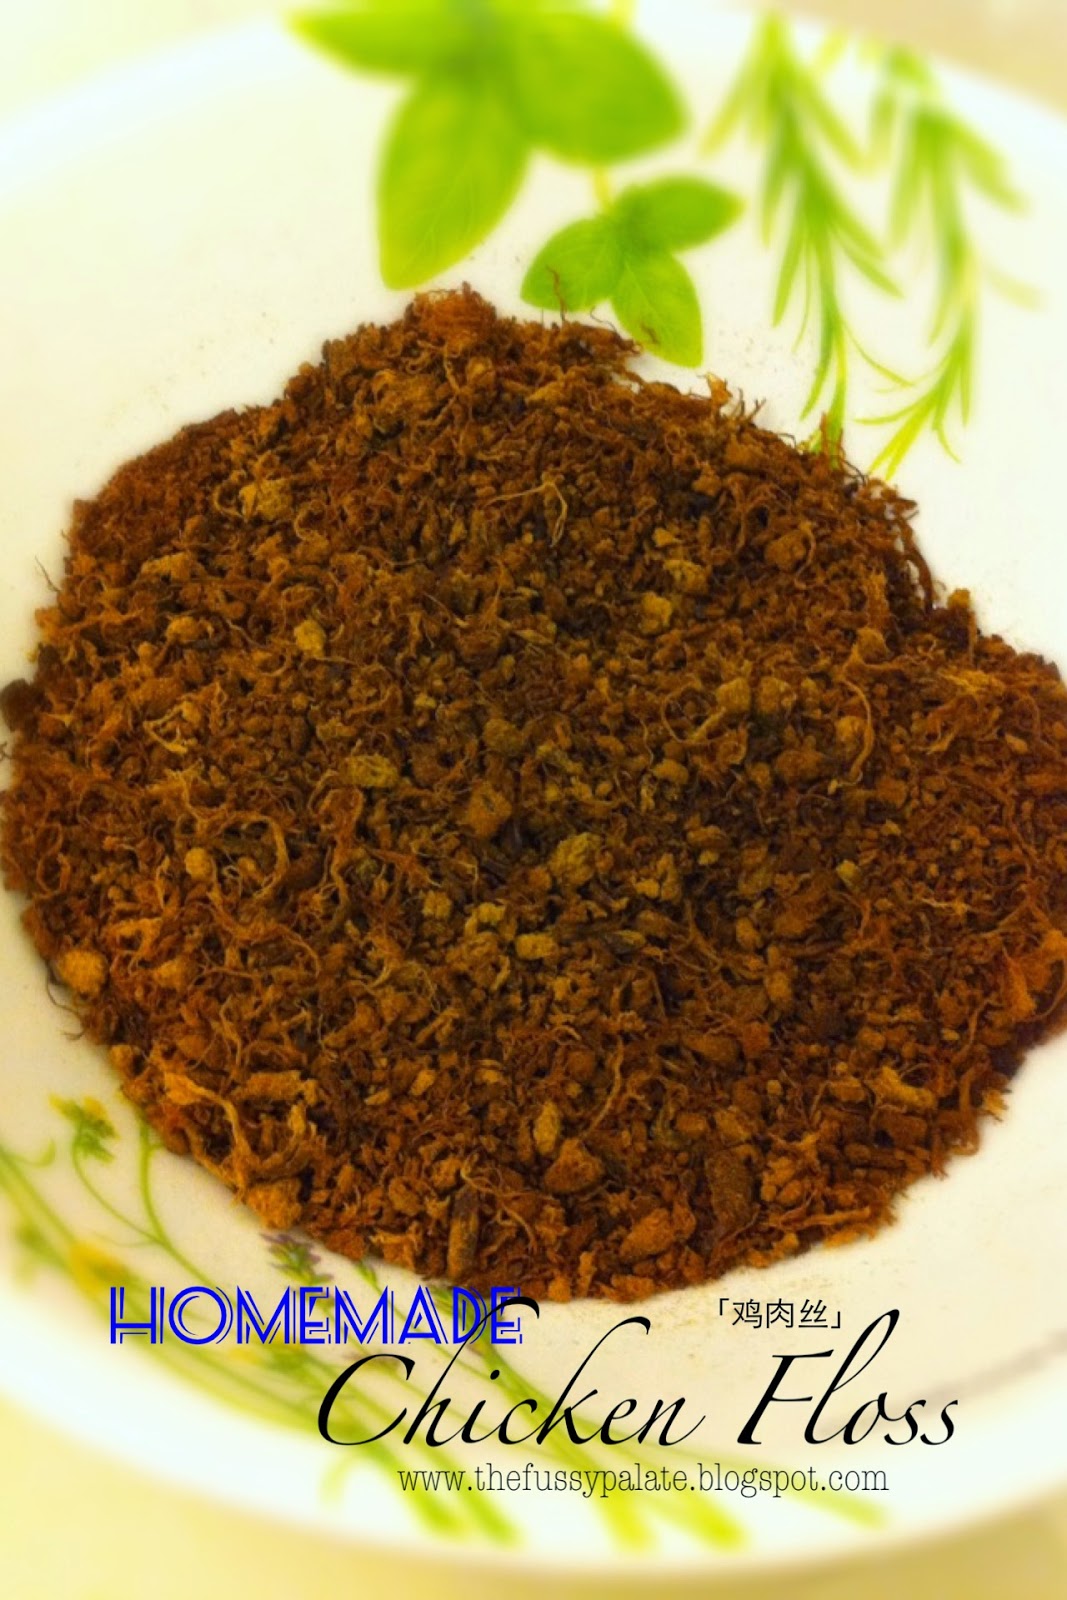
Having had made some chicken floss and seeing them lying in my fridge, I thought why not do something with them.

Flipped through Alex Goh's Magic Bread recipe book and then went about my yet-another bread adventure.  Hope my hubby isn't getting too sick of eating bread since I am already racking my brain to make different kinds of bread each week! Talk about effort, huh? Heh!

These colourful really-sushi-look-alike sandwiches tasted great! Hubby said that these sushi sandwiches were so cute and dainty to eat.


Sushi? Or bread?

Now read on to see how I do it, will you? I hope you do follow on, and do try making it, I am pretty sure kids will like it too and this could be another way to get them to eat their vege :) 

Well, first thing, get down to doing a sandwich loaf first. I did it using Alex Goh's Magic Bread book - Sandwich Bread. 

Beware of long long recipe post ahead - 1 on Sandwich Bread and another on Sushi Sandwiches.

Gelatinised dough and overnight sponge dough were both prepped a night before.


Sandwich Bread
Recipe by Alex Goh's Magic Bread, adapted from Happy Home Baking
(makes one 11cm x 11cm x 20cm loaf)

(A) Gelatinised dough (烫种)
75g bread flour
53g boiling water

(B) Overnight sponge dough (隔夜中种面团)
100g bread flour
60g water (room temperature)
1/4 teaspoon instant yeast

(C) Main dough(主面团)
225g bread flour
10g milk powder
22g caster sugar
5g salt
4g instant yeast
143g water (room temperature)
60g overnight sponge dough
gelatinised dough from (A)
30g butter (cut into cubes)

Gelatinised dough (烫种)
Add the boiling water in (A) into the bread flour, stir and mix to form a rough dough. Cover dough and set aside to cool. Wrap dough and leave it to chill in fridge for at least 12 hrs. (Bring back to room temperature before using.)

Overnight sponge dough
Mix bread flour in (B) with instant yeast. Add water and mix to form a rough dough. Cover dough let it proof for 30min. Wrap dough and refrigerate overnight. Note: only 60g is required. Bring back to room temperature before using.

Main dough
1. Mix together bread four, milk powder, caster sugar, salt and instant yeast in a mixing bowl. Make a well in the centre, and add in water and overnight dough. Knead to form a rough dough. Knead in gelatinised-dough.
2. Transfer dough to a lightly floured work surface. Knead the dough till smooth. This should take about 10 min. Knead in the butter. Continue to knead the dough until it no longer sticks to your hand, becomes smooth and elastic. This should take about another 15~20 min. Do the window pane test: pinch a piece of the dough, pull and stretch it. It should be elastic, and can be pulled away into a thin membrane without tearing/breaking apart easily. 3. Place dough in a lightly greased (use vegetable oil or butter) mixing bowl, cover with cling wrap and let proof in room temperature (around 28 to 30 deg C) for about 60 min, or until double in bulk.
4. Remove the dough from the bowl and give a few light kneading to press out the gas in the dough. Divide the dough into 3 equal portions. Roll each dough into smooth rounds, cover with a damp cloth or cling wrap and let the dough rest for 10min.
5. On a lightly floured work surface, flatten each dough and roll out to form a longish oval shape. Starting from the shorter end, roll it up swiss-roll style. Leave the doughs to rest for another 10 min.
6. Flatten each dough and roll it out again to form a long rectangle (around 30cm x 10cm). Flip the dough over and roll up swiss-roll style, roll up as tightly as possible. Pinch and seal the seams. Place the three dough, seam side down, in a well greased (with butter) pullman tin.


7. Cover with damp cloth or cling wrap and leave dough to proof for the second time for about 50~60 min, or until the pan is 80% full. Cover the lid (well greased with butter) and bake at 220 deg C for 35 min. Unmould immediately and once cool store in an airtight container.

There you go! Soft white sandwich bread to spread your favourite jam on.

Still following through? Great! Let's move on to Sushi Sandwich making now :)


Sushi Sandwiches

Prepare sandwich bread slices (as per above).

Mayonnaise
Cucumber (cut into strips)
Carrot (cut into strips)
Crab sticks (cut into half long strip each)
Chicken / Pork floss
Seaweed sheet


1. You may remove the slides of bread crumbs which I did. Spread some mayonnaise onto the bread slices. 
2. Place cucumber, carrot, crab stick and chicken floss on top and roll it up firmly. Set aside for 10 minutes to firm the shape.


3. Cover the bread with seaweed sheet (slice them up equally and you're done!).

Tuesday, October 21, 2014

Homemade Chicken Floss

What do you do normally do with the pork ribs and chicken breast meat that you cook in your soup? Throw them away? Or eat them do you?

I am the guilty one - dumping them after we are finished with consuming the soup.  Well, unless I use chicken drumsticks or good pork ribs, I normally do not eat the meat used to cook the soups.

Last week I came across Everybody Eats Well In Flanders' post on making chicken floss with the help of bread machine and it got me excited. I knew I had to do this and could do it some hours later since I had a pot of soup simmering away for our dinner. I got my bread machine to work soon after that night.  Chicken floss was churned out in some 2 hours' time! No sweat :)


I am still very much amazed at my bread machine's ability to make not just bread, but jams and now, chicken and pork floss!  Meat floss goes well with porridge and fried rice, right? Hehe! Another reason for me to cook more soup :P


Chicken Floss
300g chicken, boiled and shredded, and drained well of liquid
2.5 tbsp fish sauce (I used 1 tbsp abalone sauce instead which worked well too. Abalone sauce is okay too)
5 tbsp fine sugar (I used 4 tbsp fine brown sugar)
1.5 tbsp dark soya sauce
3 tbsp water

1. Place deboned meat into a ziplock bag and press it flat. Add in all the seasonings into the ziplock bag and mix well.
2. Add in the seasoned meat into the bread machine.  Select Jam function 10 (Function number 10 on Kenwood BM250), takes 1h 05min per cycle) and do it 2 times/cycles, a total of 2h 10min. The Jam Function starts stirring continuously for first 10min after being started and until 10 or 15min before end, it will not have any stirring in between that.  I used a spatula and stir up the floss in between the heating cycle when machine stirring is not going on.  This is done to prevent overheating at bottom of floss when floss are being heated and dried, causing it to be a little black.
3. After 2 cycles are up, remove floss and leave to cool before scooping into airtight containers or bottles for storing.  Keeps well for roughly up to 3 weeks in the refrigerator.
(I aren't too sure if it could keep longer than that as we finished the floss before that :P)

Radish Soup

Hubby is a Cantonese while I am a Teochew, so we both love soup.  It's quite a soup affair for us when we are at home during the weekends.

My Mum and Mother-in-Law make good soup, and I try to replicate their soups on Saturdays when we are at home and going nowhere during the evenings.

Without further ado, this is another soup added to my soup collection. I love radish, so I am always happy when I know that my MIL cooks this soup. Cantonese soup broth are often put to simmer on low heat for hours, to bring out the rich essence and taste of all ingredients in the soup pot. Yummy!


Radish Soup
(Serves 2)

4 pcs medium or XL size dried scallops, washed & rinsed
1 pc chicken breast with bone 
1 white radish, de-skinned and cut into bite size pcs
1 carrot, de-skinned and halved
1 onion, de-skinned and rinsed
1/2 dried cuttlefish, rinsed
5 red dates, pitted and rinsed (I ran out of it and did not add them)
1 tbsp of peppercorn, crushed slightly (I did not add them)

2 litre of water
salt to taste

1. Remove chicken breast skin and all excess fats and blood residues. Wash and drain.
2. Put water to main pot and bring to boil.


3. Meanwhile, bring a separate small pot of water to boil, put in chicken breast and blanch it for another 1 minute to remove oil and scum. Briefly rinse blanched chicken breast meat under running water and pour it into the boiling main pot. Add in all other ingredients into main pot and leave to boil on high heat for about 15 minutes. 
4. Bring down to low heat and let simmer for 3 hours. 
5. Just before serving, add in salt to taste. 

Monday, October 20, 2014

Pork & Shrimp Siu Mai Dumplings

Siu mai dumplings and har gao prawn dumplings are the usual suspects that will appear on our order list when we are out for yum cha.  It has been quite awhile since we had dim sum so I decided to make siu mai for yum cha at the comfort of our own home!


I did not wanna waste time on making the yellow wanton wrappers and got ready made ones from the supermart.

It was a great treat for hubby as he loves siu mai.  These are easy food that everyone can make at home, so try it!  It will not be too long before I make them again :)

Siu Mai Dumplings

250g minced pork
8 medium sized tiger prawns
4 chinese mushrooms
3 water chestnuts
1 packet of wonton wrappers (round)

Seasonings
1.5 tbsp light soy sauce
1/2 tbsp chinese cooking wine
a dash of pepper
1.5 tsp sesame oil
a dash of salt
1 tsp cornstarch

Garnishing
Gouji

1. Soak chinese mushrooms in warm water till soft. Lightly squeeze out mushroom water, remove stalk and cut into little cubes. Set aside.
2. Remove water chestnuts skins and cut into small cubes.
3.. Deshell and devein prawns. Wash and pat dry with kitchen towel.  Roughly chop up prawns into coarse texture.
4. Place minced pork, prawns, chinese mushrooms and water chestnuts into a mixing bowl. Add in all seasonings. Mix with chopsticks till well blended. Set aside for 15 minutes.


5. Carefully separate each pieces of wonton wrappers and cover with a damp cloth.
6. Rinse a tablespoon of gouji, drain and set aside.
7. Place a piece of wonton wrapper into middle of palm. Using a butter knife or teaspoon, place about 1 tbsp of filling onto centre of wrapper.


8. Smooth sides of filling, dap sides of wrapper with some water and carefully gather the sides of wonton wrappers up around filling, with the top filling exposed.
9. Place siu mai on flat tabletop to flatten the base.  Smooth top exposed fillings. Trim off excess wrapper at the top sides to level with filling, if required. Repeat the same for all other siu mai.
10. Place 1 or 2 gouji on centre of siu mai as garnishing.
11. Put a big pot of water (for steaming siu mai) to boil. While waiting for water to boil, line a piece of baking paper in a chinese bamboo steamer and oil lightly with a brush.


12. Place siu mai into bamboo steamer, cover and place it into the steamer pot. Steam on high for about 6 to 8 minutes.


13. Remove and serve immediately.

Note:
- If you do not have a chinese bamboo steamer, you may place siu mai on a plate suitable for steaming too.

Friday, October 17, 2014

Carrot & Cinnamon Loaf


How do you like the idea of incorporating vegetable into bread?  I tried baking a carrot bread and like it!

Colour of the bread has a slight tinge of orange with little shredded carrot bits all over the loaf, which was what I like - natural coloured bread.  It was a good try and I look forward to making more healthy vegetable loaf bread.

No one says that bread must be white and plain.  With creativity, baking can be fun.

I am keeping this post short and sweet.  So little time, yet so much to do! Till then, cya! =)


Carrot & Cinnamon Loaf
Recipe adapted from Kimmy Cooking Pleasure with slight change (I added cinnamon and hence renamed it as Carrot & Cinnamon Loaf instead of Carrot Loaf Bread)

Ingredients for Sponge Dough
180 gm bread flour
120 gm cornflour
3 tsp instant yeast
230 ml water

Mix all ingredients into a soft and smooth dough.  Cover and leave to proof for at least 1-2 hours.

Ingredients for Bread Dough
300 gm bread flour
150 gm red carrot [grated finely]
3 tbsp sugar
1 tsp  salt
1/4 tsp cinnamon powder [optional] - (I love cinnamon in bread and added 1/2 tsp of it)
40 ml water [add gradually]
30 gm butter

1. Add all the ingredients [except water and butter] to the sponge dough. Knead [from low speed to medium] until well combined.  Gradually add in water [may need less as the carrots contains water] and knead dough until smooth [about 10 minutes] then add in butter.  Continue kneading until soft, smooth and elastic.  Knead a further 5-10 minutes and dough does not stick to the fingers or window pane stage.
2. Shape into a ball and cover with a clean cloth to proof for 15 minutes or until double in size. Punch down dough.
3. Divide dough into 2 equal portions.  Roll and fold each portion into thirds, then roll swiss roll style into a log.  Place in baking tin [Pullman's tin] and leave to proof in oven for an hour or until double in size [almost reach the rim of the baking tin.  [You can divide dough into any number of equal portions to make smaller loaves].  Remove from oven before preheating it.
4. Bake in preheated oven at 180 degrees C for 25 minutes or at 160 degrees C for 40 minutes.
5. Remove to cool on rack immediately after baking.

Tuesday, October 14, 2014

Sambal Chicken Fried Rice

Mum has been my sole supplier of any grinded chilli sauce and paste. Chicken rice chilli, sambal belachan, dried shrimp chilli (hae bee hiam) are all stashed away in my freezer. I use them carefully. My mum makes seriously good chilli paste and I am always happy to take it when she makes them and give us some!

There was this one weekend evening that I had no idea what I wanna cook. (Yes yes, sorry for yet another overdue post. Hehe!) I had put no effort into thinking what to prep for dinner that day. Ran through my fridge and gathered some ingredients to come up with this sambal chicken fried rice in the end.  Simple meal but Hubby was sweet enough to say that it was good enough for him.

Sambal Chicken Fried Rice

2 chicken drumsticks or thigh meat, deskinned, deboned and cubed
6 to 8 slices of canned pineapples, cubed
8 button mushrooms, sliced
3 tbsp mixed peas
4 garlics, minced
1 egg, beaten
1.5 cup overnight rice (I did not use overnight rice, I cooked the rice an hour before frying the rice)
1/2 tbsp and 2 tbsp olive oil, separated

Seasonings
1.5 tbsp light soy sauce
1/2 tbsp sesame oil
1/2 tsp sugar
1.5 tbsp sambal chilli (more if desired)

1. Heat up 1 tbsp olive oil in wok.
2. Pour in beaten egg and cook, breaking it into smaller pieces. Remove fried egg and set aside.
3. Add in remaining 2 tbsp olive oil and heat up oil.
4. Add in minced garlic and fry till fragrant, add in cubed chicken meat and pineapple cubes and fry till meat is half cooked.
5. Pour in button mushrooms and mixed peas and fry till evenly mixed.
6. Add in rice and loosen rice up with spatula to evenly mix all rice and ingredients together.
7. Add in seasonings and fry till rice and ingredients are evenly coated.
8. Lastly, mix in the fried egg evenly. Serve.

Friday, October 10, 2014

Matcha & Chestnut Bread


Yet another overdue post. These bread were done before my Hokkaido vacation.  I wanted to bake something that I could relate with Japan. On first thought, I thought of matcha! I cannot express enough on how much I love matcha. Anything matcha goes for me okay!


These babies were so soft and fluffy I could die.

Wanted some bite to the bread, so chestnuts were added.  Chopped a handful of chestnuts to small pieces and that did the trick.  Left 3 whole pieces and halved them horizontally, and then used them to top the bread.  Love how the bread turned out to be.

Proofed, egg brushed and topped with chestnuts!
Ready to be sent into the oven :)

Soft fluffy strands of bread showing!


See how fluffy these babies are. I was somewhat captivated with how I could tear these bread apart and still see stands of bread stringing to each other. Hehe!


Sliced into dainty little pieces.
Good to eat it on its own with no need for jam and all.


Homemade bread can be as good (and definitely healthier) than store bought ones. 

I love homemade food.  Knowing how my food was prepped and what goes into them are important to me.

 I have never been to any cooking or baking lessons.  Only cooking and baking lessons I have ever been to was during my Home Econ classes during secondary school days. 

Gained my baking knowledge from reading books and recipes, and surfing the net for food blogs plus exchanging info with friends with these same interests. Learnt cooking from my mum who is a good cook! It all boils down to having the interest and patience to learn and pick up. If I can do it, anyone else could too. This is a never-ending learning journey for me and I will persist on :)

It's Friday today.
Have a good weekend Everyone ;)


Matcha & Chestnut Bread
(Original recipe adapted from Alex Goh's Magic Bread Recipe book - Two-tone bread)

A (Scalded dough)
50g bread flour
35g boiling water

B
400g bread flour
5g milk powder
17g coconut milk powder (I used milk powder for this)
35g sugar
3g salt
4g instant yeast

C
85g cold water
1/2 cold egg (I used the other half for egg brush)

D
40g butter

E
some green colouring (I used 3 tsp of matcha powder)

F
25g toasted chopped macadamia nuts
50g raisins
(I used a pack of ready-to-eat chestnut, left 3 whole pieces for toppings which I cut horizontally into equal halves and chopped the rest into smaller pieces for fillings)

1. Add the boiling water from A into flour, mix until well-blended to form
dough. Cover and set aside to cool. Keep it into refrigerator for at least 12 hours. - This is scalded dough
2. Mix B until well-blended.  Add in C and knead to form rough dough.  Add in A and knead until well-blended.
3. Add in D and knead to form elastic dough.  Take 400g of the dough and mix with E untill well-blended. Add in F and mix until well combined.  The rest of dough remains in plain.
(I used bread machine for mixing and I did not do the bread into 2-tone, I did just the following - Add all wet stuff i.e. water, egg and scalded dough into BM, followed by dry stuff (bread flour, milk powder, matcha powder, sugar at one corner, salt at the other, and yeast at another corner.  Set BM to work to mix till it comes together and then add in butter and let it knead till elastic dough is formed)
4. Let it proof for 40 minutes.  Divide the plain and green dough into 2 portions each and mould it round.  (You may use the whole dough, no need for the division into 2 portions.  I divided them into 6 equal portions though)
5. Let it rest for 10 minutes then roll it flat. (After rolling the 6 portions of dough flat, I sprinkled the chopped chestnuts evenly over the flattened dough and then rolled them up like Swiss roll)
6. Place a piece of flatten green dough on top of plain dough, roll it up like Swiss roll. (Skip step if not doing 2-tone bread)
7. Place it onto a greased 17 x 9 x 7cm loaf tin.  Make 2 loaves.  Let it proof for 50 minutes. (I left it in 2 long rectangle bread tin I bought from Daiso and let it proof for 50 minutes. Lightly brush the proofed bread top with the balance egg and then place half of the chestnut on top of each dough.)
8. Bake at 180deg C for 30 minutes.