Pages

Tuesday, December 22, 2015

Tang Yuan (with Fresh Red Dragonfruit juice)


Today is Dongzhi Festival (Winter Solstice Festival) and many Chinese will celebrate this day by cooking a pot of glutinous rice balls (Tang yuan) and eating them together with the family.


This year I skipped the artificial red food colouring and made pink tang yuan using red dragonfruit juice instead.


Love the colours of the dough as well as the cooked product.


Happy Dongzhi to All who's celebrating this day!

Glutinous Rice Dumplings (Tang yuan)
Glutinous rice flour
Water
Fresh red dragonfruit juice (mash some dragonfruit pcs on a sieve and retain juice that comes through)


Ginger Soup
Water
Brown sugar
3 to 4 pandan leaves, knotted
A pc of 1-inch ginger, peeled and pounded slightly to release the ginger fragrance

To cook ginger soup, place ginger and pandan leaves in water and bring it to boil till fragrant. Allow it to simmer for further 5min on medium heat.
To make Tang yuan, place glutinous flour into mixing bowl and add in enough water and mix dough with hands or a rubber spatula. Add in more water if too dry, more glutinous rice flour if too sticky. Dough is ready if it is soft and easy to handle without sticking to hands. It should somehow feel soft like earlobes. 

For pink dough, I added a tsp of the fresh red dragonfruit juice, then followed by enough water to get a soft and non stick dough. You can add in more juice if you want it a little more pink, but not too much because it will turn the dpugh into a purple hue.
Roll dough into little balls and set them on a lightly floured plate. Once done, cook them in a boiling pot of water. They are cooked when they float. Place cooked tang yuan into serving balls and spoon ginger soup over them. Serve immediately.

Sunday, December 20, 2015

Durian Yule Log Cake


Again a maiden attempt at making X'mas log cakes.  I have always wanted to try making them but I was really lousy with roll cakes back then and did not want to do log cake with cracked roll cake (though I know it will be covered by the cream and all), but the thought of people seeing the insides when sliced stopped me from all of it.

Now thay roll cakes have been mastered, I gained the confidence to get the log cakes coming!  We were invited to my brother in law's house for a X'mas dinner and I definitely did not wanna go there empty-handed - so this log cake came about.


With the long roll cake baked, I sliced it into half and made 2 log cakes with it. Coated the insides and outsides with mao shan wang durian puree. *yummy*

One was brought to my brother in law's place and the other to my Mum's.


Bought these icing sugar figurines from the 100Yen shop in Japan during my recent Kyushu trip.

I had fun making and decorating these log cakes. Will definitely make them again because log cakes are terribly overpriced outside!!!


Durian Yule Log Cake

A
4 egg yolks
35g caster sugar
60ml water
40ml oil
1/4 tsp vanilla essence
80g plain flour


4 egg whites
30g caster sugar
1 tsp corn flour

Durian filling

- (I doubled the below amount for outer log cake frosting)
250g durian puree
3 tbsp fresh milk (or more if required to thin durian puree to desired consistency)

1. Prepare 10inch by 10inch baking tray line with baking paper.  You may lightly grease baking tray with some cooking oil and then line baking paper to prevent baked cake from having "wrinkles".  Preheat oven to 170deg C. Prepare 2 other pieces of baking paper (slightly bigger size than baking tray) or use later after cake is baked.

2. Combine egg yolks and caster sugar in A and beat till egg yolk mixture turns white and pale, and air bubbles show up when beating stops.
3. Add in water, oil and vanilla essence and mix well.  Sift in plain flour and mix well.  Set aside.
4. Beat egg whites in a clean and dry bowl till frothy, add in corn flour and beat till combined.
5. In 3 separate additions, add caster sugar into egg white mixture and beat till stiff peaks form.
6. In 3 separate additions, spoon white eggs into yolk mixture and fold in carefully till a smooth batter forms (take care not to overfold and deflate the batter).

7. Pour batter onto lined baking tray and smooth out top with a scraper.  Put to bake at 170deg C for 14min or till done.  (Cake should spring back when pressed slightly, toothpick to come out dry when inserted into centre of cake, and when pressed gently there should be slight "sss" sound.  Overbaked cake will have cracks showing up when rolled.)
8. Remove tray from oven and overturn tray on 1 piece of baking paper atop a cooling rack. Remove the lined baking paper sticking on cake and cover cake with baking tray.  Let cool for about 10min or till cake is cool.  Remove baking tray.

9. Spread prepared durian filling all over cake, leaving about 1cm of far end clear of filling.
10. Roll up cake into a log shape with the help of bottom baking paper and twist sides of baking paper to hold the cake.  Rest rolled cake with the end at the bottom and leave cake in fridge for 15-30min before frosting the outsides with the remaining half of durian puree.
11. To assemble log cake, you can slice about an inch or 2 inch of rolled cake and placed it by one side of the rolled cake, or however you want your log cake to look like. Slap on the durian puree and frost away with a palate knife - does not matter if you cannot get a smooth frosting because you are gonna make log lines on the frosting anyway!
12. After the full frosting is done, use a fork and "draw" lines on the whole cake to make it look like a log.  Decorate with your favourite (clean!!! :P) Christmas figurines and refrigerate. You can dust the top of the cake with a light layer of icing sugar otherwise it is good to go. Best served chilled.

Saturday, December 19, 2015

Soon Kueh


From young, I have always love eating kuehs. Koo chai kueh, peng kueh, soon kueh, you name it, I love it. Is it due to my dialect influence? Not sure though, but I do know I grew up eating lots of kuehs.

Drizzle sweet black sauce (and some sambal chilli if you have them) over the steamed hot soon kueh and enjoy!

My grandmother used to make the kuehs for us all and we have them for breakfast. Later stage my Mum learned the skills of kueh making and then made them.  Somehow, this is like a passing baton. Now I make kuehs too.


I was lazy gathering all different flours (rice flour, sago flour etc) for these soon kuehs , and so I took the easy way out - get a pack of ready mix soon kueh flour!

Maiden attempt in making soon kuehs and it turned out not too bad. Hubby tried and enjoyed it. Mum feedbacked that filling would taste better with dried mushrooms added, otherwise all is okay being a first try.  Practice makes perfect and I'll definitely make them again because Hubby and I love eating soon kuehs!

Soon Kueh

Soon Kueh skin
I used Skytime brand Soon Kueh flour (400g a pack)
Reserving about 30g to 50g of Soon Kueh flour for dusting
 Add adequate amount of boiling water to mix flour together (using a spatula or a pair of chopstick). Knead dough till pliable and smooth. Divide dough into 32g portions and roll them into balls.


To wrap, flatten and roll out each 32g ball dough into circular skin of about 2mm thick. Spoon 1 tbsp of filling onto centre of soon kueh skin and bring centre of soon kueh skin together, then press both sides of skin to seal gaps. Set on light greased pan. Repeat the same till skin or filling is used up.  Allow about 1 inch of space in between each soon kueh.


Put steamer to boil.  Before setting soon kueh to steam, brush top of kueh with oil. Put to steam for 10min on medium high heat.

Drizzle soon kueh with sweet dark sauce and chilli and serve.


To store, allow steamed soon kueh to cool completely then place into airtight containers and refrigerate (you can line baking paper in between to prevent sticking). If you are not able to consume it within 3 days, freeze soon kueh and re-steam it when needed.


Soon Kueh Fillings
(Recipe by Mrs Leong Yee Soo of Everyday Favourites) - I doubled the amount for fillings

455g jicama (bangkuang)
3 tbsp oil
1 tbsp minced garlic (I used 10 garlic)
1 tbsp yellow bean paste (taucheo) (I kept to just 1 tbsp with the doubled filling portion)
1 tsp sugar
1/2 tsp MSG (Optional - I did not use this)
1/2 tsp salt
115ml water (I used the water from soaking dried shrimps, top up with tap water till the desired amount if not sufficient)
55g dried shrimps (rinsed, soaked, drained and roughly chopped)
170g prawn (Optional - I did not use this)
I added 1 tsp of pepper and 3 tbsp fried shallots to enhance the taste of the filling.


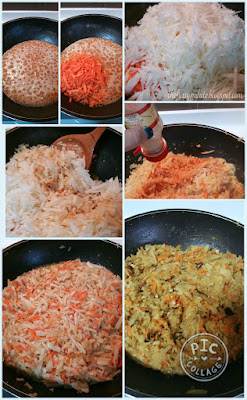
1. Peel and slice jicama into thin strips, immerse in water and drain.
2. Heat oil in a pan and fry garlic until light brown. Add yellow bean paste,sugar, MSG if using) and salt and fry for a moment.


3. Add the water, dried shrimps and prawns (if using) and bring to a boil.


4. Add the jicama, stir and cook over moderate heat until almost dry.  Stir in pepper and fried shallots till well mixed. Set aside to cool before use.

Thursday, December 17, 2015

Thai Milk Tea Chiffon Cake

Of all the many types of cakes out there, chiffon cakes still remain my favourite.  Soft, fluffy and light tasting, how can one not love it? 

Though easy on the palate, this cake is not easy to be attempted - but fret not, learn the skill of folding in and you are on your way to making your own lovely chiffon cakes.

I have not got any store bought chiffon cakes ever since the day I baked my first successful chiffon cake. I love how I can skip using cream of tartar, lessen sugar content, use healthier oil and coming up with chiffon cake flavours that I cannot get from bakeries.


This round, I made a chiffon cake in Thai Milk Tea flavour with the instant Thai Milk tea sachets I bought during my last Bangkok trip. Milk tea taste did not come through much but I love the colour of the baked product. It was just how Thai Milk Tea looks like haha! Soft and fluffy as usual.  No regrets in trying this out.


Maybe I should try using 2 sachets next time, then cutting down on the sugar amount for yolk mixture - just to see if the Thai tea tastes more obvious!


Thai Milk Tea Chiffon Cake

Egg yolk mixture

5 egg yolks
20g sugar
30g oil 
60g Thai Milk Tea (In a cup of 60ml hot water, stir in a sachet of Thai Milk Tea and let cool before use)
100g plain flour

Egg white meringue
5 egg white
60g sugar


  1. Combine egg yolks and sugar and mix well with a whisk till sugar is dissolved.
  2. Stir in oil and cooled thai milk tea, whisk till combined before adding in sifted plain flour and mix well till no clumps are present.
  3. In a separate clean and dry mixing bowl, add in egg white and beat till large bubbles are formed. In 3 additions, add in sugar. Make sure to beat till sugar is dissolved in between each addition. Stop when the white mixture reaches stiff peak stage.
  4. In 3 additions, fold in egg white meringue into yolk mixture in a one gentle direction, taking care not to over fold and deflate mixture.
  5. Pour cake mixture into chiffon tube pan and put to bake in a preheated oven and bake at 160deg C for 1 hour or till done. Remove pan and invert to let cake cool before removing and slicing.

Wednesday, December 16, 2015

Japanese Garlic Fried Rice


On days that you feel lazy to do anything, and even whip up a 3 dishes and 1 soup meal for your hubby and yourself, what would you do?  Well, for us, we will do the fried rice option.  

Fast and easy, and you wil get to eat in no time. We had Japanese Garlic Fried Rice during our recent Kyushu vacation and we love how simple, yet yummy their fried rice were. I knew I had to try to cook it when I am when here and so I attempted it.  Not too alike to what we had in Japan but was still yummy because you will not go too wrong with garlic and spring onions fried with rice yeah? :P


A few easy ingredients and you can cook up this fried rice fast.


Japanese Garlic Fried Rice

2 cups of Japanese short grain rice
(rinsed and cook accordingly, then set aside to cool before use. Can cook rice a night before and set into fridge when cooled to be use the next day - loosen rice rice up before use)

1/2 tbsp olive oil + 2 tbsp olive oil

1 or 2 eggs, lightly beaten with a fork

3 whole stalks of Spring onions, cubed

8 garlic, minced

char siew, desired amount, cubed (optional))

1 tsp black pepper powder (or lesser, adjust according to taste)

1 1/2 or 2 tbsp light soy sauce (to taste)


1. Heat 1/2 tbsp oil and then add in beaten egg.  Quick fry egg into scrambled egg form by breaking it up and dish out scrambled egg onto a bowl.

2. Add in 2 tbsp olive oil and let it heat up before adding in minced garlic.  Stir fry till fragrant, do not let it come to brown.

3. On high heat, add in spring onion bits and char siew cubes and stir fry till fragrant and well mixed before adding in cooled rice. Stir well to get all ingredients well mixed with rice.  Finally add scrambled egg.

4. Spoon in desired amount of light soy sauce and stir fry well to coat each rice bits evenly.  Do a taste test at this stage.

5. Stir in black pepper powder evenly, dish out and serve immediately.

Saturday, December 12, 2015

Espresso Muffins with Chocolate Chips


As one grows older, taste in food changes, and that's speaking from experience. Muffins were not my favourite before, same goes for coffee but now, I love muffins, and I love coffee even more! Anything coffee goes for me so I definitely had to make muffins, the coffee way.

Here I used espresso coffee but was a tad disappointed that the coffee taste did not come through that much. Chocolate chips added kinda took over the overall taste, making it more like chocolate chip muffins. Nevertheless, I still would like to share it here, for those who love coffee, but nt too strong tasting though.


Moist and soft centre muffins 
for our breakfast


Espresso Muffins with Chocolate Chips
Adapted from Ellena Guan's Chocolate Chip Muffins, with slight variations


Makes 6 Regular Muffins (I made 10 small muffins)


    Dry Ingredients - (A) 
  • 165g All-purpose Plain Flour
  • 2 Teaspoon Baking Powder
  • 1/2 Teaspoon Sea Salt

  • Wet Ingredients - (B)
  • 1 Large Egg (60g)
  • 70g Caster Sugar
  • 120ml Espresso coffee without sugar (cooled to room temperature)
  • 60ml Vegetable Oil
  • 1/2 Teaspoon Vanilla extract 

  • Desired amount of chocolate chips for mixing or sprinkling

1. Preheat oven to 200°C (392°F) and line muffin tins with muffin liners or alternatively grease muffin tin. 

2. Stir Ingredients (A) together in a bowl till well-mixed and set aside. 

3. Whisk Ingredients (B) together using a hand whisk starting with egg and sugar till combined then followed by the rest.

4. Pour mixture (B) into (A), using a spatula gently fold mixture to combine until no trace of flour is found (the batter will be thick and lumpy so do not over mixed it). 

5. Lastly fold in chocolate chips and spoon batter into prepared muffin tin all the way to the brim (do not 't worry the batter will not overflow). Top with optional chocolate chips or walnut on top before baking. 


6. Bake at 200°C for the first 5 minutes and then reduce temperature to 180°C for another 25 - 30 minutes until surface is browned and a skewer inserted in the center and comes out clean. 


7. Remove muffin tin from the oven and allow the muffins to cool in the tin for at least 10 minutes before removing it on a wire rack. 

Tuesday, December 8, 2015

Crunchy Chocolate Chips Cookies


Last year about this time, I made these same chocolate chip cookies to be given to my ex colleagues as X'mas gifts. I made them again this year, but done at the request of my hubby, who wanted to bring these to office for party. I made 4 batches of these cookies at one go and yield 5 big tubs of crunchy munchies.


Cooled and packed into dainty packs and off it went to hubby's office. According to him, the cookie packs were gone in a jiffy and had good reviews. Indeed no fail crunchy chocolate chip cookies.

Racking your brain on what to bake as giveaways this X'mas? Now you know what to do ya? ;)

Crunchy Chocolate Chips Cookies

125gm unsalted butter
100gm fine sugar (I used a total of 130g of brown sugar)
50gm Splenda Brown Sugar Blend (I did not use this)
1 egg
1 tsp vanilla essence
190gm plain flour (I used 220g plain flour as the dough was a little sticky for me to handle)
30gm cornflour
1/2tsp baking powder
1/2 tsp baking soda
1/4 tsp salt
180gm Semi-Sweet Chocolate Chips (I used 250g chocolate chips cuz my colleagues love more of them!)

1. Preheat oven to 180 deg cel. Line baking trays with baking sheets.
2. In a large bowl, cream butter and sugar till fluffy and pale. Add egg, vanilla & salt, beat on low speed until blended.
3. Sift in flour, baking powder and baking soda and stir with a wooden spoon until just blended. Add the chocolate chips and mix well.


4. Shape the dough into small balls 11gm each and place on the baking sheets, spacing them about 2 inches apart.


5. Bake the cookies for 12 minutes or until golden brown around the edges. Let the cookies cool briefly on the sheets before transferring them to the racks to cool completely. (For my Rowenta Oven, I baked my cookies at 180deg for 12min, switch trays halfway through the baking)


6. Store in airtight containers when cooled.

Friday, December 4, 2015

Durian Roll Cake

Some days back my hubby told me about Ah Seng durian starting their sale of mao shan wang durians again, and we then realised that we still have got 2 packs of durian puree stashed away in our freezer!!! So wait no more, we decided that I should use a portion of the durian puree to make our favourite durian roll cake.  Having previously baked this, I decided to use the same recipe I used before.


Here I present you my yummy roll cake with thick mao shan wang durian puree!  A sinful indulgence but let's just enjoy, because it is December - a month of play and feastings.


Durian Roll Cake


A
4 egg yolks
35g caster sugar
60ml water
40ml oil
1/4 tsp vanilla essence
80g plain flour


4 egg whites
30g caster sugar
1 tsp corn flour

Durian filling
250g durian puree
3 tbsp fresh milk (or more if required to thin durian puree to desired consistency)

1. Prepare 10inch by 10inch baking tray line with baking paper.  You may lightly grease baking tray with some cooking oil and then line baking paper to prevent baked cake from having "wrinkles".  Preheat oven to 170deg C. Prepare 2 other pieces of baking paper (slightly bigger size than baking tray) or use later after cake is baked.

2. Combine egg yolks and caster sugar in A and beat till egg yolk mixture turns white and pale, and air bubbles show up when beating stops.
3. Add in water, oil and vanilla essence and mix well.  Sift in plain flour and mix well.  Set aside.
4. Beat egg whites in a clean and dry bowl till frothy, add in corn flour and beat till combined.
5. In 3 separate additions, add caster sugar into egg white mixture and beat till stiff peaks form.
6. In 3 separate additions, spoon white eggs into yolk mixture and fold in carefully till a smooth batter forms (take care not to overfold and deflate the batter).

7. Pour batter onto lined baking tray and smooth out top with a scraper.  Put to bake at 170deg C for 14min or till done.  (Cake should spring back when pressed slightly, toothpick to come out dry when inserted into centre of cake, and when pressed gently there should be slight "sss" sound.  Overbaked cake will have cracks showing up when rolled.)
8. Remove tray from oven and overturn tray on 1 piece of baking paper atop a cooling rack. Remove the lined baking paper sticking on cake and cover cake with baking tray.  Let cool for about 10min or till cake is cool.  Remove baking tray.

9. Spread prepared durian filling all over cake, leaving about 1cm of far end clear of filling.
10. Roll up cake into a log shape with the help of bottom baking paper and twist sides of baking paper to hold the cake.  Rest rolled cake with the end at the bottom and leave cake in fridge for at least an hour before cutting.  Best served chilled.

Note:
You may lessen durian puree to 150g and add 100ml of whipping cream to durian filling if you do not like thick durian filling. 

Wednesday, December 2, 2015

Moist Cocoa Cupcakes with Chocolate Frosting


After a good break, life back here continues.  Looking forward to the series of festive public holidays and given company holiday - Dec is my favourite month of the year!  And with this good month here, mood just got better and I picked myself up to bake, again. 


Here's some cupcakes baked to celebrate my younger sister's birthday.


I prefer flat tops to work on

Simple rose swirls that needs more practising!

Dressed my cupcakes with some toppings.


More reasons these month to bake frosted cakes and improve on my piping skills :)

If you love moist chocolate cupcakes, try these :)

Moist Cocoa Cupcakes with Chocolate Buttercream Frosting
(Makes 14 to 16 small cupcakes)

90g plain flour
45g cocoa powder
3/4 tsp baking powder
1/2 tsp baking soda
2 eggs
160 brown sugar
80ml olive oil
2 tsp vanilla extract
1/2 cup buttermilk (If you do not have buttermilk on hand,  mix 120ml milk with 1.5 tsp of vinegar or lemon juice. Allow it to sit for at least 5min before use.)


1. Preheat oven to 180deg C. Line muffin tray with cupcake liners and set aside.


2. Sift plain flour, baking powder, baking soda and cocoa powder and set aside.


3. Place olive oil, brown sugar and vanilla extract in a bowl and mix well, then add in eggs and whisk till well mixed.


4. Pour in buttermilk and whisk well. Add in sifted flour mixture and fold in gently till not much big lumps of flour are visible.


5. Spoon mixture into cupcake liners till just half full and put to b
ake for 18 to 20 min. (For my Rowenta oven, I baked them at 175deg C for 17min) To test readiness, insert a toothpick into centre of cupcake, cake is done when inserted toothpick comes out clean with no sticky mixture.

6. Remove cupcakes from oven and set to cool on cooling rack before use.


7. Pipe chocolate frosting on cakes when cooled and decorate with your favourite sprinkles!


Chocolate Buttercream Frosting

80g dark converture chocolate
115g unsalted butter, softened
50g icing sugar
1/2 tsp vanilla extract
A pinch of salt

1. Melt dark converture chocolate in a double boiler (bain marie) and set aside to cool before use.


2. Cream butter and icing sugar till white and fluffy. Add in vanilla extract and salt and mix well.

3. Add in the cooled melted chocolate and mix till well combined.

4. Add more icing sugar (if required) to attain desired consistency for frosting. I do not need a thick and sturdy frosting, and did not want it to be super sweet, hence I left out on more icing sugar (and it was still sweet!)