Friday, November 14, 2014

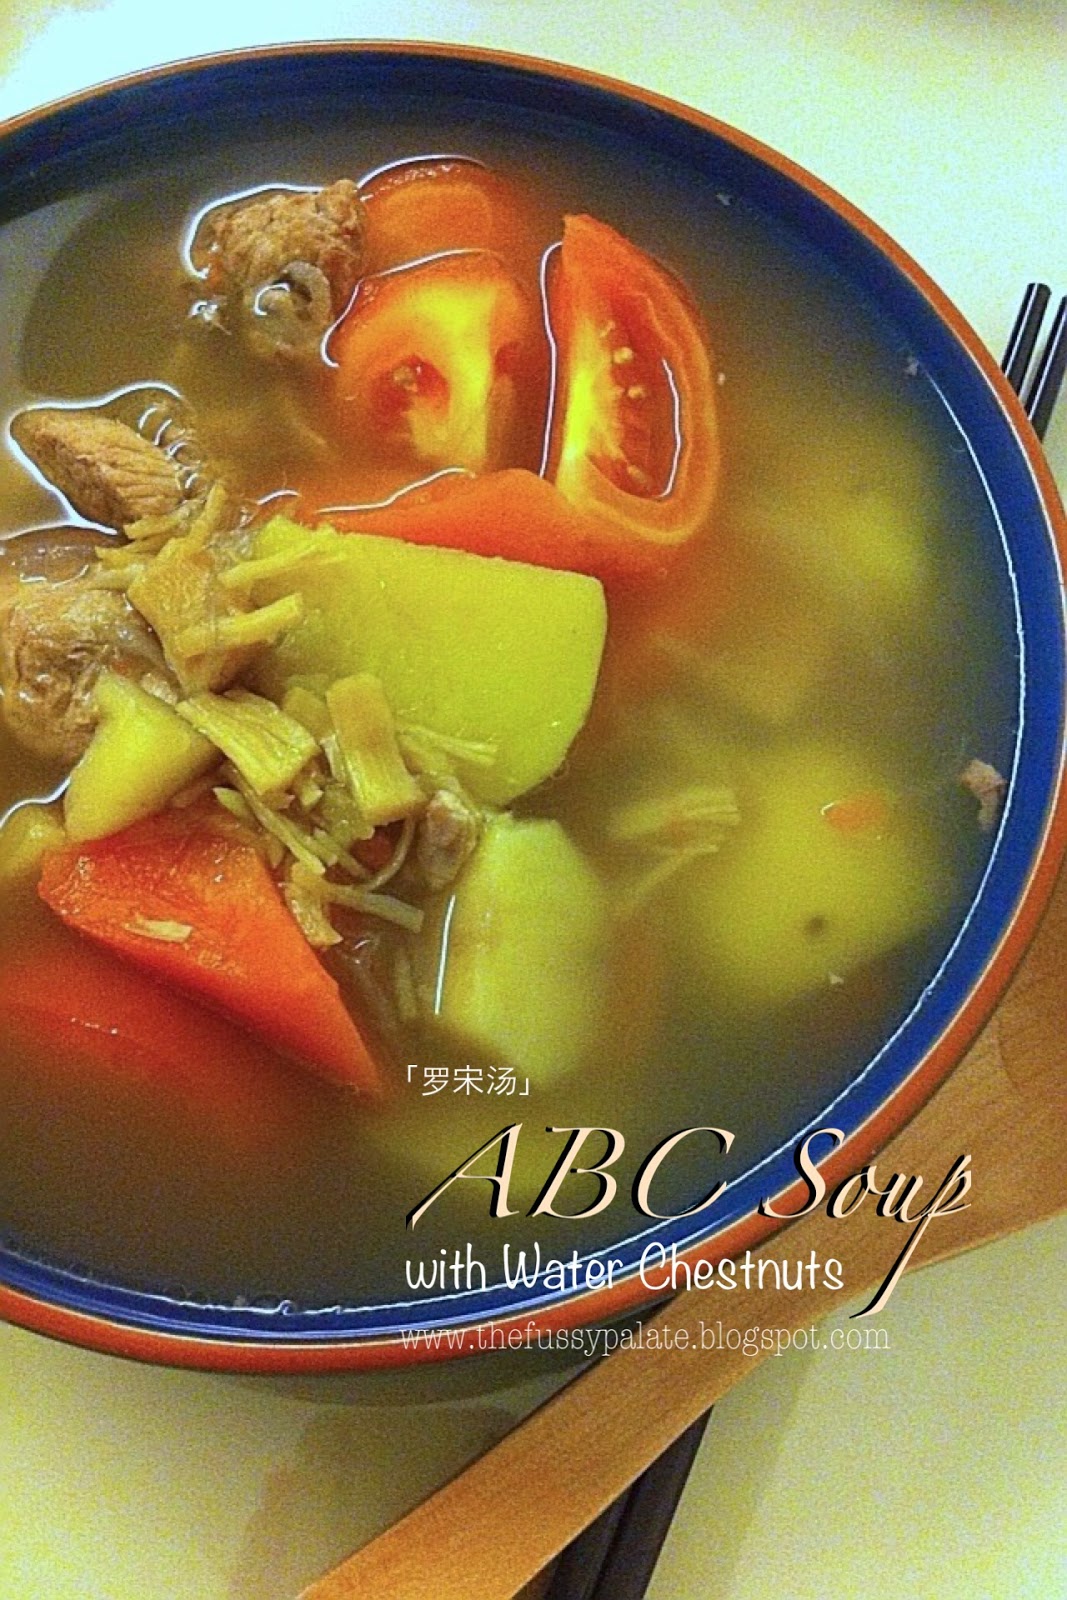
ABC Soup with Water Chestnuts

Plagued by a bad throat and blocked nose yet again.  Not sure if it is the weather or my weak body playing games with me. It seems to be more like the latter. My weak weak body. I get heaty so easily, so much more nowadays that I have to wean off spicy food. I am capping a limit to anything spicy nowadays. A little more of them and my throat and stomach suffer! Sobs. Now, I am not gonna let this little problem upset me. There are definitely so much more yummy food out there without the chillies and spices.

Some 2 weeks back, I started using my thermal cooker again for my soups. *Dust cobwebs off my thermal cooker*

I love how this wonderful pot can churn out good soup without the hours of simmer over the stove. I just need to wake up slightly earlier each morning, put all ingredients into them, bring pot to boil, leave in thermal pot holder and then come back home to a nice bowl of soup. How nice :)


Do you like ABC soup as much as we do? We enjoy drinking this soup, and we could consume this on its own without rice. Love the amount of vitamins and nutrients packed in this soup, ingredients within easy reach and easy to cook. Try it if you haven't :)


ABC Soup with Water Chestnuts

4 whole potatoes (Russet or Brastagi are fine) (de-skin & cut into 4 pieces)
2 medium tomatoes
1 carrot (de-skin & cut into serving pcs)
8 water chestnuts (de-skin and cut into half)
1 onion (de-skin)
3 medium size dried scallops (rinsed)
300g pork ribs
1.5 to 2 litres of water
salt to taste

Garnishing: Spring Onions (optional)

1. Wash pork ribs. Blanch pork ribs in a pot of boiling water to remove scums and oil. Rinse briefly and leave aside.
2. Put 2 litres of water into thermal pot and bring to boil before adding in all ingredients and pork ribs (except tomatoes) into boiling pot. Let boil for further 15 minutes or if time permits,  30 minutes more.
3. Turn off heat and immediately lift thermal pot into thermal pot holder and close lid. Soup will continue to cook on its own and be kept warm.
4. When ready to consume, remove thermal pot and put on stove to bring soup to boil. Add in tomatoes pieces, Add salt to taste and serve.

Thursday, November 13, 2014

Chocolate Bread with Golden Raisins


Just last week I gave my bread machine another chance to let it prove its worth of not just being able to do initial mixing and knead, but also to final stage of baking the bread. And it showed me it could produce a decent and soft loaf of bread. 

See how the bread grew and turned into a ball of bread instead of a loaf!  Bread was so soft till top got dent marks when I removed it from the tin to cool.


I used the recipe from Kenwood's BM recipe manual and substituted milk with yoghurt.  Not sure if it was a blessing in disguise to have forgotten to buy the milk while on the way home from work, but this time my BM baked me a loaf bread that stayed soft till the 3rd day.  My last few tries with milk weren't this good, so... yoghurt is here to stay when I wanna put my BM to work from the start till end ;)


Chocolate Bread
 (Recipe from Kenwood World with slight changes)

For 750g loaf
1 egg + water (Place 1 egg into a jug and add in water to make up 225ml)
100ml semi-skimmed milk (I used yoghurt)
1tbsp cocoa powder 
1 1/2tsp salt   
40g caster sugar 
25g butter   
450g unbleached white bread flour   
1 1/2tsp easy blend dried yeast 
75g plain continental style (70% cocoa) chocolate, coarsely chopped or use plain chocolate chips (I included 5 tbsp of golden raisins, briefly rinse in water and drained the raisins before use)

1. Put all ingredients into BM according to above sequence (except for chocolate chips), from wet to dry.
2. Select Function 1 for Basic Bread, 750g weight and the type of crust you like (I chose thinnest crust). Press the Start button to let BM work.
3. Add the chocolate chips (and drained golden raisins) when the bread maker makes an audible sound during 2nd kneading cycle.
4. Remove bread tin when BM is done with the baking, remove bread and let cool on cooling rack before slicing.

Tuesday, November 11, 2014

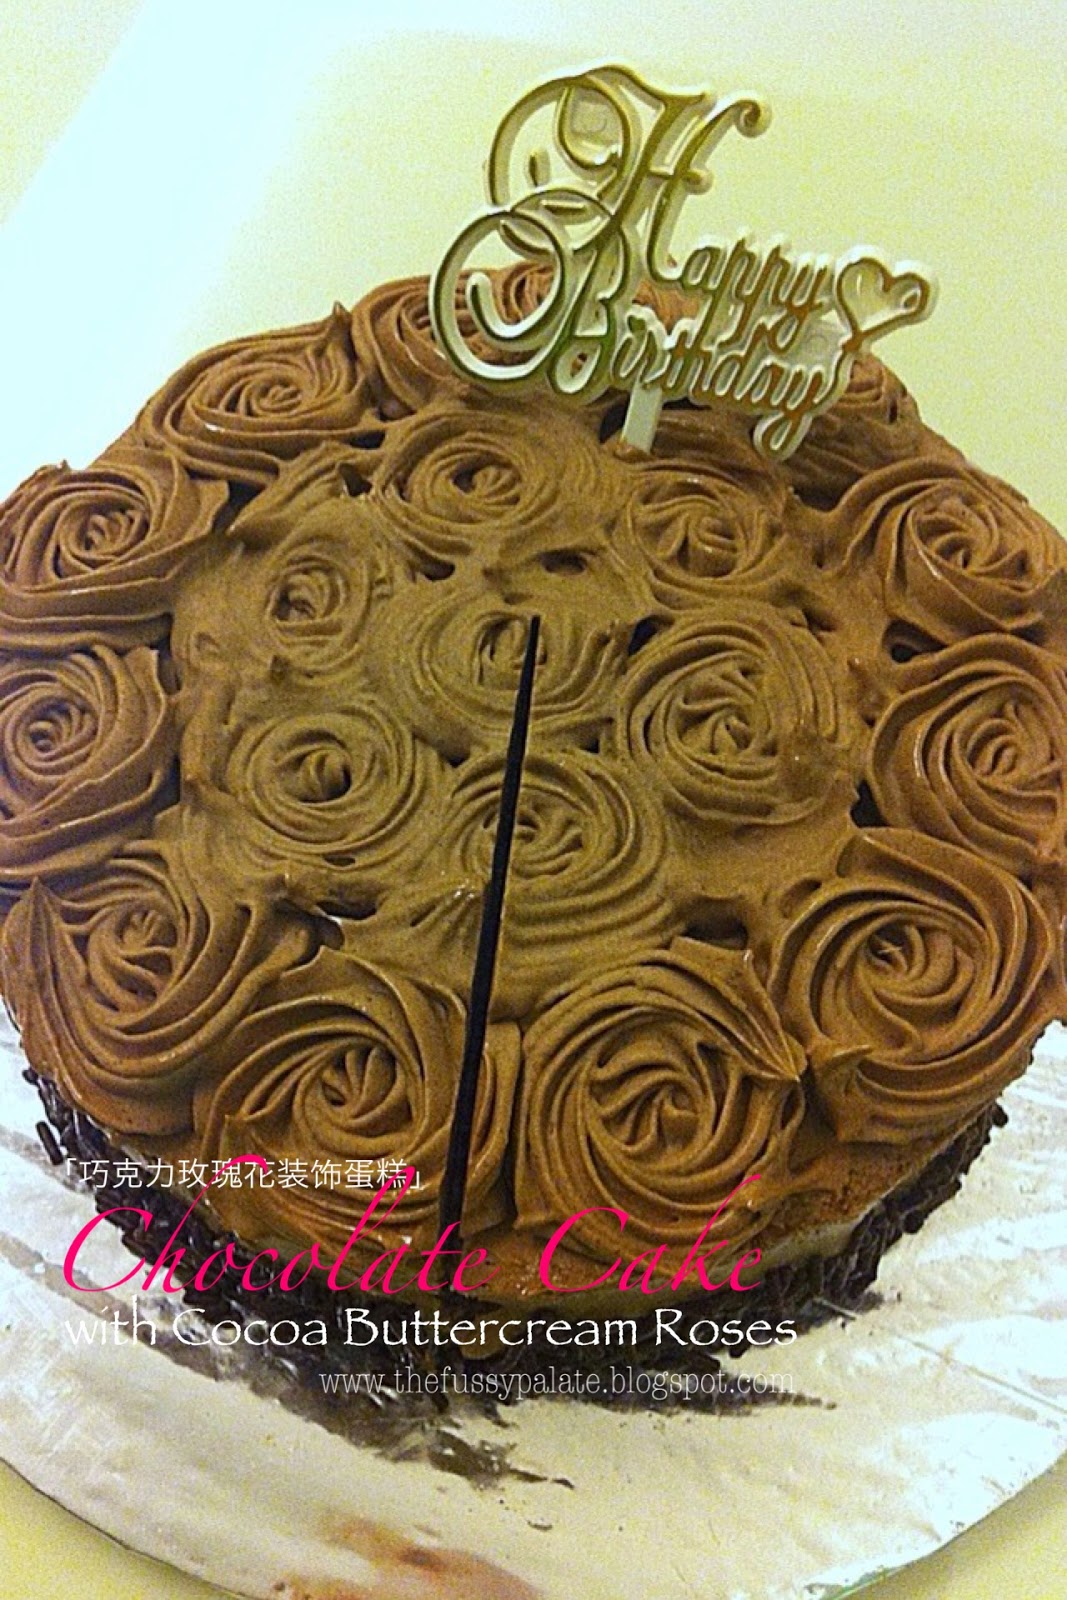
Chocolate Cake with Cocoa Buttercream Roses

Feasting period started from end October for Hubby and I. Anniversary, birthday, festive celebrations all fall during this period.

Since I baked a Japanese cheesecake for Hubby some 2 weeks back for our wedding anniversary, I decided to do a buttercream cake for Hubby's birthday this year, and because I wanted to practise piping, I added buttercream roses on the top of the cake.


How is it for a noob who has not really done much piping her whole life?  I thought it looked not too bad hehe!  Okay, more excuses to do bakes that calls for frostings. I need more practices!

Talk about frostings, I love using buttercream for cake frosting. I am never good at whipping cream, yes, even heavy cream, so I try to steer clear from them as much as I could.

I love how easy is it to make buttercream. It is almost foolproof and I have never overbeat buttercream. Divert your attention a little and you risk overwhipping cream and heavy cream, and you get that grainy texture with milk oozing out. Buttercream holds its piped shapes better too!

I made this cake 3 days earlier for the Hubby, sang him the birthday song, he made a wish, cut the cake and we digged into it right after. He loved the cake. It was good! Soft, moist and not too sweet, just how we like our cake to be hehe!

I love taking photos of birthday cakes!

Especially when candles are lit.

 
So birthday song was sang,
wish was made,
cake was cut.
What's next?

Have your cake and eat it lor :P

Chocolate Cake with Cocoa Buttercream Roses
3 egg yolks
55g cake flour
1/4 tsp baking powder
40g caster sugar
30ml canola oil
35ml milk
a pinch of salt

3 egg whites
1/4 cream of tartar
5g cocoa powder

Chocolate rice

Sugar syrup for brushing
1 tbsp sugar
2 to 3 tsp hot water
(Dissolve sugar in hot water and set aside for cake brushing)

1. Preheat oven to 150deg C.
2. Sift cake flour, baking powder and cocoa powder and leave aside.
3. Beat yolk and 1/2 tbsp sugar till sugar has dissolved and yolk mixture has turned pale.


4. Add salt and beat well before adding canola oil in 2 additions. Make sure yolk mixture is well beaten between each addition.
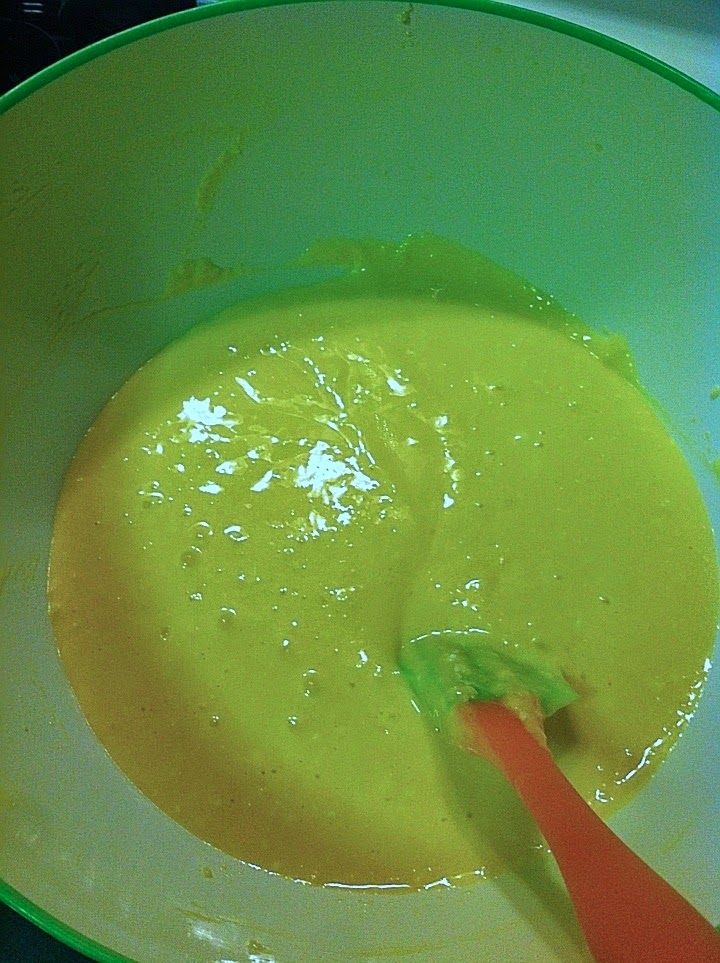
5. Add in milk in 2 additions and mix well before placing in sifted cocoa flour mixture. Use a spatula and mix well till batter turns thick and creamy. Set aside.
6. In a separate bowl, beat egg whites till frothy. Add in cream of tartar and continue to beat till soft peaks form, add in remaining caster sugar in 3 additions and beat till stiff peaks are formed.


7. Spoon half of white mixture into cocoa batter and fold in till well mixed. Repeat the process with remaining white mixture in 2 additions.
8. Pour folded in batter into 6-inch baking tin and drop it on a table top twice to remove excess air bubbles.
9. Place baking tin in oven to bake at 150deg for 60 min or till done.
10. Remove from oven and place it overturned on a cooling rack to cool. Prepare buttercream frosting. (Refer to bottom for steps)
11. Slice a little of the uneven cake top if top is domed shape, then slice cake to get 2 even pieces for layering.  I used 3 toothpicks to guide me with the even and equal slicing.


12. Place a slice of the cake on a cake board and set it on a turntable, brush sugar syrup all over cake. Slap on some buttercream and spread it evenly. Place the other cake on top of buttercream.


13. Brush sugar syrup all over cake, then crumb coat whole cake with a thin layer of buttercream to seal in cake crumbs so they will not get in the way during final coating, you may freeze crumb coated cake for about 15min before doing final thick coating.
14. Layer an even coat round sides of cake. (I left out the top since I will be piping on roses.) Spoon chocolate rice on to side of frosted cake.


15. Spoon remaining buttercream into a piping bag with a star nozzle and pipe the roses on the cake top, starting from outer layer to inner layer. Refrigerate and enjoy.

Cocoa Buttercream Frosting
120g salted or unsalted butter, softened (use good butter pls! I used Lurpak salted butter)
30g icing sugar
3 tbsp cocoa powder


1. Place butter into a mixing bowl, cut into smaller cubes and let it soften a little before beating.
2. Beat butter and icing sugar on low speed. Turn up speed when icing sugar has been blended with butter.
3. Beat till butter is smooth, add cocoa powder and continue to beat till buttercream is smooth, creamy and firm enough to hold its shape when piped.


Tuesday, November 4, 2014

Teochew Style Steamed Pomfret

How do you like to have your fish to be cooked?  I like mine steamed.  I feel that a fresh good fish is best eaten steamed, this way the sweetness of the meat can be savoured rightaway, plus this method of cooking is healthy too! Oh, I should also add that it is also easy and fuss-free to prepare too.

I belong to the Teochew dialect group, and being a teochew, I am no stranger to the Teochew steamed fish (潮州蒸). Mum cooks them often since we were young, till now!


I like that there are many ingredients added to this steamed fish dish because I can save on prepping other dishes. Go on and say I am lazy. Everyone has their down and out days and I am no exceptional. I experience those days too, and when I do, I get the easy way out.  I cook real easy dish to pair with rice and that's it. Eat out? Yes, that is another escape route which we turn to sometimes, but homecooked is the preferred. I love feeding my hubby with homecooked food :P

Teochew Style Steamed Pomfret
(Serves 2)

1 medium white pomfret
3 or 4 dried chinese mushrooms (rinsed, soaked and cut into thin strips) - you may reserve the mushroom water for seasoning
2 pcs salted plums (use a spoon to mash it a little, deseed)
1 pc pickled mustard (salted vege/kiam chye) - I used 1 small pack of pickled sichuan vege, rinsed 1 time and drained
1 small pc ginger (thinly sliced into strips)
2 small red chilli (cut into small pcs, remove as much seeds) - optional
Half or 1 box tofu good for steaming (cut into smaller pieces) -
1 medium tomato (washed and sliced thinly)
salt

Garnish
1 stalk spring onions
1 stalk coriander (I did not use)

Seasonings
1/2 tsp sesame oil
1 tsp soy sauce
1 tsp chinese cooking wine/Hua Diao Jiu
A dash of pepper (optional)
3 tbsp water, or more if desired (I used the mushroom water)

1. 30 minutes before putting the fish to steam, make 2 slanted deep cuts on the fish. Rub some salt on both sides of fish. Stuff some ginger into the fish stomach portion. Cover with cling wrap and leave in fridge.
2. Put a steamer or wok filled with enough water for steaming to boil.
3. Sprinkle leftover ginger strips all over the fish. Spoon mashed salted plums on sides of fish, line sides of the fish with tomato slices, tofu slices, pickled vege, sliced chinese mushrooms and lastly sprinkle red chilli evenly.
4. Mix all seasonings together and spoon over fish.
5. Put to steam on high heat for 10 to 12 minutes or till done.
6. Garnish with spring onions and coriander. Serve immediately.

Sunday, November 2, 2014

Baked Garlic Butter Prawns

Hubby wanted to have some western style dinner. He asked and he got it. I actually prefers that he lets me know what he wants so that I need not rack my brain on what to cook then.

Woot! These baked prawns were sure yummilicious! Fast and easy to do, and delicious they were.  Baked these prawns to go along with grilled beef steak, pan seared scallops and foie gras. Yums!


Baked Garlic Butter Prawns
(Serves 2)

8 pieces of fresh tiger prawns, butterflied and de-veinned
6 garlics (or more if desired), minced
1/2 tsp garlic powder
2 tbsp butter, melted
Olive oil
Salt
Ground black pepper
Chopped parsley (I did not have so I left it out and used thyme leaves instead)

1. Preheat oven to 180deg C.
2. Cut prawn whiskers and rinse prawns.
3. Butterfly the prawns by running a sharp knife down back of prawns, slicing deep enough to have it opened up. Remove intestinal tracts.


4. Place prawns on a baking tray and season with some salt and ground black pepper.
5. Mix together minced garlic and melted butter.


6. Add in half teaspoon garlic powder.


7. Sprinkle some ground black pepper into butter mixture and mix well. (You may add in chopped parsley if you have it)


8. Spoon garlic butter mixture onto butterflied prawns.


9. Drizzle some olive oil all over. Sprinkle thyme leaves over top and put to bake for 15 minutes or till done.


10. Serve immediately.

Saturday, November 1, 2014

Hokkaido Milk Loaf

October had been a wonderful month for me.  A wonderful month filled with a holiday to remember, our 3rd year wedding anniversary which we celebrated (many more good years to come!), a nice surprise from the hubby sent to my office and a handful of new books to read!


I am a woman afterall, plus it's always nice to get surprises now and then from your lovely other half, isn't it?

Thank you hubby!

2 recipe books which my lovely colleague helped get for me ďuring her trip to Taiwan. Did I mention I prefer looking up recipe books than surfing through the internet? I love buying recipe books hehe!

Before I digress further, I should get going on my bread post before this post gets longer and longer.

So I made Japanese Milk Loaf with a pack of Hokkaido milk I bought from the supermarket. No, I did not lug this pack of milk back from Hokkaido.

I love the rich and creamy taste Hokkaido milk has, and it definitely makes good bread. 


I made this bread using Alex Goh's Magic Bread recipe book - a book that has many good recipes that yield soft yummy bread. 


Hokkaido Milk Loaf
(Recipe adapted from Alex Goh's Magic Bread book with slight amendments)

A.
60g bread flour
43g boiling water

B.
195g bread flour
37 sugar
3g salt
4g instant yeast

C.
60g cold milk (I used Hokkaido 3.6 Milk)
50g whipping cream
Half cold egg

D.
20g butter

1. Add the boiling water from A into flour, mix until well-blended to form a dough. Cover and set aside to cool. Keep it in refrigerator for at least 12 hours.
2. Mix B until well blended, add in C and knead to form rough dough. Add in A and knead until well blended.
3. Add in D and knead to form elastic dough,
4. Let it proof for 40min. Divide the dough into 3 pieces and mould it round. Let it rest for 10 minutes,
5. Flatten it and roll it into oblong shape. Place 3 pieces of the dough onto a greased loaf tin. 


6. Let it proof for 50min. Pipe some Mexico topping on top. (I skipped the topping) Bake at 180deg C for 20 to 25 minutes.

Friday, October 31, 2014

Luo Han Guo & Chrysanthemum Tea


Weather has been scorching hot these day and what is simple and good to make at home to help ease the heatiness in us?  It has got to be arhat fruit chrysanthemum tea drink.

Arhat fruit is also known as luo han guo in mandarin.
 This fruit has got amazing health benefits - helps to ease cough and moisten lungs, rich in Vitamin C, helps in anti-aging, anti-Cancer, weight loss and colon cleansing.  Also, it is a natural sweetener which in turn makes it a good sugar substitute for diabetic patients. One can drink it everyday without worrying it to be too cooling to our bodies.

With the impending cough that hubby and I are having, this drink really helps ease our bad throat especially with the addition of chrysanthemum in it.  The combination of luo han guo chrysanthemum drink is said to work doubly well on cough and bad throat.

Luo Han Guo & Chrysanthemum Tea

2 luo han guo (briefly scrub and wash exterior of fruit)
A handful of dried chrysanthemum flowers (briefly rinse and drained)
1.5 to 2 litres of water

1. Using the back of a knife or spoon, gently crack open the washed luo han guo to expose the insides.
2. Place luo han guo and water in a pot and bring to boil on high heat.
3. Bring down to low heat and let simmer for another 15 min.
4. Place chrysanthemum flowers into pot and cover. Turn off fire and let it heat for 15 to 30 min. Strain and serve.

Note:
Choosing and buying luo han guo - pick one of the fruit and give it a gentle shake. If you can feel and hear the seeds moving - the fruit is not fresh and would not give off much taste and benefits.

Thursday, October 30, 2014

Japanese Cheesecake (again!)

3 years ago on this day, we got married.

All these years from our courtship days to dating days, and now as a married couple, you never fail to treat me sweetly.

You aren't a sweet talker.  You show me your love with actions.  You support me in whatever decisions I make and in all things I do.  Thank you Hubby!

I am blessed to have a loving hubby who helps out with the housework. On days that he knows I am burnt out, he will take over all housework and ask me to rest or just concentrate on my baking and cooking.

I am glad that I've got him - A friend, a hubby and a soulmate who willingly listen to whatever I have to say, always being my guinea pig to test and try all food I churn out in the kitchen, and enduring my naggings!

If I could have 1 wish, I wish for many more wonderful anniversary celebrations with this man.

To celebrate our day, I baked this cake that hubby likes alot - the Japanese Cheesecake.


I wanted a reliable recipe so I stuck by Rasa Malaysia's which I used in my other 2 cheesecakes posts.

Japanese Cheesecake
(Makes an 8" or 9" cake)

140g/5 oz. fine granulated sugar
6 egg whites
6 egg yolks
1/4 teaspoon cream of tartar
50g/2 oz. unsalted butter (I used salted butter)
250g/9 oz. cream cheese
100 ml/3 fluid oz. fresh milk
1 tablespoon lemon juice
60g/2 oz. cake flour /superfine flour
20g/1 oz. cornflour (cornstarch)
1/4 teaspoon salt (I did not use this as I used salted butter)

1. Melt cream cheese, butter and milk over a double boiler. Cool the mixture. Fold in the flour, the cornflour, salt, egg yolks, lemon juice and mix well. After folding this, I put the mixture through a sieve to get a smooth and lump-free mixture.


Fold in.

Pour mixture over a sieve and let it run through with the help of a spoon or spatula to get a smooth mixture.

Smooth lump-free mixture without creamcheese and flour bits.

2. Make the meringue by whisking egg whites with cream of tartar until foamy. You can beat with a stand mixer or handheld mixer. Add in the sugar and whisk until soft peaks form.

3. Take 1/3 meringue and fold into the cheese mixture, then fold in another 1/3 of meringue. After incorporated, pour the batter back to the remaining 1/3 meringue and fold. FOLD GENTLY. (I scooped out 2 tbsp of mixture and added 1 tbsp of cocoa to make some chocolate mixture and scoop into a piping bag) Pour the mixture into a 8-inch round cake pan (lightly grease and line the bottom and sides of the pan with grease-proof baking paper or parchment paper). Snip off abit at the tip of the cocoa mixture filled piping bag. Try piping out on a piece of kitchen towel to test the flow before piping out your desired design on the cake.)


I painstakingly piped this out with reference from the internet. PHEW~!

4. Bake cheesecake in a water bath for 1 hours 10 minutes or until set and golden brown at 160 degrees C (325 degrees F). (Dr Leslie Tay's baking direction: Preheat to 200C (I used 220C for 30min as my oven temp is slightly lower than other oven) non fan forced. Bake for 20min. Lower temperature to 160C and bake for 10min (I did mine at 180C 20min). Turn off oven, and leave cake in oven with door closed for 30min. Open oven door slightly ajar and leave cake to cool inside for 20min. Finally, take cake out of pan and cool on rack)


Ta-daah!
Made specially for my dearest hubby.


Some Notes with reference from Rasa Malaysia:
1. I used an 8″ pan, and I lined the sides of the pan with parchment paper with the paper extending slightly higher than the cake tin by about 1.5”.


2. I left the cake to cool down in the oven with the oven door open, about an hour. This is to prevent sudden change of temperature that may cause the cake to shrink drastically. It’s normal that the cake will shrink about ½ inch to 1 inch after cooling, it’s normal. If the cake shrinks a lot, the main reason is over mixing the egg white mixture with the cheese mixture. Beat the egg whites until soft peaks form, FOLD VERY GENTLY, do not stir or blend.


Pardon the lousy photo with bad lightings.
I just wanted to show the slight shrinkage of the cake when cooled slowly.

3. Refrigerate the cake (with or without the cake tin) for at least 4 hours or overnight.