Tuesday, April 29, 2014

Pumpkin Loaf bread with Pumpkin seeds (Sponge dough method)

After making the pumpkin cake and pumpkin loaf bread the last 2 rounds, I still have some pumpkin left which was just nice for another loaf. I do not like to bake the same thing consecutively in a row, but in order not to waste the leftover pumpkin, I made another loaf of bread with it, with some variations though :P

Chanced upon Carol's honey pumpkin toast some months back and I like how she used pumpkin seeds to adorn the loaf crust. I decided to follow suit since I have a pack of the healthy seeds in my fridge.


Pumpkin Loaf Bread

Ingredients for sponge dough
150g bread flour
1 tsp instant yeast
125ml water

Mix all ingredients into a soft rough dough.  Cover and leave to proof for at least 1-2 hours or put in a plastic bag, tie up and without proofing, keep in fridge for at least 4 hours (I left my sponge dough to proof in the fridge overnight, about 14 hours). Thaw for 15 minutes before adding sponge dough into bread dough ingredients.

Ingredients for bread dough
125g bread flour (I used 150g bread flour and did not use wholemeal flour)
25g wholemeal flour
1.5 tbsp sugar
1/2 tsp salt
Half egg
100g pumpkin puree
25ml water [did not add]
25g butter

Pumpkin seeds (for exterior garnishing use)

I like using nuts and healthy seeds in bread to give the extra crunch.


1. Add all ingredients except water and butter to the sponge dough. Knead until well co,bined, then gradually add in water (if necessary) while kneading untik a soft dough is formed. Knead for about 10 minutes then add in butter. Continue kneading untik you get a soft, smooth, elastic dough and it does not stick to the fingers, or to window pane stage (to test, try stretching a small part of the dough till a thin membrane is formed without having holes formed).
2. Shape into a ball and cover with a clean cloth to proof for 15 minutes or till double in size. Punch down dough.
3. Roll out dough into a rectangle shape and fold into thirds, then roll dough into a log like a swiss roll. Place in greased baking tin and leave to proof for more than an hour or double in size. (I used a Pullman tin with lid instead to get a square loaf. Do remember to grease the lid too!)

             
See how my dough proof in 45 minutes.

4. Bake in preheated oven at 180deg C for 25 minutes.  Remove to cool on rack immediately after baking. (After the 25 minutes is up, I remove the lid from the tin and let it bake a further 10 to 15 minutes to get a darker top.)

Ta-daah! My orangey square loaf :)

Monday, April 28, 2014

Pumpkin Loaf (Sponge dough method)


My first pumpkin loaf bread.  Nice and soft. I like how the pumpkin puree turned my bread into a nice orange coloured loaf.

As much as I can, I try not to use colour essences in my cools and bakes as to much of those artificial colour essences can be detrimental to health. This is one reason why homemade stuff is still the best.

Ending this short post with the pumpkin loaf bread recipe by Kimmy-Cooking Pleasure (I halved the whole recipe and made just 1 loaf).


Pumpkin Loaf Bread

Ingredients for sponge dough
150g bread flour
1 tsp instant yeast
125ml water

Mix all ingredients into a soft rough dough.  Cover and leave to proof for at least 1-2 hours or put in a plastic bag, tie up and without proofing, keep in fridge for at least 4 hours (I left my sponge dough to proof in the fridge overnight, about 14 hours). Thaw for 15 minutes before adding sponge dough into bread dough ingredients.

Ingredients for bread dough
125g bread flour (I used 150g bread flour and did not use wholemeal flour)
25g wholemeal flour
1.5 tbsp sugar
1/2 tsp salt
Half egg
100g pumpkin puree
25ml water [did not add]
25g butter

1. Add all ingredients except water and butter to the sponge dough. Knead until well co,bined, then gradually add in water (if necessary) while kneading untik a soft dough is formed. Knead for about 10 minutes then add in butter. Continue kneading untik you get a soft, smooth, elastic dough and it does not stick to the fingers, or to window pane stage (to test, try stretching a small part of the dough till a thin membrane is formed without having holes formed).
2. Shape into a ball and cover with a clean cloth to proof for 15 minutes or till double in size. Punch down dough.
3. Roll out dough into a rectangle shape and fold into thirds, then roll dough into a log like a swiss roll. Place in greased baking tin and leave to proof for more than an hour or double in size.
4. Bake in preheated oven at 180deg C for 25 minutes.  Remove to cool on rack immediately after baking.

Sunday, April 27, 2014

Bird's Nest Soup with Rock Sugar


After the bout of bad cough and flu, I learnt that loving myself is more important now than before. Need more nourishing stuff for myself! 

Bird's nest is considered as a tonic in TCM, and is good in relieving asthma and chronic cough, clears phglem and relieve fatigue. Ah, and of course bird's nest is known to maintain good complexion and enhance youthfulness! 

I used to consume bottled bird's nest but dislike the sweetness, so now I turned to double-boiling my own. More work for sure but I get more and better stuff out of the money paid.

Bird's Nest Soup with Rock Sugar

2-3 pieces bird's nest
10 slices of American ginseng [optional]
6 small red dates (pitted) [optional]
1 dried honey date [optional]
3 small size yellow rock sugar
1.5 to 2 rice bowl of lukewarm water

1. Soak bird's nest pieces in a bowl of water for about 1 hour till it softened.


2. Remove feathers and dirt from bird's nest using a tweezer.  Be careful not to grasp the bird nest too hard as the softened bird nest will break up.
3. Rinse well and drain.


4. Put cleaned bird's nest and all other ingredients into a small pot (good for double-boiling), and top with lukewarm water.
5. Put pot into a bigger pot of boiling water and double boil for about 1 hour to 1.5 hour (depending on thickness of bird nest).
6. Serve chilled or when cooled.

Consume them before meals to allow better absorption of its nutrients.

Thursday, April 24, 2014

Savoury Pumpkin Cake

I have several items on my to-do foodie list, 1 of them is savoury pumpkin cake. Mummy gave me a pumpkin last weekend and I immediately knew what I wanna do with it!  Yeah, pumpkin cake! Mum makes nice yam cakes and pumpkin cakes, so using her recipe, I tried it out.

All the prep works leading up to cooking it was no sweat, except for the shredding of the pumpkin part. Oh, I swear my right arm got slightly toned after the time spent shredding the pumpkin. Keke~

Gave half of the pumpkin cake to MIL. Hubby and I finished up the balance of 5 pieces during breakfast the next day! Yummy. Another thumb's up from my man :)


Savoury Pumpkin Kueh

400g pumpkin
180g rice flour
30g tapioca flour
300ml water (1st portion) (mix the water used to soak dried shrimps and dried mushroom together, top more water to make up 300ml)
300ml water (2nd portion) (for mixing of rice flour and tapioca flour)
1 tsp (alkaline water) – I omitted
50g dried shrimps
100g minced chicken
8 to 10 dried mushrooms, shredded
6 to 8 clove garlic, minced
½ tsp salt
½ tsp white pepper
½ tbsp chicken stock (you may use plain water too) – I used ¼ cube Knorr chicken cube mixed in 3 tbsp hot water, spoon out required amount to use)
6 tbsp cooking oil
2 to 3 tbsp sliced shallots (fried and leave aside)

For garnishing (Optional)
200g sliced shallots (fried and leave aside)
Sliced spring onions
Sliced red chilli

1. Wash and rinse dried shrimps briefly, soak dried shrimps in hot water for about 30 minutes.  Remove soaked dried shrimps and chop till fine. Leave aside the water used to soak the dried shrimps.
2. Wash and soak dried mushrooms in hot water till soft.  Remove mushrooms and keep the mushroom water aside.  Remove mushroom stalks and cut into thin slices.
3. Skin pumpkin and shred it.
4. Mix rice flour and tapioca flour with 1 portion of water.
5. Deep fry sliced shallots over low heat set aside.
6. Stir fry garlic and dried shrimps with cooking oil till fragrant.  Add in mushrooms, stir fry for about 30 seconds, add in minced chicken and stir fry till minced chicken is just cooked.


7. Add pumpkin, the 1st portion of water , alkaline water (which I omitted), chicken stock, white pepper, salt and 2 to 3 tbsp fried shallots.  Cook till it boils and turn down heat.
8. Give the 2nd portion of flour and water mixture a stir to break up clumps forming at bottom, then stir in flour mixture into the main pot.  Stir and mix well.  Remove from heat.


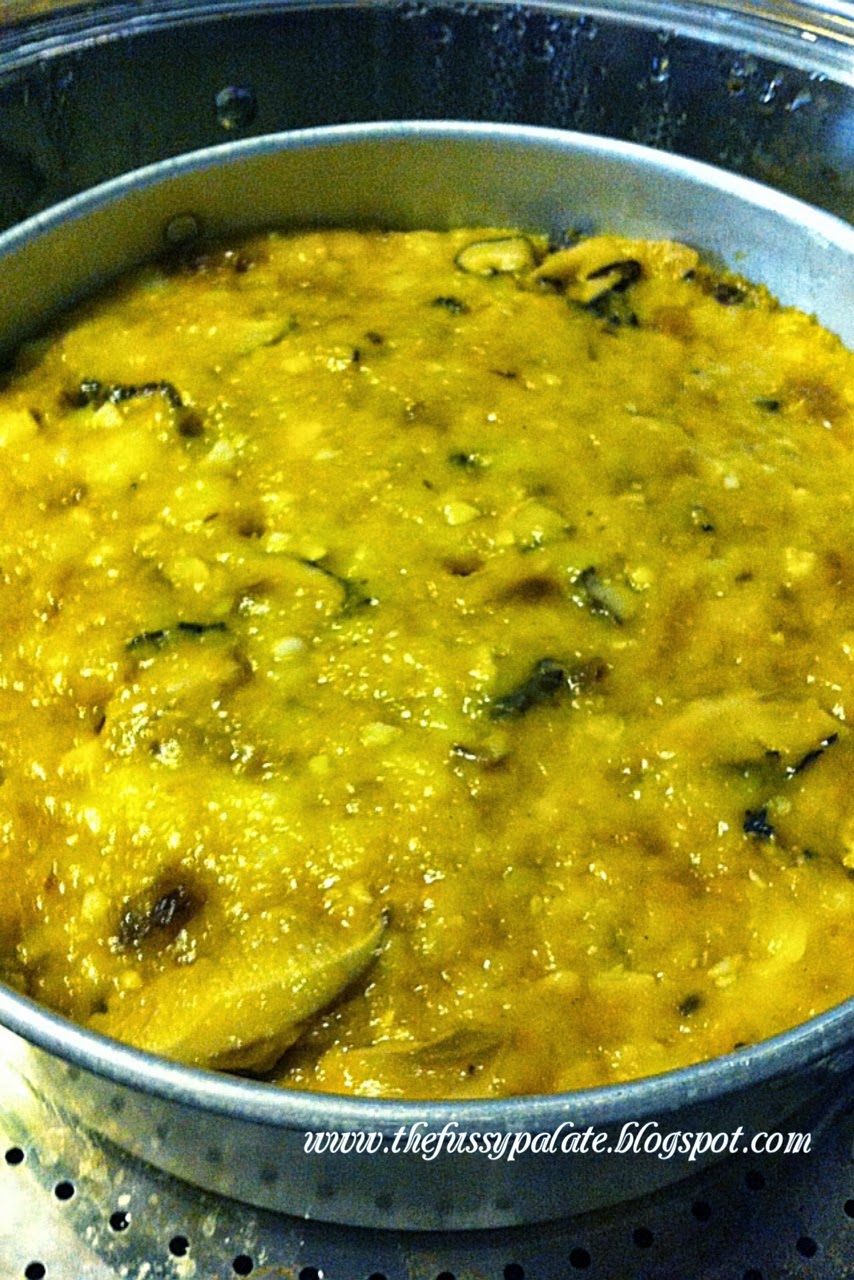
9. Pour pumpkin mixture into a greased 7-inch round tin, spread the mixture out with a spatula and even out top and steam over high heat for 45min to an hour or till cooked.

Mine cooked after an hour.

10. Leave to cool completely before cutting. Garnish with spring onions, red chilli and shallots before serving.

Sunday, April 20, 2014

Tiramisu Charlotte Cake (using cream cheese)


What is the one thing that comes to your mind when you see these 2 items??  Yeah, Tiramisu cake alright!

Made this dessert many times with mascarpone cheese and received compliments for it, but this time I decided to challenge using cream cheese instead.  Wanna see if there is much difference to using mascarpone cheese and cream cheese.  Yes, there is. Using mascaporne cheese yields a lighter tasting tiramisu, while cream cheese got the cake tasting slightly heavier and had that tangy taste, which I actually quite like! Great! A cheaper alternative for me next time keke~


Tiramisu, to me, is quite a fail-proof dessert that everyone can make.  Who doesn't like after-meal sweets??? So do it!

Tiramisu Charlotte Cake
Recipe by Happy Home Baking

(makes a 7" cake)

Espresso Syrup:
1 tablespoon instant espresso/ strong coffee powder
1/2 tablespoon sugar
1/2 cup (125ml) boiling water
1 tablespoon Marsala (I used Baileys Irish Cream)

Filling:
250g mascarpone cheese (I used cream cheese)
1 1/2 teaspoons vanilla extract
3 tablespoons icing sugar
2 tablespoons Marsala (I used Baileys Irish Cream)
1 cup (250 ml) heavy/whipping cream (I used whipping cream)

about 24 sponge fingers (savoiardi)
50g dark chocolate (optional, I did not use)

cocoa powder, to dust
dark and white chocolate shavings (optional)
strawberries for decoration (optional)


Method: 

To make the Espresso Syrup:
Dissolve instant espresso coffee powder, sugar in boiling water. Leave to cool. Stir in 1 tablespoon Baileys Irish Cream. Set aside.

To make the Filling:In a mixing bowl, with a manual whisk, whisk mascarpone cheese (cream cheese) with icing sugar, vanilla extract, Baileys Irish Cream and 3 tablespoons of the espresso syrup until blended.

With an electric mixer whisk the whipping cream until soft peak (do not over whip). With a spatula, fold in 1/4 of the whipped cream to the mascarpone (cream cheese) mixture. Fold in the remaining whipped cream to the mascarpone mixture  (cream cheese).

To assemble the cake:
Cut off one end of the sponge fingers so that each one is about 3" in length. Line the sides of a 7" round baking pan* (with a removable base or use a springform pan) with the sponge fingers (do not dip them in the espresso syrup). You will need about 17 sponge fingers (depending on the type/brand). If the last sponge finger cannot fit in nicely, trim away part of it to fit it in. Save the leftover small pieces.


One at a time, gently dip (do not soak) sponge fingers in the espresso syrup and use them to line the base of the pan. Cut the sponge fingers into shorter lengths if necessary. Use the leftover pieces to fill the gaps.

Spoon over half of the filling. Spread evenly. Grate the dark chocolates over the filling (I used cocoa powder). Repeat with another layer of sponge fingers and spoon over the remaining filling (I did 3 layers and dust the 3 layers with cocoa power). Spread and smooth the top (I dust a 3rd layer of cocoa powder). Cover with cling wrap and refrigerate for at least 4 hours, best left overnight.

I covered the top with clingwrap and secured it with a rubberband, and refrigerate it.

Just before serving, unmold the cake and dust the top with cocoa powder (my 4th layer). Decorate with dark and white chocolate shavings and strawberries (as desired).

Equally sliced and ready to be eaten!

Enjoy!

Thursday, April 17, 2014

Chicago Cheesecake


Went home after work on Monday and told hubby that I am gonna bake a Chicago Cheesecake after dinner.  His eyes lit up and said "Really?!! Okie okie!"

I have not eaten CBTL's Chicago Cheesecake before and hence do not know how it tastes like, but heard ravings about how good it is. Got to do one that is creamy, silky smooth and tangy tasting like CBTL's.

Googled and found a recipe by Bakericious .  I like that the cheesecake need not be baked in a waterbath! So I made it.  Hubby gave a thumbs up. Brought some for the peeps in office and I got positive feedback on the cheesecake.  Hmm, this recipe is definitely a keeper!  I will bake this again :)


Chicago Cheesecake
(for 6" cake pan)

Crust:
64g unsalted butter, softened and cut into chunks (I used salted butter and omitted the salt)
20g icing sugar
1/8 tsp vanilla extract
64g all-purpose flour
pinch of salt (I omitted)

Filling:
500g cream cheese, softened
100g granulated sugar
2 tbsp lemon zest
3/4 tbsp all-purpose flour
1/8 tsp salt
1/3 cup buttermilk (original recipe calls for sour cream) - I do not have both, so I substituted it with 1/3 tbsp lemon juice mixed with enough milk to make up 80g and let stand for 5 minutes
3/4 tsp vanilla extract
1 medium egg yolk
2 medium eggs

For the crust:
The baked crust with pricky holes from the fork made before I send them into the oven

1. Best the butter and sugar together on medium speed until light and fluffy.
2. Add vanilla extract and mix until combined.
3. Add the flour and the salt and beat on low speed until just combined.
4. Press the crust evenly into the bottom of the pan.  Refrigerate until firm, about 30 minutes. (I just put in the freezer for 10 minutes)
5. Pre-heat oven at 175 degree.
6. Prick the chilled crust several times with a fork and bake until golden, about 20 minutes.
7. Transfer to a wire rack and cool completely.

For the filling:
1. Pre-heat oven at 175 degree.
2. Beat the cream cheese on medium-low speed to break it up and soften it.
3. Add half the sugar and the lemon zest and beat on medium-low speed until combined.
4. Beat in the remaining sugar, flour and salt until combined, about another minute.
5. Mix the vanilla extract with buttermilk and add into the batter to beat till combined.
6. Add the egg yolk and beat for one minute.
7. Add the eggs, one at a time and beat to combine after each addition.
8. Grease the side of the cake pan.  Set the pan on a rimmed baking sheet or aluminum foil to catch any spill.

No spills!

9. Pour the filling onto the cooled crust and bake for 50-60 minutes or until the cheesecake is firm around the edges and barely jiggles in the centre. (See! No need for waterbath! Yeah :P)

Cheesecake when removed from the oven continues to cook for that 3 hours, and that is why we need to remove it when it still has a slight jiggle in the middle. When it finally cools down after the 3 hours or so, it sets nicely in the fridge and you will get that silky smooth and creamy texture.


10. Transfer to wire rack and cool for 3 hours then wrap tightly with plastic and chill in the fridge for at least 3 hours and up to 4 days.
11. Unmould the cheesecake and serve.

Enjoy!

Wednesday, April 16, 2014

Yuanyang Coffee & Tea Bread loaf (Pre-fermented dough method)


Made this loaf of bread on Sunday morning - Yuanyang bread.

Yuanyang is a combi of sweet, creamy coffee and milk tea together, and this beverage is hugely popular in Hong Kong.  One of the must-have on my list when in Hong Kong.  So back to my bread expedition... I was struggling between making a coffee loaf and a milk tea loaf, and then I thought, why not do a 2-in-1?

Kept thinking that the soothing and decadent coffee-tea mixture will bring about a nice and flavourful loaf, but sadly I was wrong :(  No, not that the bread was a flop.  It was all soft and wonderful, and the bread colour was brownish tinged like a cuppa yuanyang, except that it did not have the strong yuanyang smell or taste I wanted!  I used up a whole 30g instant yuanyang tea sachet for this loaf by the way...


Oh well... that's how life is.  Sometimes things just do not happen the way you want it to.  Nevertheless I got a really soft and fluffy loaf, and the softness lasted till the 2nd day where leftover slices were gobbled up.  Pretty sure it would have stayed as soft even on the 3rd :)


This soft loaf makes up for all that did not happen, and is worth a 2nd chance, a 3rd and more.  I will make this again!


Yuanyang Coffee & Tea Bread Loaf (Pre-fermented dough method)
(makes 1 loaf)

Pre-fermented Dough
230g bread flour
1 tsp instant yeast
1/2 tsp salt
1/2 tbsp skimmed milk powder
135ml water


Dissolve yeast in water.  Add to rest of ingredients & knead until soft. Place dough in a big ziplock bag and refrigerate for at least 17 hours. The dough will expand in the bag, so make sure there is room for expansion.

Main Dough
100g bread flour
1 tbsp skimmed milk powder
1/2 tsp salt (I omitted this)
40g sugar (I used brown sugar)
1 small egg (lightly beaten)
40ml instant yuanyang coffee tea sachet (I mixed 30g of instant yuanyang coffee tea sachet with 60ml hot water and used only required amt for main dough)
1 tsp instant yeast
30g butter (softened at room temperature)
chocolate chips (optional) - I had some choc chips left which was not enough to make cookies, so I used it up for this loaf

1. Knead all main dough ingredients together (except butter), then add in pre-fermented dough piece by piece.
2. Knead as you add until the dough is soft and smooth (the dough is quite wet but should be acceptable after about 10-15 minutes of kneading) - I did the mixing of all ingredients by my trusty bread machine.
3. Add butter and continue to knead until dough is soft, smooth and stretchable and does not stick to your fingers when pressed. - I left Step 1 to 3 to my trusty bread machine and only took over from here to knead it till window pane stage as I prefer to feel the dough and achieve windowpane stage with my own hands.  I hate mixing part as I do not like my hands getting on gooey.
4. Flour your hands before shaping dough into a ball and leave in mixing bowl.  Cover the bowl with a clean and damp cloth (or with clingwrap) and let it proof for about 15-30 minutes or until double in size. (I had lunch while letting it proof for 45 minutes)


5. Punch down dough and roll dough flat into a long rectangular shape, add chocolate chips (optional) and roll dough up like swiss roll.  You may shape your dough according to your preference.


6. Grease your loaf tin with butter or oil.  Place rolled up dough in loaf tin and cover top loosely with clingwrap.  Let proof for 45 minutes or till dough has risen to 80-90% of tin.

I lined my loaf tin with a lovely greaseproof paper instead :)

After 45 minutes of proofing,  the dough rised so much it hung on the sides of the tin and a mushroom shaped loaf appeared when I sliced it after it was baked and cooled.  Uber cute!


7. Bake at 180 degree preheated oven for 25-30 minutes.  Unmould and let it cool on cooling rack.

8. Slice when cool. Eat it with a cup of tea or coffee!


Tuesday, April 15, 2014

Hawaiian Pizza

Time flies.  It's already Tuesday and almost reaching midweek!  Great that this week is a short week - all thanks to Good Friday!  So looking forward to the long weekend. How are you going to spend your long weekend :)

And so this post is sort of a continuation from the last.  Like I say, it was a stay home Saturday, and I made pizza for dinner on that same day I made soup (for lunch) but was lazy to blog a long post altogether! In fact staying home does not mean more rest for me, because I am the kind who will be buzzing around in the kitchen, cooking or baking away.  Home is the best, isn't it?  I can do what I like, no one's stopping me keke~

Some weeks back, my hubby asked me to make pizza and I did not.  Bad wife huh?  I bet you have those days too where you are okay to cook or bake anything, everything except that particular food?  Unfortunately for my hubby, I do, so I said "okay, I make for you another day".

Okay... at least I kept my promise and made him one leh... :P

I wanted a fluffy pizza base, bread type for a change, so I fell back on my all-time fave recipe.  End product was good and hubby gave a thumbs up. All time and effort spent into making it was well-worth the while.  What all homemakers and home bakers need is the support from your other half and family members!


Hawaiian Pizza (using sweet bun base by Sponge Dough method)
(Makes one 10-inch round pizza)

Pizza toppings
6-8 pieces of canned pineapple slices (cut into small pieces)
4 pieces of ham (wash, pat dry with kitchen towel and cut into small rectangles) - I ran out of ham so I used chicken franks
1 can of button mushrooms (sliced thinly) - I used Hosen brand button mushrooms
Mozzarella cheese (shredded)
Cheddar cheese, shredded (optional)
Parmesan cheese, shredded (optional)
4 tbsp pasta sauce
1 tbsp sweet chilli sauce (optional unless you want a tangy yet spicy taste)

1. Squeeze out some of the pineapple juice to remove excess juice, otherwise when added to pizza base, base will turn soggy.
2. Mix all topping ingredients (except all cheese) in a bowl and leave in fridge till ready to use.
3. Mix pasta sauce and sweet chilli sauce well.  Leave base sauce aside.

Pizza base (sweet bun base)
Step 1: Sponge dough
50g plain flour
75g bread flour
1.5 tsp instant yeast
65ml cold water

Mix yeast with water in mixing bowl, then add in flour.  Knead to form a smooth dough. Cover and leave to proof for 1 to 1.5 hours or double in size.

Step 2:
125g bread flour
40g sugar
1/2 tbsp milk powder
1/2 tsp salt
1/2 small egg (set aside balance for egg glaze on the rim of pizza base)
65ml cold water
25g butter (soften at room temperature)
Egg glaze

1. Add all Step 2 ingredients (except butter) to sponge dough from Step 1. Knead from low speed until well combined.  Continue to knead on medium speed until dough is soft and smooth.  Add in butter, continue to knead
till dough is soft and elastic or reaches window pane stage.
2. Shape dough into ball.  Cover and leave to proof for 15 minutes or dough in size.  Roll out the dough into flat and round shape that fit into 10-inch round baking tray.


3. Spread base sauce over pizza base, leaving 1-inch of the sides clear.
4. Sprinkle some mozzarella over sauce.  Add toppings all over evenly.
5. Top with thick layer of mozzarella cheese (and other cheese).
6. Leave to rise for 20 minutes.  Brush sides of base with egg glaze.
7. Bake in preheated oven at 190 deg for 12-15 minutes or till golden brown.  Serve.

Monday, April 14, 2014

Lotus roots & Peanuts pork ribs soup

Yesterday was a stay home Saturday for us. He needed the rest.  I needed some (inner) peace after a bad week at work. So how do I destress? Cook and bake! And so I did - both! Told you I had lotsa time!

My husband is no fussy eater. He eats whatever I cook and never complains. Lucky me. So most of the time I just have cook/bake what I like and he eats it.

And since we planned to stay home, I had time on hand. I made a pot of lotus roots & peanuts pork ribs soup, and my idea was to let it simmer for long and get the naturally sweet and flavourful taste. Just pair it with a bowl of plain rice and that settles our lunch.  Thumbs up from my man for the simple yet flavourful lunch. I am a happy woman :)

Dinner was done with slightly more effort, but I shall leave this to the next post!


Lotus Roots & Peanuts Pork Ribs Soup

3 litres of water
400-500g of lotus roots (remove soil, wash & scrub clean if not removing
skin or remove skin with peeler and cut 1cm thick)
250g pork ribs (cut off fatty parts)
150g raw peanuts (soaked overnight, rub peanuts and remove as much skins as possible)
A handful of dried scallops (I used small whole ones)
10-15 red dates (pitted)
2-3 honey dates (optional)
1 dried cuttlefish (optional)
salt to taste

Washing and soaking raw peanuts overnight allows 'shedding' of the skins easily.  Just gently rub the peanuts the next day and more skins will come off. Not necessary to get rid of all skins.


1. In the pot of water, add lotus root, raw peanuts, dried scallops, red dates, honey dates and cuttlefish and put on high heat.


2. In a separate pot, blanch pork ribs in boiling water for about 2 minutes to remove scum and oil.  Drain and wash pork ribs in clean water and add into the main pot.
3. Bring main pot to boil and then put to simmer for the next 1.5 hour to 2 hours.  Turn off fire.
4. If ready to serve, bring soup to boil and add salt to taste.

My idea of comfort food :)


Friday, April 11, 2014

Steamed egg cake (Ji Dan Gao)

Surely everyone must have eaten steamed egg cake at least once in their life, right? ?  Yeah, I had a sudden craving for it in office yesterday afternoon, and decided that I should do one after I got home from work.  I have always love this cake from young. Yums!


Steamed egg cake aka ji dan gao is one of the few cakes that calls for little and simple ingredients.  4 items and you are set to go. A 5th item if you wanna mask some of the eggy smell and taste. Oh and did I mention that some patience and a strong arm strength is required too? Heh, that's how you get the fluffy end product. Good luck to those who uses a manual whisk to do the job :P

The simple 5 ingredients to soft and fluffy steamed egg cakes!
Our grandmothers were clever to have used soda water to make this cake as baking powder was not an easy find during the old days. 


Steamed Egg Cake (Ji Dan Gao)
Recipe by The Little Teochew
(I halved the recipe to make a 6-inch cake)

220g eggs excluding weight of shells (about 4 large eggs)
210g caster sugar
230g cake flour or top flour (sifted 2 or 3 times)
1 tsp vanilla extract (optional unless you want to mask some of the eggy smell and taste)
6 tbsp cream soda or 7-Up or Sprite


1. Whisk the eggs till frothy, then start adding sugar a little by little,to ensure it is well-incorporated. Add vanilla extract and continue beating until the batter becomes very pale, thick and creamy. This takes time, and there is no shortcut. (This is why I said having patience and some good arm strength will do you good.)  Meanwhile, heat up your wok, pot or steamer until you get a gentle boil.  Do make sure it is large enough to fit the cake tin and have ample space for the batter to rise and the steam to circulate.

2. Fold in the flour in thirds, alternating with the soda, and ending with flour. Once they are no streaks of flour, stop.

3. To steam, either pour the mixture into a bamboo steamer lined with greaseproof paper or use a 6 or 7-inch lined baking tin. (Line the bamboo steamer first before starting with Step 1 so that you will not fumble with this step.) Pop it into the wok, pot or steamer - then cover - and steam on high for 30min. (I tested by inserting a clean skewer in the middle of the cake, when it comes out clean, the cake is done, otherwise leave it on more further 5-10min)


4. Once done, place the cake on a rack and allow to cool before slicing.

 I did not have a smiley cake, but I was very satisfied with the texture it had!
To reheat on the 2nd day, steam it for 2-3 min and you will get back the soft fluffy cake again.


Note
- If you want your cake to 'smile' (nice cross split) in the middle, you may sprinkle course sugar forming a cross on the batter surface.
- I will skip the vanilla essence the next time to get that full eggy smell and taste!
- Will try adding in a tbsp of fresh pandan juice to get a pandan flavour ji dan gao.

Tuesday, April 8, 2014

Old cucumber soup

Weather has been real hot and humid of late.  Taking showers can only cool me down temporarily!  Aircon is my best friend now!

So, I am finally showing signs of recovery and am able to get back to simple cooking. Yeah!! Back to work in the kitchen and I made a pot of old cucumber soup which is something good to have now in this weather.

To enjoy flavourful, thick and sweet soup, apart from the ingredients, time duration is very important, of cuz unless you have a pressure cooker (which I do not own one).

Here I present you my humble old cucumber soup recipe :P


Old Cucumber soup recipe

1 old cucumber (medium sized)
2 tbsp dried scallops, rinsed
1 carrot, skinned and cut half (optional, but I like that it helps with making the soup naturally sweet)
12 to 15 red dates, pitted and rinsed (I was told that soup cooked with red date seeds unremoved makes the soup heaty. Not sure if it is true but since it isn't too tough to deseed it, I do it anyway.)
1 dried cuttlefish, rinsed briefly
About 200g of pork ribs (remove fatty parts, rinsed well)
2 litres of water
A pinch of salt (to further bring out the flavour of the soup)

1. Rinse the whole old cucumber under water and scrub it clean. Cut half, remove seeds and cut into smaller pieces.
2. Put old cucumber pieces, dried scallops, carrot, red dates, dried cuttlefish into the pot of water and turn on medium heat.


3. Bring a separate small pot of water to boil, put in pork ribs pieces and blanch it for about 1 minute to remove oil and scum. Pour away hot water and rinse blanched pork ribs under tap water and put pork ribs into the soup pot.

Blanching the pork ribs prior to adding them to the soup pot helps remove scum and oil. Soup will be clearer and less oily.

Adding in the blanched and rinsed pork ribs.

4. When it comes to a boil for about 5 minutes, turn down fire and let it simmer for about 1.5 to 2 hours.
5. Add salt only when serving, otherwise turn off fire after the simmer. Bring soup back to boil, add salt to taste and serve thereafter.

After the hours of simmer.

My bowl of thick and flavourful old cucumber soup :)