Sunday, May 31, 2015

Pork, Chives & Mushroom Dumplings 猪肉韭菜香菇饺子

Was doing our weekly marketing at the supermarket when I saw chives at the vegetable section. It then came upon me that I have not made dumplings for a long long time! So let's do it!

I just wanted simple fillings for my dumplings. No prawns or shrimps. Save the shells peeling and chopping. I am lazy.

Used 3 simple mains for the dumpling. Pork and chives are the must have, and I added chinese mushrooms this time. Yummy!


Lazy me used store bought dumpling flour for the dumpling wrapper. Simply pour in water, mix, knead, rest and ready to use!

So how do you like your dumplings to be cooked?

I steam it.

And also boiling it.
Love lots of ginger and black vinegar with it.

You can also pan fry the dumplings and eat them as guo tie (pot stickers). 

Come, let's dig in! :)


Pork, Chives & Mushroom Dumplings

Wrapper
600g store bought dumpling flour
300g water

Filling
600g minced pork
300g chives, washed 3x, remove soggy and yellow parts, cut and remove stem parts
8 pcs dried chinese mushrooms, soaked till softened, remove stems and steam for 6 min on high heat till cooked, then cube into small cubes

Seasoning
1/2 tsp salt
1 tbsp sugar
4 tbsp light soy sauce
2 tsp sesame oil
1 tbsp oil
1 tbsp cornflour
dash of pepper

1. Mix dumpling flour and water to form a dough, knead well till dough does not stick to hands and is soft. Cover with a clean moist cloth and set aside to rest for 30 min. This allows the dough to become smooth and stretchy, ready for use.


2. Place minced pork, chopped chives and mushroom cubes into a mixing bowl.


Add in all seasonings and mix well with a pair of chopsticks till filling mixture turns into a sticky paste. Cover with clingwrap and set in fridge for 30 min.

3. Punch down dough cut out dough into small pieces for use. I weigh each pc to be 12g round and roll them flat. Place a teaspoon heap of filling on centre of dough wrapper and wrap up. Pinch a side of dough and press tight to seal opening. Repeat till use up fillings.


Place wrapped dumplings on a plate or tray, taking care not to let them be too close and stick together. When one plate or tray is fully filled with dumplings, cover with cling wrap and leave in freezer and let dumplings freeze before removing each frozen dumpling and storing in ziplock bags. Freeze dumplings.


4. No need to thaw dumplings when you want to eat it. Bring a pot of water to boil. Add enough jiaozi to cover the base of the pot about one and a half times, stirring to make sure no dumplings stick to the base of the pot. Cover.

When it comes to a boil, add 250ml water. Cover and repeat 2 more times. When the water comes to a boil for the third time, the dumplings are ready. Scoop dumplings onto a plate and serve immediately with vinegar and shredded young ginger.


NOTE: The theory behind adding cups of water is that if you stop it before the third boil, the meat will not be cooked through. Also, if you don’t add cold water each time, the jiaozi will fill up with air and explode.


For steaming, put steamer pot filled with water and let it come to boil on high heat, place frozen dumplings into bamboo steamer basket and set in steamer pot to steam for 15min, or till done. Serve immediately.


Tuesday, May 26, 2015

Coffee Cream Cake 咖啡奶油蛋糕


It was Mama's birthday last Friday. We had an early birthday celebration with Mum some 2 weeks back, done together with Mothers' Day celebration. No we are not saving on an extra meal. Mum has to go for an operation end of this month and we wanted her to steer clear from heaty food to prep for the operation, hence the combi of 1 dinner for 2 occasions.


Cake ready to be delivered to the birthday girl!

I made this cake to make up for Mum's missing dinner on her actual birthday. Made a coffee cream one because Mum loves coffee!

I love old-fashioned birthday cakes, you know, those kind of salty buttercream cakes sold during the 1970s to 1980s? You can only find these cakes in those traditional bakeries now.

Got the cake design idea from Nasi Lemak Lover. Family said the cake looked nice when it was presented to my Mum. Of course, my dearest Mother was all smiles. It was worth my every effort making this into the late night a night before.


I was happy to see the distinct layers when the cake was sliced after the usual birthday song singing and making of wish.


3 nice layers of soft chocolate sponge with coffee cream
I am a happy girl.

I am getting more confident in making buttercream cakes. Looking forward to making one for myself next month!


Coffee Cream Cake
makes a 6-inch cake

3 egg yolks
55g cake flour
1/4 tsp baking powder
40g caster sugar
30ml canola oil
35ml milk
a pinch of salt

3 egg whites
1/4 cream of tartar
5g cocoa powder

Chocolate rice (for deco on the side of cake)


Cake Method

1. Preheat oven to 150deg C.
2. Sift cake flour, baking powder and cocoa powder and leave aside.
3. Beat yolk and 1/2 tbsp sugar till sugar has dissolved and yolk mixture has turned pale.

4. Add salt and beat well before adding canola oil in 2 additions. Make sure yolk mixture is well beaten between each addition.
5. Add in milk in 2 additions and mix well before placing in sifted cocoa flour mixture. Use a spatula and mix well till batter turns thick and creamy. Set aside.
6. In a separate bowl, beat egg whites till frothy. Add in cream of tartar and continue to beat till soft peaks form, add in remaining caster sugar in 3 additions and beat till stiff peaks are formed.


7. Spoon half of white mixture into cocoa batter and fold in till well mixed. Repeat the process with remaining white mixture in 2 additions.
8. Pour folded in batter into 6-inch baking tin and drop it on a table top twice to remove excess air bubbles.
9. Place baking tin in oven to bake at 150deg for 60 min or till done.
10. Remove from oven and place it overturned on a cooling rack to cool. Prepare coffee buttercream frosting. (Refer to directions below.)

11. Slice a little of the uneven cake top if top is domed shape, then slice cake to get 3 even pieces for layering.  
12. Place a slice of the cake on a cake board and set it on a turntable, slap on some coffee buttercream and spread it evenly. Place the other cake on top of buttercream.
13. Crumb coat whole cake with a thin layer of buttercream to seal in cake crumbs so they will not get in the way during final coating, you may freeze crumb coated cake for about 15min before doing final thick coating.


14. Layer an even coat round sides of cake.  Spoon chocolate rice on to side of frosted cake.

15. Spoon remaining coffee buttercream into a piping bag with a star nozzle and pipe desired designs on the cake top. Refrigerate and enjoy.


Coffee Cream Frosting
150g butter
3g instant coffee
40g egg white
65g sugar
20g water

Place butter and instant coffee powder into mixing bowl, mix well and set aside.

Place egg white and 5g of sugar in another bowl and beat till frothy. In a pot, mix water and remaining sugar well and heat to let it thicken to slight yellow sugar water. Gradually pour in thickened sugar water into egg white mixture and continue beating till egg white turns stiff peak.

Spoon white mixture into coffee cream mixture and mix well with spatula. Coffee buttercream frosting is now ready for use.

Saturday, May 23, 2015

Golden Custard Salted Egg Buns


Have you tried those flowy salted egg steamed buns in those Hong Kong dim sum eateries or restaurants? I love these buns and have always wanted to try making them but am afraid that my salted egg fillings would not be flowy like those I have ate.

After much procrastination, I tried making these yummy golden custard salted egg buns. I will use this same fillings for steamed buns next round because this filling were just right for our taste.  They are not exactly those flowy fillings you will get from restaurants, but aren't too bad and has a taste of the salted egg and slightly milky taste.

On the search for more flowy ones but will keep to this current filling recipe for now.


Golden Custard Salted Egg Buns

Salted egg yolk filling
3 salted egg yolk
55g caster sugar
25g custard powder 

35g evaporated milk
28g full cream milk powder
8g corn starch
50g butter at room temperature

Buns

Gelatinized dough
50g bread flour
35ml boiling water

1. Place flour in a mixing bowl.
2. Add hot boiling water and mix with wooden spoon to form a rough dough.
3. Cover bowl with cling film and leave dough to cool in the fridge for at least 1 hour, and up to 48 hours.


Basic sweet bread dough
(Yield roughly 480g dough. I divided them into 8 equal portions)

150g bread flour
50g plain flour
40g sugar
10g milk powder
4g instant yeast
1/4 tsp or 3g salt
87ml cold water
30g cold egg
30g butter, room temperature


Filling
1.        Steam salted egg for 10 minutes or until cooked. Crack salted egg and remove egg yolks for use. (I used remaining whites for lunch with porridge) Mash yolks with a fork.

2.        Cream the butter slightly and add in sugar and cream till sugar more or less melted. Add in the rest of the ingredients and mix well. Refrigerate filling mixture until firm. Portion into 8 balls and freeze till solid. (Do this one day or a night before so that you can cut down on the freeze and wait part on the actual day of bun making.)


Buns
1. Tear gelatinized dough into smaller pieces into the bread machine. Add water, beaten egg and top with flour And milk powder. Place salt and sugar on opposite corners of bread machine, make a small deep hole in centre of flour and spoon in instant yeast. Gently cover yeast with some flour and set BM to work. I use Function 8 fory Kenwood BM250 for this step. 

2. When dough has come together and is more or less a smooth dough, add in softened butter. I restarted my BM on Function 8 again and let BM mix till well incorporated with dough and is smooth and soft. I then remove dough and hand knead till dough reaches window pane stage, where you get a thin translucent membrane when dough is stretched. (This more or less tells you that you will get soft and fluffy bread and buns!)

3. Shape dough into a ball, leave to proof for 40 min or until doubled. 

4. Punch down dough to rid excess air, then divide dough into 8 equal portions at 60g each and roll it round and set aside for 5 min to let it relax for easier rolling.
Roll out dough into a round shape. 


5. Roll in each ball of frozen salted egg yolk filling. Knead each little dough portions into ball shapes. 


6. Seal bottom of dough to secure salted egg custard fillings from spilling out. Set dough with sealed ends at bottom. 


7. Place dough onto greased baking tin. 


8. Cover with clean moist cloth and leave to proof for 40min or till doubled in size. 


9. Brush bun tops with whisked egg yolk mixed with 1 tsp water and bake in a preheated oven at 200°C for 5 minutes. Lower oven temperature to 180°C and bake for further 15 minutes or till slightly golden brown. Do not over-bake if not the filling will not flow or will burst like mine!  I saw bubbling lava flowing out from some buns while they were baking in my oven :(


Good thing the other 5 buns were intact!

15.        Cool on a wire rack before serving.


Thursday, May 21, 2015

Chocolate Custard Bread


As you know, I love to buy recipe books and to date, my best buy for bread and bun recipe book was one by Alex Goh. Tried many recipes from the book and it never failed to yield soft yummy bread.

Savoury buns for the past few weeks brekkie so this time, I made a change and did some sweet fillings for our buns.  It did not disappoint as usual. I got a pan of pillowy soft and fluffy buns with yummy streusel toppings.


See how fluffy these buns are!
Trying making these and enjoy them over a cup of coffee for an extra oomph.


Chocolate Custard Bread
Recipe by Alex Goh Magic Bread book


Basic Sweet Bread Dough
A
50g bread flour
35g boiling water

B
150g bread flour
50g plain flour
40g sugar
3g salt
10g milk powder
4g instant yeast

C
87g cold water
30g cold egg

D
30g butter

1. Add boiling water from A into flour, mix till well blended to form dough. Cover and set aside to cool. Keep into refrigerator for at least 12 hours.
2. Mix B until well blended. Add in C and knead to form rough dough. Add in A and knead until well blended.
3. Add in D and knead to form elastic dough.
4. Let it proof for 40 min.
5. Divide the dough into 9 portions and mould it round. Let it rest for 10 min and ready for use.
6. Flatten the dough and wrap in fillings.


7. Place it onto a greased baking pan.
8. Place it in warm place and let it proof for 45 min.
9. Egg wash the dough, sprinkle some streusel on top.
10. Place in the bottom of the oven, bake at 180deg C for 20-25 min.

Chocolate Custard Fillings
40g instant custard powder
7g cocoa powder
100g milk
25g roasted and chopped hazelnuts

Sieve cocoa powder into instant custard powder and mix well.  Add in milk, mix until well-blended.  Add in roasted hazelnut, mix until well-combined.  Set aside.


Streusel Topping
30g sugar
25g butter
50g bread flour

Mix sugar and butter until crumbles by using hands. Add in flour and mix until crumbles. Keep it into refrigerator. Use it to sprinkle on top or coat the surface of the dough.

Sunday, May 17, 2015

Otah Buns 乌打餐包

Had enough of me using Alex Goh's gelatinized dough method for my bun makings? I cannot help but use this method over and over again because who does not love the soft and fluffy end product? And it last for days when stored well. 

Sorry for not being creative enough to try other bun recipes. Sorry for just sticking to this one recipe and cheating by changing just the bun fillings. Be forewarned that I have overdue posts still in queue. I promise to try new things soon :)


This round, Otah buns were made. Old school buns that I don't easily see them in bakery shops these days.

Hubby requested for them and so I purchased some freshly grilled otahs and got my hands to make the man his buns.

The way to a man's heart is through his stomach, right?


Oh at the same time, I would like to spread the news that I have started a Facebook Page for this foodie blog. Follow me on My Facebook Page @ The Fussy Palate (Page Link is on the top right corner of my blog)

See you there :)

Otah Buns

Gelatinized Basic Sweet Bread recipe by Alex Goh

Gelatinized dough
50g bread flour
35ml boiling water

1. Place flour in a mixing bowl.
2. Add hot boiling water and mix with wooden spoon to form a rough dough.
3. Cover bowl with cling film and leave dough to cool in the fridge for at least 1 hour, and up to 48 hours.


Basic sweet bread dough
(Yield roughly 480g dough. I divided them into 6 equal portions)


150g bread flour
50g plain flour
40g sugar
10g milk powder
1/2 tbsp instant yeast
1/4 tsp salt
87ml cold water
1/2 cold egg (about 30g)
30g cold butter, cubed 


6 sticks of grilled otahs

1. Combine flour, sugar, milk powder, yeast and salt together in a mixing bowl.
2. Tear the gelatinized dough into pieces and add to the bowl along with the eggs
3. Using a stand electric mixer, mix on low speed, adding cold water gradually.
4. Mix until dough is well combined and leave the side of bowl.
5. Add in the cold butter cubes and mix on medium speed until dough is smooth.
6. Shape dough into a ball, leave to proof for 40 min or until doubled.
7. Punch down dough to rid excess air, then divide dough into 6 or 8 equal portions at 80g or 60g respectively and  roll it round and set aside for 5 min to let it relax for easier rolling.

8. Roll out dough into a round shape.
9. Place one otah meat onto centre of flattened dough. Wrap one end over otah meat and top with another side of dough.
10. Seal dough well and set dough with sealed ends bottom down. 
11. Place dough onto greased baking tin.
13. Cover with clean moist cloth and leave to proof for 40min.
14. Brush top with the leftover beaten egg (mixed with 1 tsp water) from the dough mix. (I then sprinkled some dried parsley on top of each dough as garnish)
15. Bake in preheated oven at 180deg for 25min or till bun top turn slightly golden brown. (Every oven works differently so indicated temperature might or might not work for you.)

Thursday, May 14, 2015

Tuna & Onion Buns 金枪鱼大葱餐包

Short stay here in blogsphere this time. Yet another bun post.  I cannot get enough from making buns.  Just too therapeutic. :)

Leaving you with some photos of my soft soft tuna and onion buns.


Tuna & Onion Buns

Gelatinized Basic Sweet Bread recipe by Alex Goh

Gelatinized dough
50g bread flour
35ml boiling water

1. Place flour in a mixing bowl.
2. Add hot boiling water and mix with wooden spoon to form a rough dough.
3. Cover bowl with cling film and leave dough to cool in the fridge for at least 1 hour, and up to 48 hours.


Basic sweet bread dough
(Yield roughly 480g dough. 
I divided them into 6 equal portions)

150g bread flour
50g plain flour
40g sugar
10g milk powder
1/2 tbsp instant yeast
1/4 tsp salt
87ml cold water
1/2 cold egg (about 30g)
30g cold butter, cubed 


A can of tuna, any flavour of your choice
1 yellow onion, cut into small cubes)
(I heat up a pan and fry the tuna and onion cubes to dry the fillings a little so that my buns will not be soggy after baked. Set aside to cool. Portion them equally for the bun fillings.)


1. Combine flour, sugar, milk powder, yeast and salt together in a mixing bowl.
2. Tear the gelatinized dough into pieces and add to the bowl along with the eggs
3. Using a stand electric mixer, mix on low speed, adding cold water gradually.
4. Mix until dough is well combined and leave the side of bowl.
5. Add in the cold butter cubes and mix on medium speed until dough is smooth.
6. Shape dough into a ball, leave to proof for 40 min or until doubled.
7. Punch down dough to rid excess air, then divide dough into 6 or 8 equal portions at 80g or 60g respectively and  roll it round and set aside for 5 min to let it relax for easier rolling.

8. Roll out dough into a round shape.
9. Spoon a portion of tuna filling onto centre of dough and wrap up.
10. Seal bottom of dough to secure tuna fillings from spilling out. Set dough with sealed ends at bottom.
11. Place dough onto greased baking tin.
13. Cover with clean moist cloth and leave to proof for 40min.
14. Brush top with the leftover beaten egg (mixed with 1 tsp water) from the dough mix. (I then sprinkled some dried parsley on top of each dough as garnish)
15. Bake in preheated oven at 180deg for 25min or till bun top turn slightly golden brown. (Every oven works differently so indicated temperature might or might not work for you.)


Baked Chocolate Cheesecake 巧克力乳酪蛋糕


Last week a no-bake cheesecake was featured. This week, expect a baked one! Yeah I love making cheesecakes! Baked or no-bake ones, Im okay with both. Ask which one I enjoy eating more, you can wait long long for my answer haha! I love them all.

Other than having to clear the packs of creamcheese, I also have to take care of the chocolate bars stashed in a big compartment of my fridge, where I could definitely make good out of that space. 

These chocolates would have made me a real happy girl in the past, but not anymore now. I do not chomp on choco bars like I used to, when I still got that slim (or maybe skinny) bod. Chocolates are very much eaten with caution now. I can live without them now. And so, to get rid of those chocolates, I planned to incorporate them into my bakes. Prep yourself for more choco stuff :D


I tasted the slice of cheesecake right after I was done with the phototakings.  Smooth, creamy and easy on the palate. Not as dense as no-bake ones but still yummy enough for me! I will bake this again!


Shared some with the sis who is also a cheesecake lover and I brought some into office. It is always good to share the calories, no?? :P

Baked Chocolate Cheesecake
Recipe from Grace Kitchen Corner
Original recipe from Nigella Lawson (Nigella Feasts) 9 inches round pan
(I used 6-inch springform pan)


For the base: 

(I used 120g of digestive biscuits and 80g of Oreo cookies without cream)
200g digestive biscuits 
100g unsalted butter (I used 85g of butter and melted it for use)
1 tablespoon cocoa powder (I left this out)

For the filling: (I left out the top filling)
175g dark chocolate
500g Philadelphia cream cheese
120g caster sugar
1 tablespoon cornflour
3 large eggs
3 large egg yolks
150 ml sour cream
½ teaspoon cocoa & 1 teaspoon instant coffee dissolved in 1 tablespoon hot water

For the glaze:
2 tablespoon cream
55g dark chocolate, finely chopped
1 tablespoon golden syrup
1 tablespoon warm water


1. Make the base, process the biscuits to make rough crumbs and then add the butter and cocoa. Process again until it makes damp, clumping crumbs and then tips them into a 23cm springform tin. Press the biscuit crumbs into the bottom of the tin to make an even base and put into the freezer while you make the filing. 

2. Preheat the oven to 180’C. Put a kettle on to boil. Melt the chocolate either in a microwave or double boiler, and set aside to cool slightly. 

3. Beat the cream cheese to soften it and then add the sugar and cornflour, beating again to combine. Beat in the whole eggs and then the yolks, and the sour cream. Finally add the cocoa dissolved in hot water and the melted chocolate, and mix to a smooth batter. 

4. Take the springform tin out of the the freezer and line the outside of the tin with a good layer of clingfilm, and then another layer of strong foil over that. This will protect it from the water bath. Sit the springform tin in a roasting pan and pour in the cheesecake filing.


5. Fill the roasting pan with just-boiled water to come about halfway up the cake tin, and bake in the oven for 45 minutes to an hour. The top of the cheesecake should be set, but the underneath should still have a wobble to it. 

6. Peel away the foil and clingfilm wrapping and sit the cheesecake in its tin on a rack to cool. Put in the fridge once it’s no longer hot, and leave to set, covered with clingfilm, overnight. 

7. Let it lose its chill before unspringing the cheesecake to serve. 
To make the chocolate glaze, very gently melt the chopped chocolate and cream. When the chocolate has nearly melted, take off the heat and whisk it to a smooth sauce. Add the golden syrup and mix well. Add the warm water then mix till you got a smooth chocolate glaze. 

8. Pour it evenly on the center of the chocolate cheesecake. Chill in the fridge for few minutes until the glaze slightly set.
Use a hot knife to cut the cheesecake.

Monday, May 11, 2015

Kimchi Fried Rice 韩式泡菜炒饭 (Kimchi Bokkeumbap) 김치볶음밥


I can't wait for my next trip back to Korea again, for their food! Not that I am flying again anytime soon, that is just me daydreaming. Hehe!

Everything Korean is kinda part of my lifestyle now. From food to variety shows to dramas, songs, facial products, make up and so many more. It is why more Korean food is popping up here in this space.

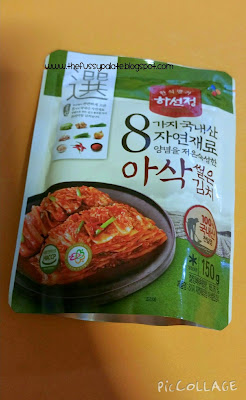
We had just one serving of kimchi rice in Seoul and that left me craving for more I just had to cook them at home.  Might not be the authentic Kimchi Fried Rice but at least it could fill a void in me. Hey at least the kimchi was from Lotte mart okay!

Do you love kimchi like I do?

Okay, I tried to take a shortcut here with a heat-up-and-ready-to-consume soondubu jjigae (spicy tofu stew) which I also lugged back with me from Korea. I just threw in more ingredients of my own and voila, a meal of rice and soup.


Aren't jotting down how I cooked the soup because it was just cutting up side ingredients, emptying soup contents into my Korean ddukbaegi, an earthernware that is traditionally used to cook guk (soup) and jjigae (stew). It was worth the while buying this ddukbaegi back here. I love how it keeps my soup and stew hot till we finish our meal. Nice!


Hubby said he thought he was back in Korea when he sipped one spoonful of the stew.

Now, on to my kimchi rice cooking experience.

Kimchi Fried Rice (Kimchi Bokkeumbap) 김치볶음밥
175g Kimchi
2 cups cooked rice
2 tbsp butter
3 tbsp Kimchi juice
2 eggs
1 tsp salt
½ tsp black pepper

I also used:
1 garlic, minced
1 spring  onion (green onion) – sliced side, thinly (leave sliced white parts for frying, and green part for garnishing)
Drizzle some sesame oil over once Kimchi rice is fried and done


1.        Make rice
Cook rice if you don’t have any. Use Korean rice, also known as short grain rice, sticky rice or Japanese rice. See cooking white rice in a pot andcooking white rice in a rice cooker. For fried rice, make the rice a little drier than usual by adding a little less water. This prevents your Kimchi Fried Rice from becoming too soggy. White rice is usually used for Kimchi Fried Rice, but multigrain or brown rice is okay too. 

2.        Chop kimchi
Chop kimchi into ¼” pieces (about 1 cm) to yield 1½ cup of chopped kimchi (about ⅛ of a whole nappa cabbage kimchi). It’s ideal to use over-fermented (sour) kimchi. You can also add meat or vegetables you like (see tips above). Chop them into the same size as kimchi. 

3.         Butter
In a large pan or wok melt 2 tablespoons of butter on medium heat. (You can add one more spoon if you love butter.) If you are not using butter, you can use vegetable oil but adding some sort of meat to the dish is recommended to enhance the flavor. (Add in minced garlic and white part of spring onion / green onion and fry for awhile)


4.        Saute kimchi
Add chopped kimchi to pan and saute for 5-10 min on medium heat or until kimchi is cooked completely. Add 3 tablespoons of kimchi juice (optional) while cooking. If kimchi starts to stick to the bottom but not cooked through yet, add a little bit of water or more kimchi juice. You can add more kimchi juice if you like it spicy. If you don’t have kimchi juice, you can also add some gochugaru for more spiciness and red color. 

5.        Add rice
Reduce heat to low. Add 2 cups of cooked rice and mix thoroughly. If you are using cold leftover rice, make sure you mix it until there are no cold lumps of rice and all the rice is warmed up. Let it sit on low heat for about 5 min. If you like it crispy on the bottom, you can spread the fried rice thinly over the pan and cook on low heat until the crispy bottoms if formed. 

6.        Season
Taste and season with salt only if necessary. The amount of salt depends on the saltiness of kimchi and how much kimchi juice is used. Add a pinch of black pepper. 

7.        Fry eggs (optional)
In a pan, add a little bit of vegetable oil and fry eggs on medium heat. Season with salt and pepper. You can cook one egg for each serving. Sunny side up is great for presentation but you can cook to your preference.
8.        Serve
Serve Kimchi Fried Rice on a plate. Top it with a fried egg. Enjoy! 


Dig in!