Showing posts with label Buttercream. Show all posts

Monday, July 20, 2015

Espresso Roll Cake


I have kept away from 3-in-1 instant coffee for a long time. Somehow those coffee taste too artificial for me. I prefer coffee from my Nespresso machine.


Being quite a coffee addict, I decided it is time to settle with a roll cake, since I have not been baking much coffee stuff for a long time. And so, I used my Nespresso machine brewed espresso coffee in my roll cake. Made espresso buttercream too. Everything coffee!  Hubby's No. 1 choice too when I asked if he prefers a chocolate or coffee roll cake.


If you are a coffee lover like us, this roll cake should be your cup of tea.


Espresso Roll Cake

Makes one 31cm x 21cm cake

80g egg yolks (about 4 eggs)
20g castor Sugar
30g olive oil
3 tbsp Espresso coffee, cooled (I used a Nespresso Coffee Machine Espresso (Kazaar) capsule, mixed with 1/2 tsp sugar, balance for buttercream)
65gm plain flour

150g egg whites (about 4 eggs)
70gm castor sugar


Espresso Buttercream


80gm softened Butter
40gm Icing Sugar 

40gm Espresso coffee, cooled

(I normally prepare cake fillings before doing the sponge cake.  Leave the cream into fridge for later use till cake is baked & cooled for use.)


1. Sift in icing sugar into softened butter and mix well with a spatula first before beating under high speed till fluffy and creamy.


2. Pour Espresso coffee into butter mixture over 4 additions, making sure to beat well before adding more coffee, to prevent curdling. Beating of this stage has to be on high speed, with room temperature coffee (applies to other liquid as well).
3. Beat to combine well and it is ready for use.


Espresso Roll Cake Recipe

1. Preheat oven to 170 deg C. Line baking tray with baking paper, leaving about an inch of extra baking paper up the sides of the baking tray.


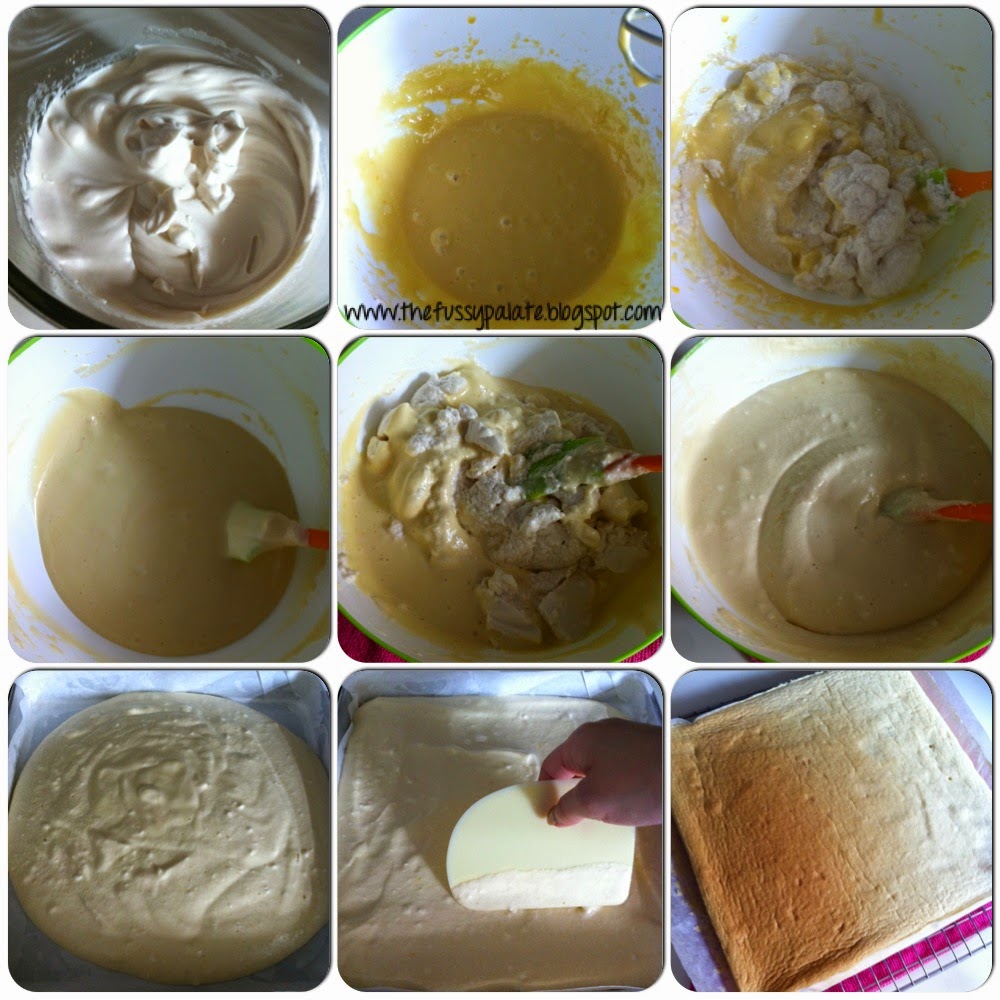
2. Beat egg yolks and sugar till well mixed and sugar has dissolved. Add in oil, cooled Espresso coffee and mix well.


3. Sift in flour and mix well. Set aside.


4. Beat egg whites using an electric mixer under low speed till whites turn foamy. Add in sugar gradually in 3 additions and beat till slightly stiff peaks are formed.


5. Beat whites under low speed for one minute to get a smooth and fine egg white mixture.


6. Fold in the 1/3 of whites into the yolks mixture. Mix well with a hand whisk. - this is done to allow easier incorporation of the remaining egg whites when you fold in later.


7. Pour the mixture into the remaining whites and fold well using a spatula.


8. Pour into the lined baking tray and even out batter top.


9. Bake at 170 deg C for 15 minutes. (For my Rowenta oven, I baked it at 180 deg C for 22min, no preheating needs to be done.) Cake is done when the surface turn brown and springs back when pressed lightly with finger.


10. Remove lined baked cake from baking tray to cool on cooling rack with a sheet of baking paper on top.  After about 5 minutes, invert cake over and carefully peel off baking paper from cake bottom.


11.  Place a new piece of baking paper over cake and invert.  Peel off top piece of baking paper, make about 3 slits 1/3 down start of cake to allow easier rolling.  


12.  Spread Espresso coffee buttercream evenly over cake with a spatula and roll up cake tightly.  Twist both ends of baking paper to secure roll cake, leave in fridge for an hour before cutting.


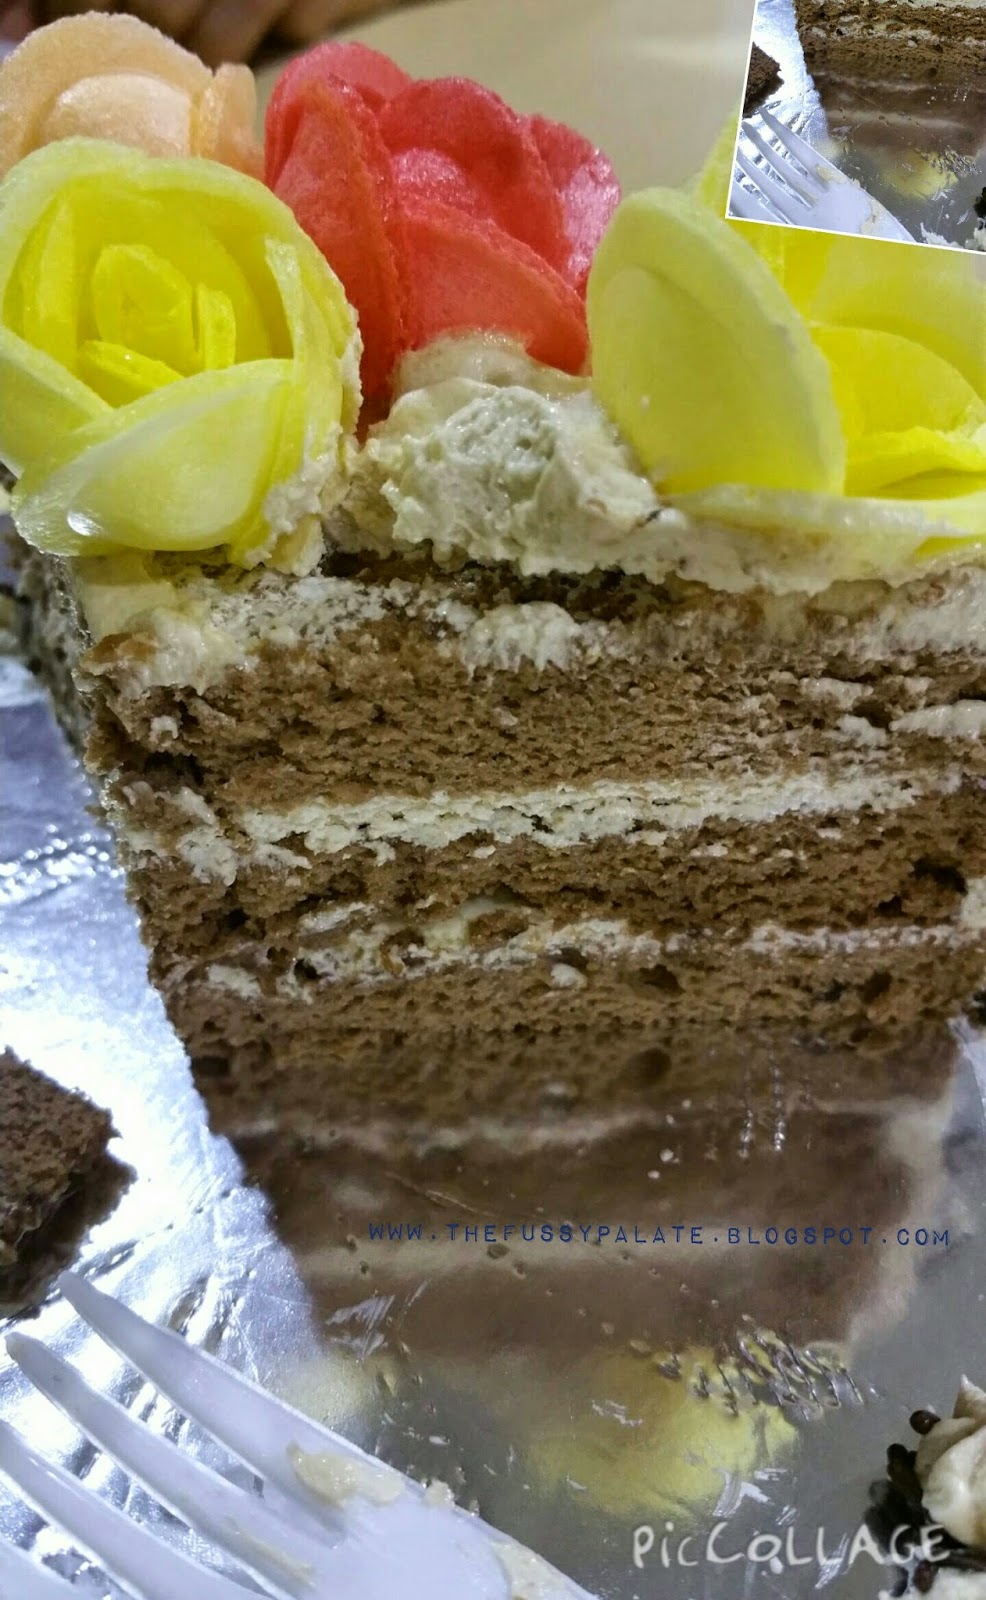
Here I leave you with a last photo of my Espresso roll cake I snapped.  I am glad i got the outer roll cake skin all nicely baked and no cracks from the rolling.


Tuesday, May 26, 2015

Coffee Cream Cake 咖啡奶油蛋糕


It was Mama's birthday last Friday. We had an early birthday celebration with Mum some 2 weeks back, done together with Mothers' Day celebration. No we are not saving on an extra meal. Mum has to go for an operation end of this month and we wanted her to steer clear from heaty food to prep for the operation, hence the combi of 1 dinner for 2 occasions.


Cake ready to be delivered to the birthday girl!

I made this cake to make up for Mum's missing dinner on her actual birthday. Made a coffee cream one because Mum loves coffee!

I love old-fashioned birthday cakes, you know, those kind of salty buttercream cakes sold during the 1970s to 1980s? You can only find these cakes in those traditional bakeries now.

Got the cake design idea from Nasi Lemak Lover. Family said the cake looked nice when it was presented to my Mum. Of course, my dearest Mother was all smiles. It was worth my every effort making this into the late night a night before.


I was happy to see the distinct layers when the cake was sliced after the usual birthday song singing and making of wish.


3 nice layers of soft chocolate sponge with coffee cream
I am a happy girl.

I am getting more confident in making buttercream cakes. Looking forward to making one for myself next month!


Coffee Cream Cake
makes a 6-inch cake

3 egg yolks
55g cake flour
1/4 tsp baking powder
40g caster sugar
30ml canola oil
35ml milk
a pinch of salt

3 egg whites
1/4 cream of tartar
5g cocoa powder

Chocolate rice (for deco on the side of cake)


Cake Method

1. Preheat oven to 150deg C.
2. Sift cake flour, baking powder and cocoa powder and leave aside.
3. Beat yolk and 1/2 tbsp sugar till sugar has dissolved and yolk mixture has turned pale.

4. Add salt and beat well before adding canola oil in 2 additions. Make sure yolk mixture is well beaten between each addition.
5. Add in milk in 2 additions and mix well before placing in sifted cocoa flour mixture. Use a spatula and mix well till batter turns thick and creamy. Set aside.
6. In a separate bowl, beat egg whites till frothy. Add in cream of tartar and continue to beat till soft peaks form, add in remaining caster sugar in 3 additions and beat till stiff peaks are formed.


7. Spoon half of white mixture into cocoa batter and fold in till well mixed. Repeat the process with remaining white mixture in 2 additions.
8. Pour folded in batter into 6-inch baking tin and drop it on a table top twice to remove excess air bubbles.
9. Place baking tin in oven to bake at 150deg for 60 min or till done.
10. Remove from oven and place it overturned on a cooling rack to cool. Prepare coffee buttercream frosting. (Refer to directions below.)

11. Slice a little of the uneven cake top if top is domed shape, then slice cake to get 3 even pieces for layering.  
12. Place a slice of the cake on a cake board and set it on a turntable, slap on some coffee buttercream and spread it evenly. Place the other cake on top of buttercream.
13. Crumb coat whole cake with a thin layer of buttercream to seal in cake crumbs so they will not get in the way during final coating, you may freeze crumb coated cake for about 15min before doing final thick coating.


14. Layer an even coat round sides of cake.  Spoon chocolate rice on to side of frosted cake.

15. Spoon remaining coffee buttercream into a piping bag with a star nozzle and pipe desired designs on the cake top. Refrigerate and enjoy.


Coffee Cream Frosting
150g butter
3g instant coffee
40g egg white
65g sugar
20g water

Place butter and instant coffee powder into mixing bowl, mix well and set aside.

Place egg white and 5g of sugar in another bowl and beat till frothy. In a pot, mix water and remaining sugar well and heat to let it thicken to slight yellow sugar water. Gradually pour in thickened sugar water into egg white mixture and continue beating till egg white turns stiff peak.

Spoon white mixture into coffee cream mixture and mix well with spatula. Coffee buttercream frosting is now ready for use.

Saturday, January 17, 2015

Lemon Buttercream Roll Cake

Finally tried a roll cake recipe adapted from Teacher Meng's Yummy Roll Cake Book which I bought from my last JB trip.


Love this book so muchie! Cannot believe I baked this soft and yummilicious roll cake (because I made bad ones so many times I almost gave up! BUT I persevered). I made some tangy lemon buttercream to go along and it was (in my opinion) a perfect teacake. I can foresee more swiss roll bakes from now on! Keke!


Getting more confident after each successful try 😊
Always love taking photos of each cut made to reveal the nicely rolled cake slices. Mum and Hubby gave thumbs up after trying *yeah*


Lemon Butter Cream Roll Cake
(Recipe by 孟老师的美味蛋糕卷)
Makes one 31cm x 21cm cake (I baked it in my 26x26cm square cake tin)

80g egg yolks (about 4 eggs)
20g castor Sugar
30g corn Oil
1 tbsp lemon juice
2 tbsp water
Zest of 1/2 a lemon
65gm plain flour

150g egg whites (about 4 eggs)
80gm castor sugar

Lemon buttercream
80gm softened Butter
40gm Icing Sugar
20gm Lemon Juice
20gm Water
Zest of 1/2 a lemon


Lemon butter cream (I normally prepare cake fillings before doing the sponge cake.  Leave the cream into fridge for later use till cake is baked & cooled for use.)
1. Sift in icing sugar into softened butter and mix well with a spatula first before beating under high speed till fluffy and creamy.
2. Combine lemon juice, lemon zest and water in a bowl and and pour lemon juice mixture into butter mixture.
3. Beat to combine well and it is ready for use.


1. Preheat oven to 170 deg C. Line baking tray with baking paper, leaving about an inch of extra baking paper up the sides of the baking tray.
2. Beat egg yolks and sugar till well mixed and sugar has dissolved. Add in oil, water, lemon juice, lemon zest and mix well.


3. Sift in flour and mix well. Set aside.
4. Beat egg whites using an electric mixer under low speed till whites turn foamy. Add in sugar gradually in 3 additions and beat till slightly stiff peaks are formed.
5. Beat whites under low speed for one minute to get a smooth and fine egg white mixture.
6. Fold in the 1/3 of whites into the yolks mixture. Mix well with a hand whisk. - this is done to allow easier incorporation of the remaining egg whites when you fold in later.
7. Pour the mixture into the remaining whites and fold well using a spatula.
8. Pour into the lined baking tray and even out batter top.
9. Bake at 170 deg C for 15 minutes.
Cake is done when the surface turn brown and springs back when pressed lightly with finger.
10. Remove lined baked cake from baking tray to cool on cooling rack with a sheet of baking paper on top.  After about 5 minutes, invert cake over and carefully peel off baking paper from cake bottom.


11.  Place a new piece of baking paper over cake and invert.  Peel off top piece of baking paper, make about 3 slits 1/3 down start of cake to allow easier rolling.  


12.  Spread lemon buttercream evenly over cake with a spatula and roll up cake tightly.  Twist both ends of baking paper to secure roll cake, leave in fridge for an hour before cutting.


Thursday, November 20, 2014

Strawberry & Chocolate Buttercream Cake

Went back to Mama's place on Sunday and I brought a cake over to celebrate Hubby's and Sister's birthday.  They are the November babies so I took the easy way out to combine 2 birthdays with one cake.  Hehe!   


Wanting to practise rose piping again, I chose to use buttercream for the cake frosting once more.  I bought a punnet of strawberries and used them as part of the deco for the cake.  I "coloured" the balance of my buttercreamn to pink with some red dragonfruit juice.  Al natural! Glad that the cake was well received and that it was not too sweet and heavy for my family.


Well, I still suck at smoothing out my cake frosting OMG!!!  It was a good thing that I used buttercream frosting or else with the time spent on trying to smooth out my frosting, those in the bowl and piping bag would have melted and softened long long ago.  Guess it's gonna be a long way for me before I can try out other frostings.   

After xxth minute still trying to smooth out the sides, I cheated by using my palette knife to smooth the sides from bottom up to form a patterned sides.  I thought it looked not too bad keke.  At least they look much better than my not-smooth-and-even-at-all frosting.  Conclusion: Baking can quite bring out one's creativity for sure! :)


Not getting any better at rose pipings.
I will strive on!


Strawberry & Chocolate Buttercream Cake 
(6 inch cake)
3 egg yolks
55g cake flour
1/4 tsp baking powder
40g caster sugar
30ml canola oil
35ml milk
a pinch of salt

3 egg whites
1/4 cream of tartar
5g cocoa powder 

5 pcs of strawberries (washed and dabbed dry, stalk removed) 
chocolate shavings (I used a sharp knife and ran it down the sides of a bar of bitter chocolate)

Sugar syrup for brushing
1 tbsp sugar
2 to 3 tsp hot water
(Dissolve sugar in hot water and set aside for cake brushing)

1. Preheat oven to 150deg C.
2. Sift cake flour, baking powder and cocoa powder and leave aside.
3. Beat yolk and 1/2 tbsp sugar till sugar has dissolved and yolk mixture has turned pale.
4. Add salt and beat well before adding canola oil in 2 additions. Make sure yolk mixture is well beaten between each addition.
5. Add in milk in 2 additions and mix well before placing in sifted cocoa flour mixture. Use a spatula and mix well till batter turns thick and creamy. Set aside.
6. In a separate bowl, beat egg whites till frothy. Add in cream of tartar and continue to beat till soft peaks form, add in remaining caster sugar in 3 additions and beat till stiff peaks are formed.
7. Spoon half of white mixture into cocoa batter and fold in till well mixed. Repeat the process with remaining white mixture in 2 additions.
8. Pour folded in batter into 6-inch baking tin and drop it on a table top twice to remove excess air bubbles.
9. Place baking tin in oven to bake at 150deg for 60 min or till done.
10. Remove from oven and place it overturned on a cooling rack to cool. Prepare white buttercream frosting. (Refer to Buttercream Frosting Step 1 to 3)
11. Slice a little of the uneven cake top if top is domed shape, then slice cake to get 2 even pieces for layering.  I used 3 toothpicks to guide me with the even and equal slicing.
12. Place a slice of the cake on a cake board and set it on a turntable, brush sugar syrup all over cake. Slap on some buttercream and spread it evenly. Place the other cake on top of buttercream.


13. Brush sugar syrup all over cake, then crumb coat whole cake with a thin layer of white buttercream to seal in cake crumbs so they will not get in the way during final coating, you may freeze crumb coated cake for about 15min before doing final thick coating.


14. Layer an even coat of white buttercream round sides of cake. (I left out the top since I will be piping on pink buttercream roses.) OR use a palette knife to create desired pattern on buttercream on sides of cake.


15. Spoon pink buttercream (refer to Buttercream Frosting Step 4 for direction) into a piping bag with a star nozzle and pipe the roses on the outer ream of cake top. Place strawberries round piped roses. Lastly spoon chocolate shavings into middle of cake. Refrigerate.


I managed to sneak in a photo of a slice of the cake!

Buttercream Frosting
150g salted or unsalted butter, softened (use good butter pls! I used Lurpak salted butter)
50g icing sugar (you may add more if you want a firmer buttercream)

1.5 to 2 tsp Red dragonfruit juice (3 bitesize pieces, mashed, squeezed and put through sieve)

1. Place butter into a mixing bowl, cut into smaller cubes and let it soften a little before beating.


2. Beat butter and icing sugar on low speed. Turn up speed when icing sugar has been blended with butter.
3. Beat till butter is smooth, creamy and firm enough to hold its shape
when piped.


4. To make pink buttercream with the leftover buttercream, add in few drops of red dragonfruit juice and mix well with a spatula. If a darker pink tone is desired, add in few more drops and mix. (If buttercream starts losing its firm texture, add in some icing sugar and beat to get back stiff texture good for piping.)


I love this shade of pink!

Tuesday, November 11, 2014

Chocolate Cake with Cocoa Buttercream Roses

Feasting period started from end October for Hubby and I. Anniversary, birthday, festive celebrations all fall during this period.

Since I baked a Japanese cheesecake for Hubby some 2 weeks back for our wedding anniversary, I decided to do a buttercream cake for Hubby's birthday this year, and because I wanted to practise piping, I added buttercream roses on the top of the cake.


How is it for a noob who has not really done much piping her whole life?  I thought it looked not too bad hehe!  Okay, more excuses to do bakes that calls for frostings. I need more practices!

Talk about frostings, I love using buttercream for cake frosting. I am never good at whipping cream, yes, even heavy cream, so I try to steer clear from them as much as I could.

I love how easy is it to make buttercream. It is almost foolproof and I have never overbeat buttercream. Divert your attention a little and you risk overwhipping cream and heavy cream, and you get that grainy texture with milk oozing out. Buttercream holds its piped shapes better too!

I made this cake 3 days earlier for the Hubby, sang him the birthday song, he made a wish, cut the cake and we digged into it right after. He loved the cake. It was good! Soft, moist and not too sweet, just how we like our cake to be hehe!

I love taking photos of birthday cakes!

Especially when candles are lit.

 
So birthday song was sang,
wish was made,
cake was cut.
What's next?

Have your cake and eat it lor :P

Chocolate Cake with Cocoa Buttercream Roses
3 egg yolks
55g cake flour
1/4 tsp baking powder
40g caster sugar
30ml canola oil
35ml milk
a pinch of salt

3 egg whites
1/4 cream of tartar
5g cocoa powder

Chocolate rice

Sugar syrup for brushing
1 tbsp sugar
2 to 3 tsp hot water
(Dissolve sugar in hot water and set aside for cake brushing)

1. Preheat oven to 150deg C.
2. Sift cake flour, baking powder and cocoa powder and leave aside.
3. Beat yolk and 1/2 tbsp sugar till sugar has dissolved and yolk mixture has turned pale.


4. Add salt and beat well before adding canola oil in 2 additions. Make sure yolk mixture is well beaten between each addition.
5. Add in milk in 2 additions and mix well before placing in sifted cocoa flour mixture. Use a spatula and mix well till batter turns thick and creamy. Set aside.
6. In a separate bowl, beat egg whites till frothy. Add in cream of tartar and continue to beat till soft peaks form, add in remaining caster sugar in 3 additions and beat till stiff peaks are formed.


7. Spoon half of white mixture into cocoa batter and fold in till well mixed. Repeat the process with remaining white mixture in 2 additions.
8. Pour folded in batter into 6-inch baking tin and drop it on a table top twice to remove excess air bubbles.
9. Place baking tin in oven to bake at 150deg for 60 min or till done.
10. Remove from oven and place it overturned on a cooling rack to cool. Prepare buttercream frosting. (Refer to bottom for steps)
11. Slice a little of the uneven cake top if top is domed shape, then slice cake to get 2 even pieces for layering.  I used 3 toothpicks to guide me with the even and equal slicing.


12. Place a slice of the cake on a cake board and set it on a turntable, brush sugar syrup all over cake. Slap on some buttercream and spread it evenly. Place the other cake on top of buttercream.


13. Brush sugar syrup all over cake, then crumb coat whole cake with a thin layer of buttercream to seal in cake crumbs so they will not get in the way during final coating, you may freeze crumb coated cake for about 15min before doing final thick coating.
14. Layer an even coat round sides of cake. (I left out the top since I will be piping on roses.) Spoon chocolate rice on to side of frosted cake.


15. Spoon remaining buttercream into a piping bag with a star nozzle and pipe the roses on the cake top, starting from outer layer to inner layer. Refrigerate and enjoy.

Cocoa Buttercream Frosting
120g salted or unsalted butter, softened (use good butter pls! I used Lurpak salted butter)
30g icing sugar
3 tbsp cocoa powder


1. Place butter into a mixing bowl, cut into smaller cubes and let it soften a little before beating.
2. Beat butter and icing sugar on low speed. Turn up speed when icing sugar has been blended with butter.
3. Beat till butter is smooth, add cocoa powder and continue to beat till buttercream is smooth, creamy and firm enough to hold its shape when piped.