Sunday, November 30, 2014

Beef Stew

My younger brother stayed over at our place last weekend and I made a pizza and cooked a beef stew. I used the same pizza recipe as the last round as I really like how time saving this recipe was, and I could have nice tasty pizza in no time! I guess it will take me quite awhile before I get willing to move on in search for another thin crust pizza recipe...! Hehe!

Now for the beef stew, I tested and came up with a simple and yummy beef stew that hubby and brother commented "delicious!"


I love how easy and forgiving stews are. You can just dump all the ingredients into the one pot and let it simmer on low heat till meat turns tender, vegetables turn soft and the gravy gets thick and tasty. It goes so, so well with rice, and not forgetting bread too, for some stews!

Beef Stew 
(Serves 2 to 3) 

300g beef cubes 
1 brown onion (diced) 
2 carrot (cubed) 
4 brastagi potatoes (quartered) 
250ml beef broth (I used Campbell's Real Beef Stock) 
3 tbsp vinegar 
100ml water 
125ml red wine 
5 pcs garlic (flattened with a knife/ chopper) 
1 tsp of dried thyme leaves 
1 tsp dried parsley 
Olive oil 
Fresh ground black pepper 
Salt 
Cornflour + water mixture (if required) [1 tsp cornflour + 2 tsp water] 

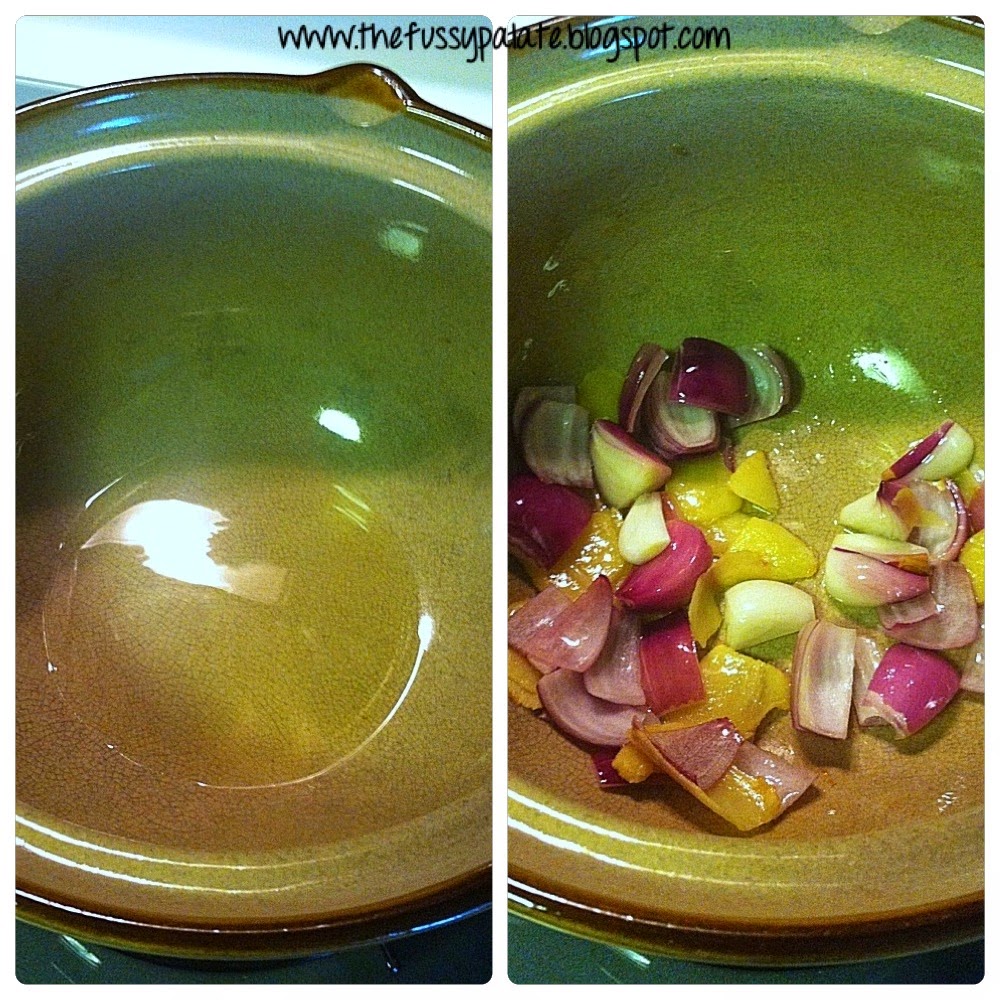
1. Heat a casserole dish with 2 tbsp of olive oil and add in add in beef cubes to brown them.  Do it over 2 batches if your casserole dish or crockpot is not big enough to brown all beef cubes.


Season beef with some fresh ground black pepper and salt. 
2. Once beef has browned on the bottom side, use a tong and turn all beef cubes top side down.  Again, sprinkle black pepper and salt all over beef. 
3. Remove beef cubes.


4. Pour in vinegar into pot and mix with wooden spoon to "release" browned bottom of pan with vinegar. 
5. Place in brown onions and garlic and saute till fragrant and onions has turned translucent.


6. Place in browned beef cubes and stir well. 
7. Pour in beef broth and stir well, then add in red wine and water.  Stir and let it come to a gentle boil on medium high heat. 
8. Add in potato and carrot, dried parsley and thyme leaves. Stir well, cover and let it come to a boil.


9. Turn down heat and let simmer for the next 1.5 hour to 2 hours or till beef cubes turn tender and come apart when pressed in with a fork.  When ready to serve, add in cornflour mixture to thicken stew gravy if required. 
10.  Serve with rice or sliced baguette.


Wednesday, November 26, 2014

Simple Lean Pork Soup with Huai Shan and Qi Zi

A simple and healthy soup recipe I came across in Chef Eric Teo's soup recipe book.  I used the double boiling method for this using my thermal pot and got 2 yummy pot of healthy soup for dinner. Quantities of ingredients were kinda halved to cater to 2 pax.

According to Chef Eric's recipe, this soup is supposed to cure chronic eye problems caused by asthemia, like blurry vision and for eyes that get tired easily.


Simple Lean Pork Soup with Huai Shan and Qi Zi
Recipe By Chef Eric Teo - Simply Soup recipe book (汤滋味)

50g huai shan (I used 10 pieces, 5 in each deep stew pot)
20g qi zi (2 tbsp, 1 tbsp in each deep stew pot)
500g lean pork, rinsed and cut into pieces (I used 300g pork ribs instead)
2.5 litres water (I just filled my stew pot to the brim)
Salt
I added 2 dried figs

Note: My individual stew pot size is just enough for 1 pax.


1. Rinse huai shan and qi zi, set aside.
2. Add 2.5 litres of water and all ingredients in a soup pot. Boil over high heat for 15 minutes. Switch to medium heat and simmer for 30 minutes. Season with salt.

(I placed a steam rack in my thermal pot, placed in 2 of my stew pots. Blanch the washed pork ribs in a small pot of boiling water, rinsed briefly with water and divide the ribs into the 2 stew pots. Place in dried figs, huai shan and qi zi, top with boiling water to brim.


Pour boiling water into thermal pot, put on thermal pot lid and put on high heat for 15 minutes. Turn off heat and place thermal pot into thermal pot holder. When ready to drink, put pot back to heat up and season with salt. Serve.)


Tuesday, November 25, 2014

Sweet Potato Balls with Chin Chow & Green Bean Soup

Do you love desserts? I do! Hot or cold, just give them to me hehe!  I cook desserts once in a while during weekends when we are going no where or when my family are over at my place for a mini gathering.

I came across Table for 2..... or More's taro balls recipe and did them soon after. I tried making the sweet potato balls instead of taro as I just wanted to try it out.  It was yummy.  I paired these chewy balls with a bowl of green bean soup, and another serving over some store bought chin chow. Both were yummy. I had them on different days la! Hehe~

One cold, one warm. Different pairing. I love them all.

I will try making taro balls another time :)


Sweet Potato Balls
Recipe by Table For 2..... or More

60g sweet potatoes (peeled, any choice of colours) - I used Japanese purple sweet potatoes
15g tapioca starch
1 tsp potato starch
2 tsp sugar
Water as needed

Taro balls
Recipe by Table For 2..... or More

80g taro, peeled
20g tapioca starch
5g potato starch
1 tbsp sugar
Water as needed

1. Steam taro and sweet potatoes until cooked. Turn off the heat, and keep the potatoes in your steamer so they stay warm.
2. Mix taro and tapioca starch and break it up by rubbing.  It could be quite hot.
3. Add in sugar and if a dough cannot form, add in water little  by little.  If you accidentally add in too much water, zap it in the microwave for 20sec, it will partially cook the starch and make the dough firmer.
4. Knead the dough until smooth, while it is still warm, roll it into a thin log, and cut into your preferred size.


5. Repeat Step 2-4 with other sweet potatoes.
6. To cook, bring a pot of water to boil.  Put in the small balls and cook until it floats.  After it floats, let it cook for another minute.


7. Prepare a big bowl of ice water.  Ladle and strain the cooked dough balls, and dunk them into the ice water.
8. Serve with syrup of choice / chin chow.  (I served it in 2 different servings - one with ready-bought chin chow & another with green bean)

Note: If you made too much of the taro or sweet potato balls, you may freeze the uncook cubed balls for up to 2 weeks. Bring them out from freezer and cook in boiling water like in Step 6.


Green Bean Soup
1/3 pack of small sago pearl
1/2 pack of green bean (washed & picked, free from black beans & dirt)
5 pieces of pandan leave (roughly tied)
1.5 litre water (add more if you prefer a watery consistency) - remember that sago pearls tend to absorb water, and make the green bean soup thick in consistency
Rock sugar, as desired

1. Put a pot of water to boil and pour in sago pearl.  Stir with a spatula or wooden spoon to loose sago pearls and prevent it from sticking to the bottom.
2. Lower heat and let simmer for 10 minutes or till sago has turned partially translucent.  Turn off heat and cover pot to let sago heat and cook further to become completely transparent.
3. Rinse cooked sago through a sieve under running water to remove excess starch then leave in a bowl of room temperature to keep it from turning gooey.
4. Put washed green beans in the big pot of water with pandan leaves to boil and cook for about 20 minutes.
5. Add in sago pearls and stir well to break up big balls of sago pearls.  Add rock sugar to taste.
6. Serve.

Monday, November 24, 2014

Tomato Rice with Sunny Side Up Egg (Rice Cooker Version)


There has been this tomato rice craze going on in the Facebook & blogsphere for the longest time. I see so many people cooking this and raving about how yummy it is. I hesitated for so long before I finally got my butt up to want to try the tomato rice out.

I did so yesterday for Hubby and my brother who stayed over at our place for the weekend. I had 2 guinea pigs this time :P

Tomato Rice with Sunny Side Up Egg

1 big tomatoes or 2 small tomatoes (washed & stem removed)
2 chicken thighs (de-skinned, remove fats & cut into small pieces)
4 tbsp mixed peas (rinsed & drained)
5 button mushrooms (sliced thinly)
1.5 cup rice (washed to normal rice cooking level)


Seasoning
1.2 tbsp olive oil
a pinch of salt
1 tbsp soy sauce
a dash of pepper

1. Remove about  5 tbsp if using 1 big tomato & 10 tbsp of rice water if using 2 tomatoes. (just make sure that rice water level is about same level as those of the ingredients added) The cooked whole tomato will produce lots of water when mashed, so too much water will cause the rice to be sticky when mixed with the mashed tomato.
2. Place all seasonings into pot and mix well with the rice and water.


3. Spoon in ingredients separately, leaving some space in the centre for tomato.
4. Place the tomato (top facing down) in the centre and put cooker to cook.


5. When rice is cooked & ready to be eaten, mash tomato to release the juice and mix it well with the rice and ingredients.  (You may remove the tomato skin if you want to)  Serve immediately.

Saturday, November 22, 2014

Beer Chicken - Claypot Style

I was treated to a good one-pot dish meal in office last week by one of our nice lady. I love how simple and heart-warming this dish is, especially when beer is added!


The trips to Europe has kinda turned me into an alcoholic! I need beer even in my food???  Let's not sidetrack. Okay, I must say this is really one pot of comfort food. You get meat (chicken), potatoes and carrots all in that 1 pot. Good lot of gravy for pairing with rice too! Beer made up the gravy.  Sounds good? Cook it :)


I added a handful of black fungus to have more varieties. This is quite a versatile dish. You can add other ingredients too. Chinese dried mushrooms, canned button mushrooms, radish etc. It is really up to you. This is somewhat like the chinese version of meat stew.  Hubby savoured and enjoyed every spoonful of this dish.   Yeah!

Beer Chicken - Claypot Style 
(Serves 2)

2 chicken thighs (skin and big fatty lumps removed), cut to chunky pieces
3 Brastagi Potatoes, deskinned & quartered
1 big carrot or 2 small sized carrots, deskinned & cut into bite sizes
a handful of black fungus, soaked in water till softened, snip off hard areas, rinsed, drained and tear into bite sizes
1 onion, deskinned and quartered

1 can of beer (room temperature)
1.5 tbsp oil
Half tablespoon of old ginger juice
1.5 tablespoon oyster sauce / abalone sauce
1 tablespoon light soy sauce
1/2 tbsp Chinese cooking Wine / Hua Diao Jiu
1 tsp sesame oil (optional)
a dash of pepper

1 small piece ginger, sliced thinly
1 tbsp black soy sauce
1 tbsp cornflour (mixed with 1 tbsp water) - for thickening (optional if you prefer a more watery consistency)

Spring onions, 1 sprig cut into 1 inch length and another sprig cut into small pieces - for garnishing (optional)

1. Marinate chicken meat with ginger juice, oyster sauce, light soy sauce, chinese cooking wine, sesame oil and pepper.  Cover with clingwrap and eave in fridge to marinate for 2 hours.


2. Heat oil in claypot till hot and add in ginger slices and onion slices and saute till fragrant.


3. Place in marinated chicken pieces and sauce into claypot.  Mix well.


4. When chicken meat has turned white, add in potatoes, carrots and black fungus and mix well.  Cover and let the dish cook for about minutes on medium heat.


5. Pour in beer and stir well.  Cover and let it come to a boil.


6. Add black soy sauce and mix well to coat all ingredients. Put in the big pieces of spring onions then give a quick stir, cover again and let it simmer on medium low heat till potato and carrot and softened. (You may do a taste test at this stage, if it is bland - add in some light soy sauce or oyster sauce, whichever preferred)


7. Add in cornflour mixture to thicken the sauce.  Be sure to be stirring the dish while adding the mixture to prevent lumpy gravy forming.
8. Turn off heat, Sprinkle spring onions on top and serve with rice.


Thursday, November 20, 2014

Strawberry & Chocolate Buttercream Cake

Went back to Mama's place on Sunday and I brought a cake over to celebrate Hubby's and Sister's birthday.  They are the November babies so I took the easy way out to combine 2 birthdays with one cake.  Hehe!   


Wanting to practise rose piping again, I chose to use buttercream for the cake frosting once more.  I bought a punnet of strawberries and used them as part of the deco for the cake.  I "coloured" the balance of my buttercreamn to pink with some red dragonfruit juice.  Al natural! Glad that the cake was well received and that it was not too sweet and heavy for my family.


Well, I still suck at smoothing out my cake frosting OMG!!!  It was a good thing that I used buttercream frosting or else with the time spent on trying to smooth out my frosting, those in the bowl and piping bag would have melted and softened long long ago.  Guess it's gonna be a long way for me before I can try out other frostings.   

After xxth minute still trying to smooth out the sides, I cheated by using my palette knife to smooth the sides from bottom up to form a patterned sides.  I thought it looked not too bad keke.  At least they look much better than my not-smooth-and-even-at-all frosting.  Conclusion: Baking can quite bring out one's creativity for sure! :)


Not getting any better at rose pipings.
I will strive on!


Strawberry & Chocolate Buttercream Cake 
(6 inch cake)
3 egg yolks
55g cake flour
1/4 tsp baking powder
40g caster sugar
30ml canola oil
35ml milk
a pinch of salt

3 egg whites
1/4 cream of tartar
5g cocoa powder 

5 pcs of strawberries (washed and dabbed dry, stalk removed) 
chocolate shavings (I used a sharp knife and ran it down the sides of a bar of bitter chocolate)

Sugar syrup for brushing
1 tbsp sugar
2 to 3 tsp hot water
(Dissolve sugar in hot water and set aside for cake brushing)

1. Preheat oven to 150deg C.
2. Sift cake flour, baking powder and cocoa powder and leave aside.
3. Beat yolk and 1/2 tbsp sugar till sugar has dissolved and yolk mixture has turned pale.
4. Add salt and beat well before adding canola oil in 2 additions. Make sure yolk mixture is well beaten between each addition.
5. Add in milk in 2 additions and mix well before placing in sifted cocoa flour mixture. Use a spatula and mix well till batter turns thick and creamy. Set aside.
6. In a separate bowl, beat egg whites till frothy. Add in cream of tartar and continue to beat till soft peaks form, add in remaining caster sugar in 3 additions and beat till stiff peaks are formed.
7. Spoon half of white mixture into cocoa batter and fold in till well mixed. Repeat the process with remaining white mixture in 2 additions.
8. Pour folded in batter into 6-inch baking tin and drop it on a table top twice to remove excess air bubbles.
9. Place baking tin in oven to bake at 150deg for 60 min or till done.
10. Remove from oven and place it overturned on a cooling rack to cool. Prepare white buttercream frosting. (Refer to Buttercream Frosting Step 1 to 3)
11. Slice a little of the uneven cake top if top is domed shape, then slice cake to get 2 even pieces for layering.  I used 3 toothpicks to guide me with the even and equal slicing.
12. Place a slice of the cake on a cake board and set it on a turntable, brush sugar syrup all over cake. Slap on some buttercream and spread it evenly. Place the other cake on top of buttercream.


13. Brush sugar syrup all over cake, then crumb coat whole cake with a thin layer of white buttercream to seal in cake crumbs so they will not get in the way during final coating, you may freeze crumb coated cake for about 15min before doing final thick coating.


14. Layer an even coat of white buttercream round sides of cake. (I left out the top since I will be piping on pink buttercream roses.) OR use a palette knife to create desired pattern on buttercream on sides of cake.


15. Spoon pink buttercream (refer to Buttercream Frosting Step 4 for direction) into a piping bag with a star nozzle and pipe the roses on the outer ream of cake top. Place strawberries round piped roses. Lastly spoon chocolate shavings into middle of cake. Refrigerate.


I managed to sneak in a photo of a slice of the cake!

Buttercream Frosting
150g salted or unsalted butter, softened (use good butter pls! I used Lurpak salted butter)
50g icing sugar (you may add more if you want a firmer buttercream)

1.5 to 2 tsp Red dragonfruit juice (3 bitesize pieces, mashed, squeezed and put through sieve)

1. Place butter into a mixing bowl, cut into smaller cubes and let it soften a little before beating.


2. Beat butter and icing sugar on low speed. Turn up speed when icing sugar has been blended with butter.
3. Beat till butter is smooth, creamy and firm enough to hold its shape
when piped.


4. To make pink buttercream with the leftover buttercream, add in few drops of red dragonfruit juice and mix well with a spatula. If a darker pink tone is desired, add in few more drops and mix. (If buttercream starts losing its firm texture, add in some icing sugar and beat to get back stiff texture good for piping.)


I love this shade of pink!

Tuesday, November 18, 2014

Dual Tone Butterfly Mantou

With the few new recipe books that I have on hand, I am kept busy reading and going through them. There are just so many recipes that I wanna try my hands on, and one of them is this dual-colour butterfly mantou which I came across in the Chinese style bun recipe book my colleague help buy for me from her Taiwan holiday.


I must say that I was not disappointed at all with this recipe.  The mantou were good. They were soft and fluffy.  No need for us to buy mantou anymore!  It was my first time at making mantou and I was abit jittery about it.  Hmm, but my worries were unfounded. It was a breeze making these butterfly shaped darlings. It was way easier than bread making, plus the time to prepare and steam it was all done under 80 minute. More mantou making soon!

Will provide step by step photo tutorial next round. Was rushing to finish making them and leave for an appointment.


雙色蝴蝶捲
(Recipe by 彭秋婷的创意手作中式發面)

分量  60g x 12个 

A   面团
速溶酵母 --- 7g
鲜奶 --- 260g
细砂糖 --- 50g
中筋面粉 --- 500g
奶油 --- 10g

B   红麹粉 --- 2g (我用可可粉)

1   搅拌 
先将细砂糖与配方中 3/4 的鲜奶充分搅拌均匀, 酵母与配方中 1/4 的鲜奶拌均匀, 将其他材料 A 放入盆中, 再倒入液状材料揉至呈光滑面团。

2   松弛
盖上湿布或保鲜膜, 让面团基本发酵 5-10 分钟。

3   延压
面团分成两等份,一份面团再加入红麹粉揉至光滑,两分钟面团分别擀成相同大小的长条形。

4   整形
a   将两份面皮用水重叠组合,修整四边,再将面皮由长向密实捲起, 在距离收口 1cm 处刷上水,固定好。
b   用刀切取约 1cm 长度, 在两两背面相对, 用筷子夹住成蝴蝶形状, 并捏出蝴蝶翅膀造型。

5   发酵
执上烘焙纸,间隔排入蒸笼層中,最后发酵 20-30 分钟。

6   蒸製
移入热水蒸锅, 以中火蒸 8 分钟,时间到后将蓋子打开一个小缝 1 分钟, 移出蒸锅再放置 2 分钟后掀蓋。

Below is the English version which I tried to translate to the best of my ability :)

Dual Tone Butterfly Mantou 雙色蝴蝶捲
Servings: 60g × 12 pcs

A. Dough
7g Instant yeast
260g fresh milk
50g caster sugar
500g plain flour
10g butter

B. 2g red yeast powder (I used cocoa powder)

1. Mix caster sugar with 3/4 of fresh milk (195g) and stir well to dissolve sugar. Sprinkle instant yeast over remaining 65g of fresh milk and let it sit for about 2 minutes before stiring them to dissolve yeast. Place all other dry ingredients in A into a mixing bowl, pour in the wet in ingredients and mix well to form a rough dough. Knead dough till smooth and shiny.
2. Place kneaded dough in mixing bowl and cover with clingwrap to let proof for 5 to 10 minutes.
3. Divide dough into 2 equal portions. Knead red yeast powder (or cocoa powder) into 1 portion of dough till colour is even and dough is smooth and shiny. Roll out 2 of the dough till flat and almost even size.
4. a) Brush water on 1 side of each flattened dough and place 1 dough of top of the other. Trim off sides of layered dough to get a rectangular shape and carefully roll up layered dough like rolling swiss roll. About 1cm at the end of the dough, brush on some water and gently press down dough to flatten it a little. Leave a tip of the end unrolled.
b) Using a sharp knife, make precise cuts of about 1cm each. Place 2 pieces of cut dough together, sides of the dough with unrolled end facing each other. Place 2 chopsticks by the sides of the dough and press in chopsticks to meet (to form wings of butterfly). Repeat the same for the rest of the cut dough.
5. Place baking paper under dough and leave dough in steamer to proof for 20 to 30 minutes.

See how my "butterflies" grew!

6. Steam mantou on medium high heat for 8 minutes. Make sure water is boiling before placing in mantou. Place lid cover sideway for about 1 minute. Remove steamer with lid covered slideways away from stove and let cool for further 2 minutes or so to cool - this is done to prevent mantou skin from crinkling up with the sudden temperature change. Serve warm!

Mantou steaming in progress!


To store, place cool mantou in ziplock bag and keep in freezer. Put mantou to steam again and it will turn soft and fluffy to eat again.

The leftover dough which I trimmed out were not wasted. I twirled the dough and twisted them to form different shaped mantou.