Showing posts with label Japanese. Show all posts

Wednesday, December 16, 2015

Japanese Garlic Fried Rice


On days that you feel lazy to do anything, and even whip up a 3 dishes and 1 soup meal for your hubby and yourself, what would you do?  Well, for us, we will do the fried rice option.  

Fast and easy, and you wil get to eat in no time. We had Japanese Garlic Fried Rice during our recent Kyushu vacation and we love how simple, yet yummy their fried rice were. I knew I had to try to cook it when I am when here and so I attempted it.  Not too alike to what we had in Japan but was still yummy because you will not go too wrong with garlic and spring onions fried with rice yeah? :P


A few easy ingredients and you can cook up this fried rice fast.


Japanese Garlic Fried Rice

2 cups of Japanese short grain rice
(rinsed and cook accordingly, then set aside to cool before use. Can cook rice a night before and set into fridge when cooled to be use the next day - loosen rice rice up before use)

1/2 tbsp olive oil + 2 tbsp olive oil

1 or 2 eggs, lightly beaten with a fork

3 whole stalks of Spring onions, cubed

8 garlic, minced

char siew, desired amount, cubed (optional))

1 tsp black pepper powder (or lesser, adjust according to taste)

1 1/2 or 2 tbsp light soy sauce (to taste)


1. Heat 1/2 tbsp oil and then add in beaten egg.  Quick fry egg into scrambled egg form by breaking it up and dish out scrambled egg onto a bowl.

2. Add in 2 tbsp olive oil and let it heat up before adding in minced garlic.  Stir fry till fragrant, do not let it come to brown.

3. On high heat, add in spring onion bits and char siew cubes and stir fry till fragrant and well mixed before adding in cooled rice. Stir well to get all ingredients well mixed with rice.  Finally add scrambled egg.

4. Spoon in desired amount of light soy sauce and stir fry well to coat each rice bits evenly.  Do a taste test at this stage.

5. Stir in black pepper powder evenly, dish out and serve immediately.

Thursday, February 26, 2015

Teriyaki Salmon 日式照烧汁煎三文鱼

Another udon meal but with teriyaki salmon. A set meal! Now you can see I have been eating fish meat regularly? Hehe... 

I love how I can control the sweetness of the homemade teriyaki sauce, in fact I read that Japanese hardly or never use teriyaki sauce from the bottles. 

Keeping it short here. Be back soon!


Teriyaki Salmon
Recipe by just One cookbook


2 salmon fillets with skin (3/4 inch thickness; skin will hold the flesh together while cooking.)
Salt
Freshly ground black pepper
1 Tbsp. flour (* see the note below for why using flour)
½ Tbsp. olive oil
1 Tbsp. butter
1 Tbsp. sake (or dry sherry)

Seasonings
1 Tbsp. sake (or dry sherry)
1 Tbsp. mirin (or 1 Tbsp. sake + 1 tsp. sugar)
1 Tbsp. sugar
2 Tbsp. soy sauce
1. Combine the ingredients for Seasonings and mix well until the sugar is mostly dissolved (or you can microwave for seconds). Rinse the salmon and pat dry. Season the salmon with salt and black pepper on both sides.
2. Sprinkle ½ Tbsp. of flour on one side of salmon and spread evenly. Flip over and sprinkle the rest of flour on the other side. Gently remove the excess flour.
3. In a frying pan, add the olive oil and melt the butter over medium heat. Don’t burn the butter. If the flying pan gets too hot, reduce heat or remove from the heat temporally.


4. Add the salmon fillets, skin side on the bottom. Cook the salmon for 3 minutes, or until the bottom side is nicely browned.
5. Add sake and cover with lid. Steam the salmon for 3 minutes, or until it's cooked through. Remove the salmon to a plate.

6. Add the Seasonings to the pan and heat up. When the sauce starts to boil, add salmon back in the pan and spoon the sauce over the salmon.
7. When the sauce thickens, turn off the heat. Plate the salmon e on warmed plate and serve immediately.

Notes

* By coating the fish with flour, we keep nice umami and juice inside. Also, the texture will get crispy and the sauce will be nicely coated.


White Bunashimeji & Vege Udon Soup

4 cups Quick dashi stock
2 packages udon
1 pack white bunashimeji (white beech mushrooms)
Few slices of leeks
Half a carrot, sliced thin

Seasonings
2 Tbsp soy sauce (I used only 1 tbsp)
2 Tbsp mirin (I used only 1 tbsp)
2 tsp sugar
¼ tsp salt


1. In a medium saucepan, add dashi and the seasonings and bring to a boil.

2. Add carrot, white bunashimeji, leeks.
3. Add the udon and cook for 3-5 minutes.
4. Serve udon and soup in bowls and top with green onion and additional toppings of your choice.

Thursday, February 5, 2015

Japanese Chestnut Rice (Kurigohan) 日式栗子饭

It has been awhile since my last trip to Hokkaido and I am definitely missing the food, weather and the beautiful things there. Oh and the onsen! Another trip there?? Hmmm.... fingers crossed! Keke... so to reminisce the good times there, I cooked something Japanese at home. Brief post, less words this time!


Japanese Chestnut Rice (Kurigohan)
Recipe by Annieliciousfood


420g or 2 cups Japanese Rice
52g or 1/4 cups Glutinous Rice
20pcs Small Chestnuts / Kuri (I used ready-to-eat chestnuts in a pack bought from the supermarket)
1 pc Dried Konbu
1 tsp Soy Sauce
1 tbsp Mirin
1 tbsp Sake
1 tsp Sugar
583ml or 2 2/3 cup Water


Garnishing option
Some black sesame seeds (I used white sesame instead)
Some spring onions


1. Soak kuri in hot water for about 30 minutes. Crack open the chestnuts and discard the shells. Soak peeled chestnuts in hot water for another 10 minutes. Drain the chestnut in a colander.
Wash and soak dried konbu for 10 minutes or until the konbu is soft. 
2. Wash rice till water turns clear and soak the rice in room temperature water for 30 minutes and then drain it in a colander. 3. The preparation is just like how you usually cook Japanese rice. Not difficult.
4. Put rice, water, soy sauce, mirin, soft konbu, sugar and sake in a rice cooker. Lightly mix them. Place chestnuts on top and start cooking. 


5. When rice is cooked, keep the rice warm in the rice cooker for about 10 minutes before opening the lid. Garnish and serve.


Note:
If you have any leftover chestnut rice, do not throw it away! You may just place leftover into a clean bowl, cover with clingwrap when cooled and refrigerate it. Steam it the next day for about 8min and it's ready to consume.

Saturday, November 1, 2014

Hokkaido Milk Loaf

October had been a wonderful month for me.  A wonderful month filled with a holiday to remember, our 3rd year wedding anniversary which we celebrated (many more good years to come!), a nice surprise from the hubby sent to my office and a handful of new books to read!


I am a woman afterall, plus it's always nice to get surprises now and then from your lovely other half, isn't it?

Thank you hubby!

2 recipe books which my lovely colleague helped get for me ďuring her trip to Taiwan. Did I mention I prefer looking up recipe books than surfing through the internet? I love buying recipe books hehe!

Before I digress further, I should get going on my bread post before this post gets longer and longer.

So I made Japanese Milk Loaf with a pack of Hokkaido milk I bought from the supermarket. No, I did not lug this pack of milk back from Hokkaido.

I love the rich and creamy taste Hokkaido milk has, and it definitely makes good bread. 


I made this bread using Alex Goh's Magic Bread recipe book - a book that has many good recipes that yield soft yummy bread. 


Hokkaido Milk Loaf
(Recipe adapted from Alex Goh's Magic Bread book with slight amendments)

A.
60g bread flour
43g boiling water

B.
195g bread flour
37 sugar
3g salt
4g instant yeast

C.
60g cold milk (I used Hokkaido 3.6 Milk)
50g whipping cream
Half cold egg

D.
20g butter

1. Add the boiling water from A into flour, mix until well-blended to form a dough. Cover and set aside to cool. Keep it in refrigerator for at least 12 hours.
2. Mix B until well blended, add in C and knead to form rough dough. Add in A and knead until well blended.
3. Add in D and knead to form elastic dough,
4. Let it proof for 40min. Divide the dough into 3 pieces and mould it round. Let it rest for 10 minutes,
5. Flatten it and roll it into oblong shape. Place 3 pieces of the dough onto a greased loaf tin. 


6. Let it proof for 50min. Pipe some Mexico topping on top. (I skipped the topping) Bake at 180deg C for 20 to 25 minutes.

Thursday, October 30, 2014

Japanese Cheesecake (again!)

3 years ago on this day, we got married.

All these years from our courtship days to dating days, and now as a married couple, you never fail to treat me sweetly.

You aren't a sweet talker.  You show me your love with actions.  You support me in whatever decisions I make and in all things I do.  Thank you Hubby!

I am blessed to have a loving hubby who helps out with the housework. On days that he knows I am burnt out, he will take over all housework and ask me to rest or just concentrate on my baking and cooking.

I am glad that I've got him - A friend, a hubby and a soulmate who willingly listen to whatever I have to say, always being my guinea pig to test and try all food I churn out in the kitchen, and enduring my naggings!

If I could have 1 wish, I wish for many more wonderful anniversary celebrations with this man.

To celebrate our day, I baked this cake that hubby likes alot - the Japanese Cheesecake.


I wanted a reliable recipe so I stuck by Rasa Malaysia's which I used in my other 2 cheesecakes posts.

Japanese Cheesecake
(Makes an 8" or 9" cake)

140g/5 oz. fine granulated sugar
6 egg whites
6 egg yolks
1/4 teaspoon cream of tartar
50g/2 oz. unsalted butter (I used salted butter)
250g/9 oz. cream cheese
100 ml/3 fluid oz. fresh milk
1 tablespoon lemon juice
60g/2 oz. cake flour /superfine flour
20g/1 oz. cornflour (cornstarch)
1/4 teaspoon salt (I did not use this as I used salted butter)

1. Melt cream cheese, butter and milk over a double boiler. Cool the mixture. Fold in the flour, the cornflour, salt, egg yolks, lemon juice and mix well. After folding this, I put the mixture through a sieve to get a smooth and lump-free mixture.


Fold in.

Pour mixture over a sieve and let it run through with the help of a spoon or spatula to get a smooth mixture.

Smooth lump-free mixture without creamcheese and flour bits.

2. Make the meringue by whisking egg whites with cream of tartar until foamy. You can beat with a stand mixer or handheld mixer. Add in the sugar and whisk until soft peaks form.

3. Take 1/3 meringue and fold into the cheese mixture, then fold in another 1/3 of meringue. After incorporated, pour the batter back to the remaining 1/3 meringue and fold. FOLD GENTLY. (I scooped out 2 tbsp of mixture and added 1 tbsp of cocoa to make some chocolate mixture and scoop into a piping bag) Pour the mixture into a 8-inch round cake pan (lightly grease and line the bottom and sides of the pan with grease-proof baking paper or parchment paper). Snip off abit at the tip of the cocoa mixture filled piping bag. Try piping out on a piece of kitchen towel to test the flow before piping out your desired design on the cake.)


I painstakingly piped this out with reference from the internet. PHEW~!

4. Bake cheesecake in a water bath for 1 hours 10 minutes or until set and golden brown at 160 degrees C (325 degrees F). (Dr Leslie Tay's baking direction: Preheat to 200C (I used 220C for 30min as my oven temp is slightly lower than other oven) non fan forced. Bake for 20min. Lower temperature to 160C and bake for 10min (I did mine at 180C 20min). Turn off oven, and leave cake in oven with door closed for 30min. Open oven door slightly ajar and leave cake to cool inside for 20min. Finally, take cake out of pan and cool on rack)


Ta-daah!
Made specially for my dearest hubby.


Some Notes with reference from Rasa Malaysia:
1. I used an 8″ pan, and I lined the sides of the pan with parchment paper with the paper extending slightly higher than the cake tin by about 1.5”.


2. I left the cake to cool down in the oven with the oven door open, about an hour. This is to prevent sudden change of temperature that may cause the cake to shrink drastically. It’s normal that the cake will shrink about ½ inch to 1 inch after cooling, it’s normal. If the cake shrinks a lot, the main reason is over mixing the egg white mixture with the cheese mixture. Beat the egg whites until soft peaks form, FOLD VERY GENTLY, do not stir or blend.


Pardon the lousy photo with bad lightings.
I just wanted to show the slight shrinkage of the cake when cooled slowly.

3. Refrigerate the cake (with or without the cake tin) for at least 4 hours or overnight.

Monday, September 22, 2014

Matcha Japanese Cheesecake


Finally succeeded in drawing on my cheesecake! Uber pleased with it even though my drawing could improve further hehe!

I guess I watched too much Running Man that giraffe was the first animal I wanted to draw on this cheesecake!  If you are a Running Man fan, you will know what's with the giraffe ;)

Needed practice first to be sure I could draw quite steadily before working on the 2nd one. 2nd animal drawn was a piggy, and it was meant for a girlfriend (I cannot afford to have a blotched job for this giveaway!!).  I made 2 cheesecakes :D

Made specially for a nice girlfriend.


On a Japanese cheesecake baking craze? Yup, I think I am. Western no-bake and baked cheesecakes just have to take a back seat for now.

Matcha Japanese Cheesecake
(Makes an 8" or 9" cake)
Adapted this recipe from here and added matcha powder to it.
140g/5 oz. fine granulated sugar
6 egg whites
6 egg yolks
1/4 teaspoon cream of tartar
50g/2 oz. unsalted butter (I used salted butter)
250g/9 oz. cream cheese
100 ml/3 fluid oz. fresh milk
1 tablespoon lemon juice
60g/2 oz. cake flour /superfine flour
20g/1 oz. cornflour (cornstarch)
2 tsp matcha powder (I will up it to 3 tsp next round as 2 tsp was too mild, not much matcha taste)1/4 teaspoon salt (I did not use this as I used salted butter)

1. Melt cream cheese, butter and milk over a double boiler. Cool the mixture. Fold in the matcha powder, cake flour,  cornflour, salt, egg yolks, lemon juice and mix well. (This time round, I put the mixture through a sieve to get a smooth cheese mixture, you may skip this step if you dont mind little lumpy bits at bottom of cake)

2. Make the meringue by whisking egg whites with cream of tartar until foamy. You can beat with a stand mixer or handheld mixer. Add in the sugar and whisk until soft peaks form.

3. Take 1/3 meringue and fold into the cheese mixture, then fold in another 1/3 of meringue. After incorporated, pour the batter back to the remaining 1/3 meringue and fold. FOLD GENTLY. (I scooped out 3 tbsp of mixture and added 2 tbsp of cocoa to make some chocolate mixture and put into a piping bag to pipe the drawings on the cake batter after pouring the balance mixture into the lined pan) Pour the mixture into a 8-inch round cake pan (lightly grease and line the bottom and sides of the pan with grease-proof baking paper or parchment paper).

4. Preheat oven to 200C (I used 220C for 30min as my oven temp is slightly lower than other oven) non fan forced. Bake for 20min. Lower temperature to 160C and bake for 10min (I did mine at 180C 20min). Turn off oven, and leave cake in oven with door closed for 30min. Open oven door slightly ajar and leave cake to cool inside for 20min. Finally, take cake out of pan and cool on rack.

Thursday, September 18, 2014

Japanese Cheesecake


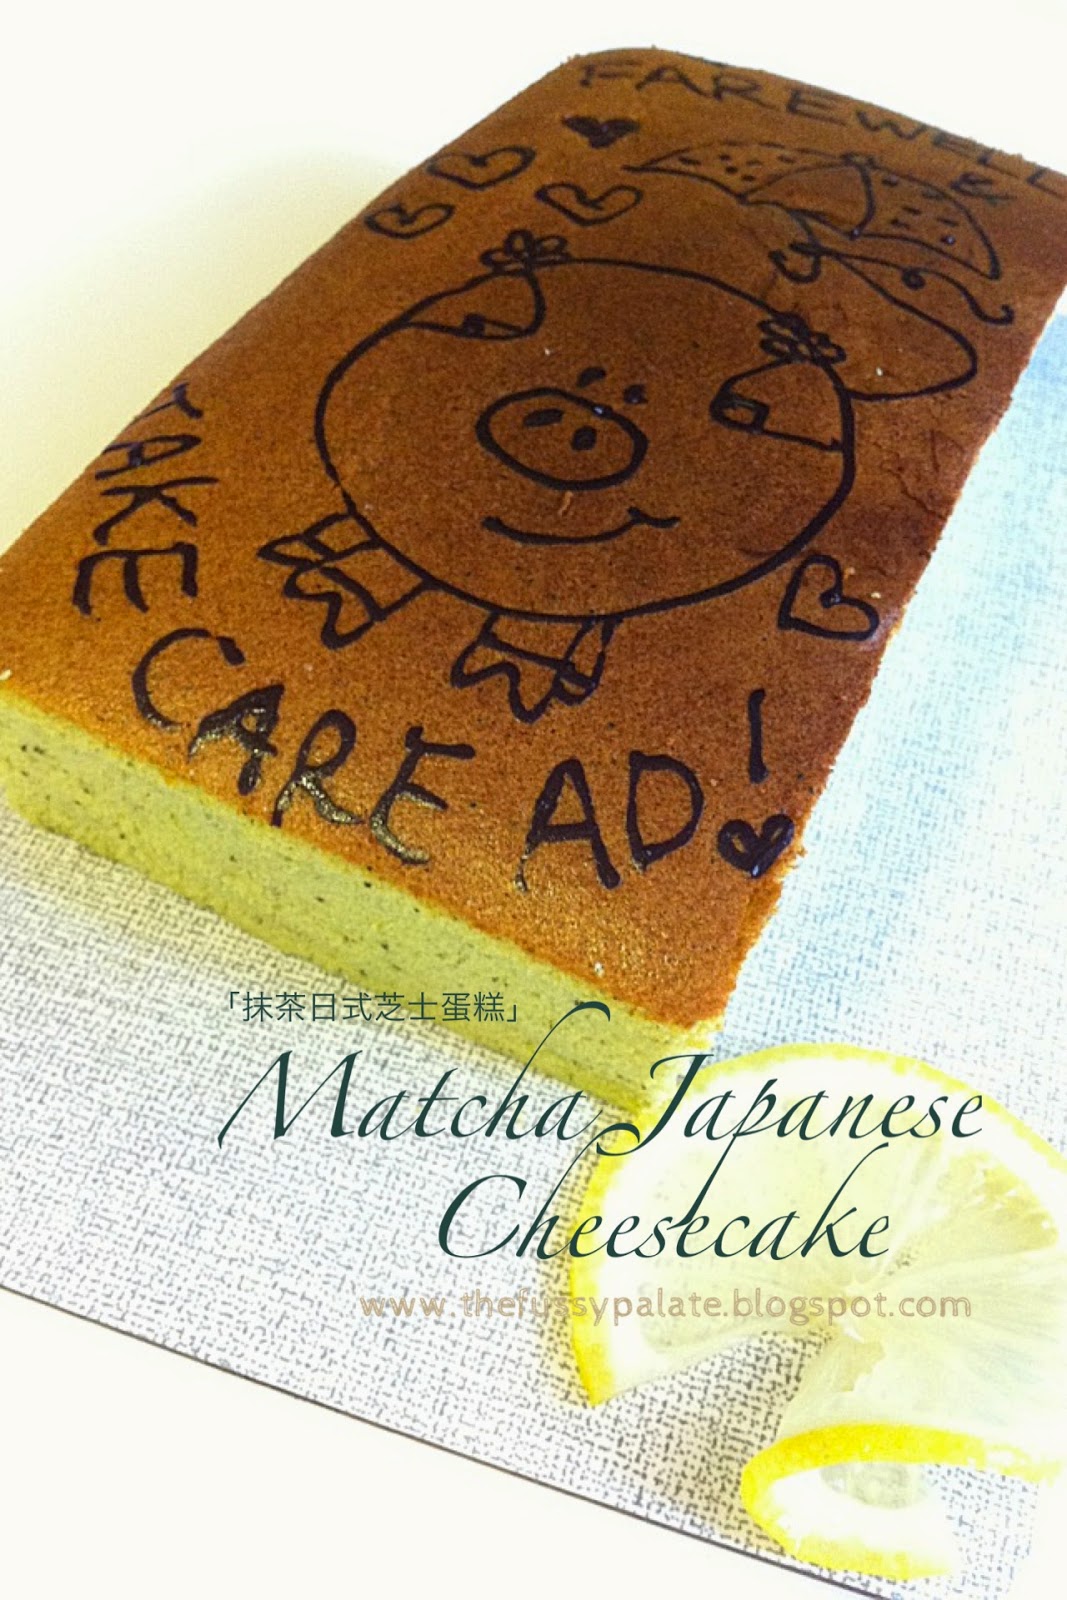
Inspired by the Japanese Cheesecake fb post by Dr Leslie Tay from ieatishootipost, I made one too. I followed Dr Tay's oven baking direction by putting it on high and bringing temperature slightly lower, then resting it and all and it brought about really good results. The cake rose nicely with no cracks, not much shrinkage when cooled and was cottony soft, so soft that it literally melts in your mouth. I aren't joking.


Hubby ate it first and told me "the cake's good, it is so soft, I prefer this to western style cheesecakes!" I did not believe him lor. And so I tried a slice, and it was gobbled up in no time. It was that nice.

Yup, I haven't eaten store bought Japanese cheesecakes before. I made one long long time ago and it was a flop, it was so heavy and cakey. That was my first and last encounter with baking and eating this cheesecake. It was not until I saw Dr Tay's post on his FB that I decided it was time to give myself and the Japanese cheesecake a second chance.  No regrets trying it out. I did it and will do it again. Different flavour next round!


Japanese Cheesecake
Recipe by Rasa Malaysia
(Makes an 8" or 9" cake)

140g/5 oz. fine granulated sugar
6 egg whites
6 egg yolks
1/4 teaspoon cream of tartar
50g/2 oz. unsalted butter (I used salted butter)
250g/9 oz. cream cheese
100 ml/3 fluid oz. fresh milk
1 tablespoon lemon juice
60g/2 oz. cake flour /superfine flour
20g/1 oz. cornflour (cornstarch)
1/4 teaspoon salt (I did not use this as I used salted butter)

1. Melt cream cheese, butter and milk over a double boiler. Cool the mixture. Fold in the flour, the cornflour, salt, egg yolks, lemon juice and mix well.

2. Make the meringue by whisking egg whites with cream of tartar until foamy. You can beat with a stand mixer or handheld mixer. Add in the sugar and whisk until soft peaks form.

3. Take 1/3 meringue and fold into the cheese mixture, then fold in another 1/3 of meringue. After incorporated, pour the batter back to the remaining 1/3 meringue and fold. FOLD GENTLY. (I scooped out 2 tbsp of mixture and added 1 tbsp of cocoa to make some chocolate mixture) Pour the mixture into a 8-inch round cake pan (lightly grease and line the bottom and sides of the pan with grease-proof baking paper or parchment paper).

4. Bake cheesecake in a water bath for 1 hours 10 minutes or until set and golden brown at 160 degrees C (325 degrees F). (Dr Leslie Tay's baking direction: Preheat to 200C (I used 220C for 30min as my oven temp is slightly lower than other oven) non fan forced. Bake for 20min. Lower temperature to 160C and bake for 10min (I did mine at 180C 20min). Turn off oven, and leave cake in oven with door closed for 30min. Open oven door slightly ajar and leave cake to cool inside for 20min. Finally, take cake out of pan and cool on rack)

Cook’s Notes (Rasa Malaysia):
1. I baked the cake in 9” round tin, did not line the sides.

2. If you use a 8″ pan, it is very important to line the sides of the 8” pan with parchment paper, make sure the parchment paper extends higher than the cake tin by about 1.5”.

3. If springform pan or loose base cake tin is used, wrap the base of your cake tin with 2 layers aluminium foil, to prevent seepage.

4. I baked the cake on the lowest shelf in the oven (to prevent cracks on top and over browning).

5. The purpose of using double boiler is to melt the cheese, butter, and milk mixture. I heated and simmered the water in the double boiler ON the stove. For the water bath, I used hot water.

6. I left the cake to cool down in the oven with the oven door open, about an hour. This is to prevent sudden change of temperature that may cause the cake to shrink drastically. It’s normal that the cake will shrink about ½ inch to 1 inch after cooling, it’s normal. If the cake shrinks a lot, the main reason is over mixing the egg white mixture with the cheese mixture. Beat the egg whites until soft peaks form, FOLD VERY GENTLY, do not stir or blend.

7. Refrigerate the cake (with or without the cake tin) for at least 4 hours or overnight.

Friday, August 15, 2014

Oven-baked Tonkatsu

Weekends nowadays are mostly spent at home or back at my parents' place.  With enough of eating-out days, I prefer cooking at home. Doesn't matter even if I cook only simple fuss free meals, hubby eats it anyway.

Before this, I made some japanese potato salad, and I made them enough for a 2nd serving on the next day, so that I could make some tonkatsu (japanese pork cutlet) to go along with. Call me a lazy wife. :P

These tonkatsu I made were oven baked and recipe was adapted from Justonecookbook.  No need for deep frying. Did not use my airfryer this round.  Verdict?  Not too bad considering they were oven baked.  It definitely cannot fight deep-fried ones but I will still use this method again. And again.


Baked Tonkatsu
(Serve 2)
Recipe by Justonecookbook

¾ cup panko (Japanese breadcrumbs)
1 Tbsp. olive oil
2 pieces pork loin (1/2 lb ,226 g), ½ inch (1.2 cm) thickness
1 tsp. salt
Freshly ground black pepper
2 Tbsp. all-purpose flour
1 large egg
Tonkatsu Sauce (or Make homemade Tonkatsu Sauce)
1 Tbsp. black and/or white sesame seeds

1. Adjust an oven rack to the middle position and preheat the oven to 400F (200C). Line a rimmed baking sheet with parchment paper.

2. Combine the panko and oil in a frying pan and toast over medium heat until golden brown. Transfer panko into a shallow dish and allow to cool.

3. Get rid of the extra fat and make a couple of slits on the copnnective tissue between the meat and fat. The reason why you do this is that red meat and fat have different elasticity, and when they are cooked they will shrink and expand at different rates. This will allow Tonkatu to stay nice and flat and prevent Tonkatsu from curling up.

4. Pound the meat with a meat pounder, or if you don’t have one then just use the back of knife to pound. Mold the extended meat back into original shape with your hands.

5. Sprinkle salt and freshly ground black pepper.


6. Dredge each pork piece in the flour to coat completely and pat off the excess flour. Then dip into the beaten egg and finally coat with the toasted panko. Press on the panko flakes to make sure they adhere to the pork.

7. Place the pork on the prepared baking sheet. Bake until the pork is no longer pink inside, about 20 minutes.

8. Cut Tonkatsu into 1 inch pieces (so you can eat with chopsticks) by pressing the knife directly down instead of moving back and forth. This way the panko will not come off. Transfer to a plate and serve immediately.

9. To make special sesame tonkatsu sauce, grind black and white sesame seeds in a mortor and add tonkatsu sauce. Mix all together.

Thursday, August 14, 2014

Japanese Potato Salad


Okay... this is one of the few things that I have always been wanting to do but kept procrastinating. Why? Because I have got enough bottled condiments lying in my fridge and they are seriously filling up the sides of my fridge!!

So I still fell for it in the end and bought a medium bottle of japanese mayo for this. Because I craved for it. Excuses. Anyway, it was yummy. And simple. 

Japanese Potato Salad
Recipe by Noob Cook
1/2 Japanese cucumber cut to thin, semi-circle slices
1/4 tsp salt
1/2 carrot peeled and cut to thin, semi-circle slices
2 russett potatoes peeled and quartered
water (enough water to submerge the potatoes)
3 tbsp cooked corn nibblets usually tetra-pak or canned (I did not add)
1/2 small onions chopped till fine bits
3/4 cup Japanese mayonnaise
salt and black pepper to taste

1. Rub cucumber slices with salt and allow to 'sweat' for about 30 minutes. This will make the cucumbers more crunchy. Rinse, drain and squeeze dry.
2.In a pot, bring water to boil. Add carrots and potatoes. Boil for 10 minutes. Drain.
3. Transfer boiled potatoes to a bowl. Use a fork to mash the potatoes, leaving some small chunks behind.


4. Add corn, carrot, cucumber, onion, and Japanese mayonnaise. Season to taste with salt and pepper. Chill in fridge before serving.

Note: Feel free to spice up this potato salad with more flavour such as chopped ham, karashi (Japanese mustard) and chopped hard boiled egg.

Tuesday, August 12, 2014

Pumpkin Croquette and Soupy Udon

July is over and we are well into mid of August. Mum's doing real well and our family is happy! Family support is very important indeed.

I have a thing for pumpkin croquettes and would definitely order them when Im in a Japanese restaurant.  Now with airfryer, I made them. Not too much like what we eat in the restaurants though. Would be better if they were crispier! Nevertheless, I have the never-say-die attitude and will improve on them again! Jiayou! Oh okay, and I have to admit that I used the normal pumpkins and not Japanese Kabocha. Next round then!


I cooked some udon to along with the croquettes as well.  Simple stock made from dashi stock packs I bought from NTUC.

Beware. Long read ahead. Hehe.

Quick Dashi Stock
Serves: Makes 3 Cups
Recipe by Justonecookbook

3 cups water
1 (9g) Awase (kombu & katsuobushi), Katsuo, or Iriko dashi packet


In a medium saucepan, add water and dashi packet (some brand may ask you to add the packet after boiling). Start cooking covered over medium high heat. After boiling, reduce heat to medium low and simmer for 5 minutes.

Discard the packet and dashi stock is ready to use.


Udon Soup
(Serves 2)
Recipe by Justonecookbook

4 cups dashi (I used just 3 cups) 
2 packages udon
2 inariage (seasoned fried tofu pouch), cut in half (I left this out)
1 green onion/scallion, finely sliced

Seasonings
2 Tbsp soy sauce (I used only 1 tbsp)
2 Tbsp mirin (I used only 1 tbsp)
2 tsp sugar
¼ tsp salt

Toppings (optional) - I left these toppings out and made it plain
Narutomaki (fish cake), thinly sliced
Blanched spinach, cut into 2" (5 cm) pieces

1. In a medium saucepan, add dashi and the seasonings and bring to a boil.
2. Add the udon and cook for 3-5 minutes.
3. Serve udon and soup in bowls and top with inari age, green onion and additional toppings of your choice.


Kabocha Croquette (Pumpkin Croquette)
Recipe by maa1012


1/4 Kabocha squash (I used those normal pumpkins)
2tsp Honey
2 tsp Butter
a pinch of Salt
1/4 onion, minced
1 tbsp sweet corn

For coating
Flour (as needed)
1 Egg
Panko (as needed)

Tonkatsu sauce for dipping (optional) (I bought the Bull-Dog brand)


1. Peel the kabocha squash. Remove the seeds and cut into 3 cm cubes.
2. Put kabocha squash onto a heatproof dish lined with paper towels. Microwave for 5 minutes.


3. Mash the squash while it's hot. Combine with the ingredients and mix. Coat with flour, egg, and panko in this order. Deep-fry until golden brown. (If using airfryer, preheat it at 200deg for 3 to 5 min and airfry it for 7min. I turned the croquettes over after the 7min is up and airfried it further for another 1min.

Note: Add a little honey to bring out the natural sweetness of kabocha. When you microwave the kabocha over paper towels, it'll absorb the excess water, and make it fluffy. Leave the mashed kabocha aside and let cool slightly before forming patties.