Saturday, July 18, 2015

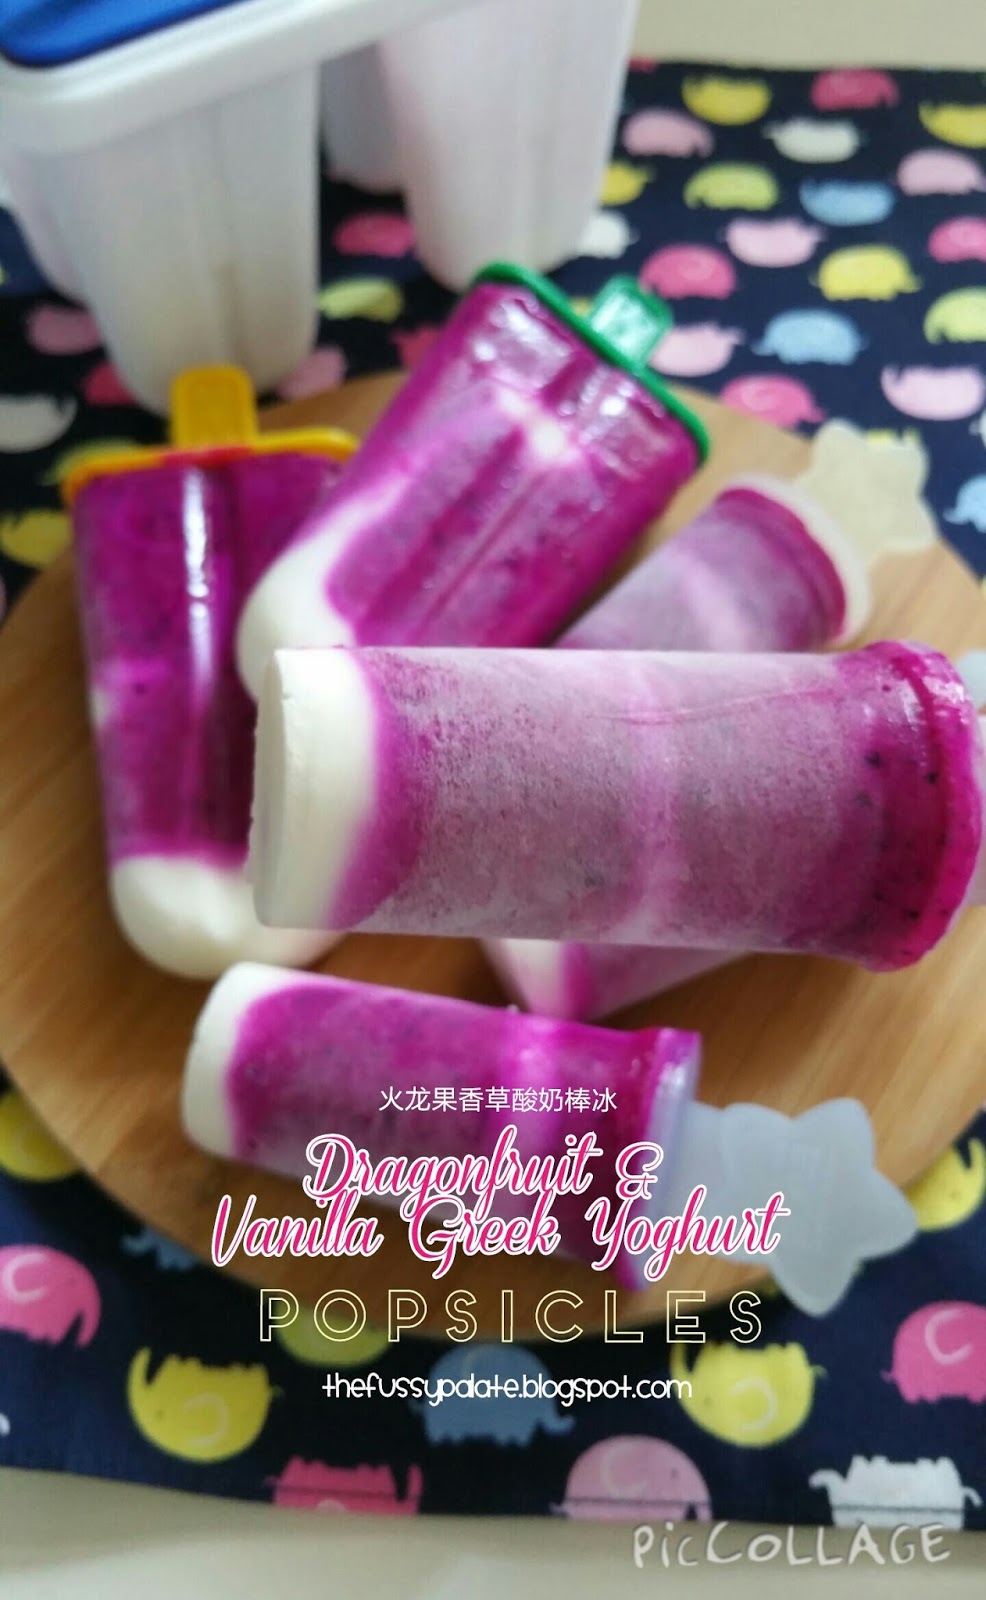
Dragonfruit & Vanilla Greek Yoghurt Popsicles


Addicted to making popsicles and eating them, so I am making these yummy treats quite frequently.


These popsicles are definitely wat healthier than ice creams. No whipped cream and sugar. Are you in for popsicles??


Dragonfruit Vanilla Greek Yoghurt Popsicles

1 red dragonfruit, de-skin and cut into smaller pcs
3 tbsp Vanilla Greek yoghurt, for blending
Desired amount of Vanilla Greek yoghurt for swirling (optional)

1. Slice and place dragonfruit pcs and yoghurt into blender. Blend!


2. Spoon half tsp of yoghurt into empty popsicle mould. Spoon dragonfruit puree halfway into popsicle moulds. 


3. Add 1/2 tsp yoghurt and then top with puree. Do not fill to brim of mould as popsicle will "pop up" slightly when frozen.


4. Finally using a chopstick, dip into mould mixture and stir about slightly to create a swirl pattern.
5. Place into freezer.


6. When removing, wrap mould with a hot dish cloth / run mould (bottom part) under running water and carefully dislodge popsicles. Enjoy!


Wednesday, July 15, 2015

Chocolate Chip Muffins


Another nice bake from my new (and lovely!) oven. Hehe! Cannot help but rave about this new toy. 

It's been some time since I last baked muffins and I was craving for some. 


Freshly out from the oven

Want some?

And so I made a batch of yummy choc chip muffins, credit to Ellena Guan of Cuisine Paradise!! It was great when paired with a cup of good coffee, and I thought tea would do well too!

Simple, fuss free and short baking time. Muffins are just so easy :)


Chocolate Chip Muffins

Recipe by Ellena Guan of Cuisine Paradise
Makes 6 Regular Muffins 
    Dry Ingredients - (A) 
  • 165g All-purpose Plain Flour
  • 2 Teaspoon Baking Powder
  • 1/2 Teaspoon Sea Salt

  • Wet Ingredients - (B)
  • 1 Large Egg (60g)
  • 80g Caster Sugar
  • 120ml Fresh Milk
  • 60ml Vegetable Oil
  • 1/2 Teaspoon Vanilla Extract

  • 80g Mini Chocolate chips
  • Some Walnuts (whole), optional
  • 20g Mini Chocolate Chips (extra), optional

1. Preheat oven to 200°C (392°F) and line muffin tins with muffin liners or alternatively grease muffin tin. 


2. Stir Ingredients (A) together in a bowl till well-mixed and set aside. 


3. Whisk Ingredients (B) together using a hand whisk starting with egg and sugar till combined then followed by the rest (I replace vanilla extract with 1/2 vanilla bean pod). 

4. Pour mixture (B) into (A), using a spatula gently fold mixture to combine until no trace of flour is found (the batter will be thick and lumpy so do not over mixed it). 


5. Lastly fold in chocolate chips and spoon batter into prepared muffin tin all the way to the brim (do not 't worry the batter will not overflow). Top with optional chocolate chips or walnut on top before baking. 


6. Bake at 200°C for the first 5 minutes and then reduce temperature to 180°C for another 25 - 30 minutes until surface is browned and a skewer inserted in the center and comes out clean. 


7. Remove muffin tin from the oven and allow the muffins to cool in the tin for at least 10 minutes before removing it on a wire rack. 

巧克力豆松饼
数量:6个松饼   

材料(A)
165克面粉
2茶匙发粉
1/2茶匙海盐

材料(B)
1个鸡蛋(60克)
80克砂糖
120毫升鲜牛奶
60毫升植物油
1/2茶匙香草精

80 - 100克迷你巧克力豆

做法:
1.预热烤箱至200度。把小纸杯放在松饼盘里备用。
2.材料 (A)筛匀在碗中,备用。
3.材料 (B)从鸡蛋和砂糖开时顺序搅拌均匀。
4.把混合液体(B)倒入(A)然后轻轻用橡皮刮刀把它们拌匀。(切记不要过度混合以免松饼变硬) 
5.之后加入巧克力豆再拌2-3次,然后将面糊分别倒入小纸杯 (你可以在上面撒些巧克力豆或核桃) 再放进预热200度烤箱烤5分钟让松饼因热度膨胀。
6.接着把温度挑低到180度再烤25-30分钟直到松饼表面呈现金黄色即可。

Tuesday, July 14, 2015

Avocado Gula Melaka Popsicles

Now how can one tolerate with such a hot and humid weather??? Aircon has been my best friend these days. All I want to do when at home is stay in my room with the air con and TV nowadays. Super no life!


To curb the heat, I cannot stop making popsicles. Eating icecreams make me fat (and guilty).  Popsicles are the new icecream (at least for me and hubby!).

So easy and fun to make, kids can join in the fun too!

Go make and eat them!! Yummy!


Avocado Gula Melaka Popsicles
2 ripe avocados
230ml milk
1.5 tbsp gula melaka syrup (for blending)
1 tbsp (for swirl patterns)

Gula Melaka syrup
100g gula melaka
40ml water
4 pcs of pandan leaves, knotted


Place gula melaka, water and knotted pandan leaves into saucepan and let gula melaka melt. Stir well. You may use a spatula to gentle press down pandan leaves and stir about so that gula melaka syrup will be infused with pandan fragrance.

Pour gula melaka syrup through sieve to rid bits of residue. Ready to use.

Popsicles
1. Half avocados and scoop out fruit flesh using a spoon and place into blender.
2. Add in milk and gula melaka syrup. Place on blender cover and blend into smoothie. If smoothie is too thick, add in a little more water. You may do a taste test, if smoothie is not sweet to your liking, add in more gula melaka syrup accordingly. Blend well.
3. Spoon into popsicle moulds. For swirl patterns, spoon in blended smoothie halfway up mould, spoon in some gula melaka syrup, top with smoothie to almost top of mould and then use a chopstick to stir and make swirl patterns.
4. Stick in popsicle mould cover and place in freezer.


5. When frozen and ready to eat, place popsicle mould under tap water, taking care not to let water sip into frozen popsicles. Twist and remove. Enjoy!

Sunday, July 12, 2015

Stir Fried Luffa Gourd with Egg


Love this vege dish from young. Haven't eaten it for a long time so I bought 1 luffa gourd and cook it! Simple, yet heartwarming. I am glad I have a hubby that is not a fussy eater and let me cook whatever I want and eat with me.

The one thing I hate about this dish is the peeling!!! 

Weather is so hot and humid these days that all I want is whip a quick dish or 2 and dig in.  Do remember to drink more water ya?  Be back soon :)

Stir Fried Luffa Gourd with Egg
Serves 2

1 luffa gourd, skin peeled, rinsed and cut into smaller pcs
1 egg, beaten
2 to 3 garlic, minced
1 tbsp dried shrimps (I used minced dried shrimps but you can use them whole)
1/2 tbsp abalone or oyster sauce
1 tbsp oil


1. Heat oil in pan.
2. Add in garlic and dried shrimps and fry till fragrant garlic slightly brown.
3. Place in luffa gourd pcs and abalone sauce. Stir fry till well mixed. Cover and let luffa gourd soften and absorb gravy.
4. Add in beaten egg and stir fry to break up egg into scramble form. Dish out and serve with rice or porridge.

Tuesday, July 7, 2015

Yuzu (Honey Citron) Chiffon Cake

Sorry for the disappearing act from this  space for such a long time. Mum went for an op and we were busy shuffling between hospital, work and home, and that certainly made me too worn out to blog.  Gonna slowly pick up my pace and make a return here.

A tub of yuzu jam specially bought by my sister-in-law from Japan

Yummy!


A simple bake here with my new Rowenta oven and it was really good. Soft, pillowy and yummy chiffon cake with a subtle yuzu taste.


I love my new kitchen gadget! Looking forward to more baking adventures with it :)

Yuzu chiffon cake for tea, anyone? :D

Yuzu (Honey Citron) Chiffon Cake (20cm tube pan)

Egg white mixture
5 Egg whites 
80g Caster sugar 
1/4 cream of tartar

Egg yolk mixture
5 Egg yolks
20g Water 
55g Vegetable oil 
80g yuzu jam (honey citron)
90g Hong Kong Flour
20g Caster sugar

1. Beat the egg whites and cream of tartar in a clean large bowl until peak foam. Gradually add in sugar, in 3 additions And beat till stiff peak forms.


2. Mix all the egg yolks mixture except flour. When everything well combined then add in sifted Hong Kong flour. Mix everything till well combined. The mixture would be quite thick, smoothand lump-free.


3. Gently fold in 1/3 of the egg whites mixture into the egg yolks mixture. When everything is well combined, fold in 1/2 of the remaining egg white mixture. Lastly, fold in the remaining egg white mixture. 


5. Pour the mixture into a 20cm chiffon cake tin and bake at a 160-170'C preheated oven for 40 to 50 minutes or till done. Turn the baked cake upside down and allow it to cool before slicing.


Wednesday, June 24, 2015

Lotus Roots and Sweet Corn with Dark Red Kidney Beans

After a break from the blogsphere and a short vacation in Bangkok to celebrate my birthday, I am back again to this hot hot country.

To prevent hydration during this super hot and humid period, pls rem to have more fluid intake!!! Soups help to add on to your fluid intake so cook them :)


This is a healthy soup. With the addition of dark red kidney beans, it enriches the soup further.  Leaving you with the recipe :)


Lotus Roots & Sweet Corn with Dark Red Kidney Beans
Serves 3 to 4


1 segment of lotus root, cleaned and sliced
1 pc chicken breast 
1 sweet corn, de-skinned and cut into smaller pcs
100g of dark red kidney beans
8 to 10 red dates, pitted and rinsed 
3 dried figs, rinsed
2 honey dates
2 litre of water
salt to taste

1. Remove chicken breast skin and all excess fats and blood residues. Wash and drain.
2. Put 2l water to main pot and bring to boil.


3. Meanwhile, bring a separate small pot of water to boil, put in chicken breast and blanch it for another 1 minute to remove oil and scum. Briefly rinse blanched chicken breast meat under running water and place  it into the boiling main pot. Add in all other ingredients (except sweet corns if you want to eat them) into main pot and leave to boil on high heat for about 20 minutes. 
4. Bring down to low heat and let simmer for 2 hours. 
5. Just before serving, bring soup to boil, add in sweet corns and let cook for 5min or till done and then add in salt to taste. Serve.

Monday, June 15, 2015

Air Fried Shallots

Are you a fried shallot lover like me? I love having them in my noodles and congee, not just purely for garnishing but for the crispy feel. Fried shallots taste so so good.


While I love fried shallots, I never like making them on my own. Hate the peeling and slicing, and most of all the frying part, so usually Mum gives me a bottle when she makes them. Lately the supply from mama stopped and I am too ashamed to ask. I thought I could try making fried shallots with my air fryer!

And so I did. Did not know that shallots cost this much nowadays. A small pack cost me 2 bucks! Okay, move on. Did the needful - peeling, rinsing and slicing. Finally the air frying part. Made it. No sweat and I whatsapped a pic of the end product for Mum to see. Mum said she will pass me sliced shallots to air fry for her from now on! Hahahah! 

Air Fried Shallots

2 to 3 handful of shallots, peeled, rinsed and sliced
some oil for coating 

1. Preheat air fryer to 180deg C for 5min.
2. Dislodge air fryer net and pour in sliced shallots. Spread out shallots evenly in air fryer net.
3. Using a cooking brush, brush a layer of oil over shallots and put to air fry on 180deg C for 10min.


4. After 10min is up, stir shallots about to even them out as they will fly about in the net as they get lighter when fried. Put back to airfry again for 10min or till done.
5. Remove and let air fried shallots cooled before storing in airtight container.


6. Garnish your noodles or fried rice with these air fried shallots.

Friday, June 12, 2015

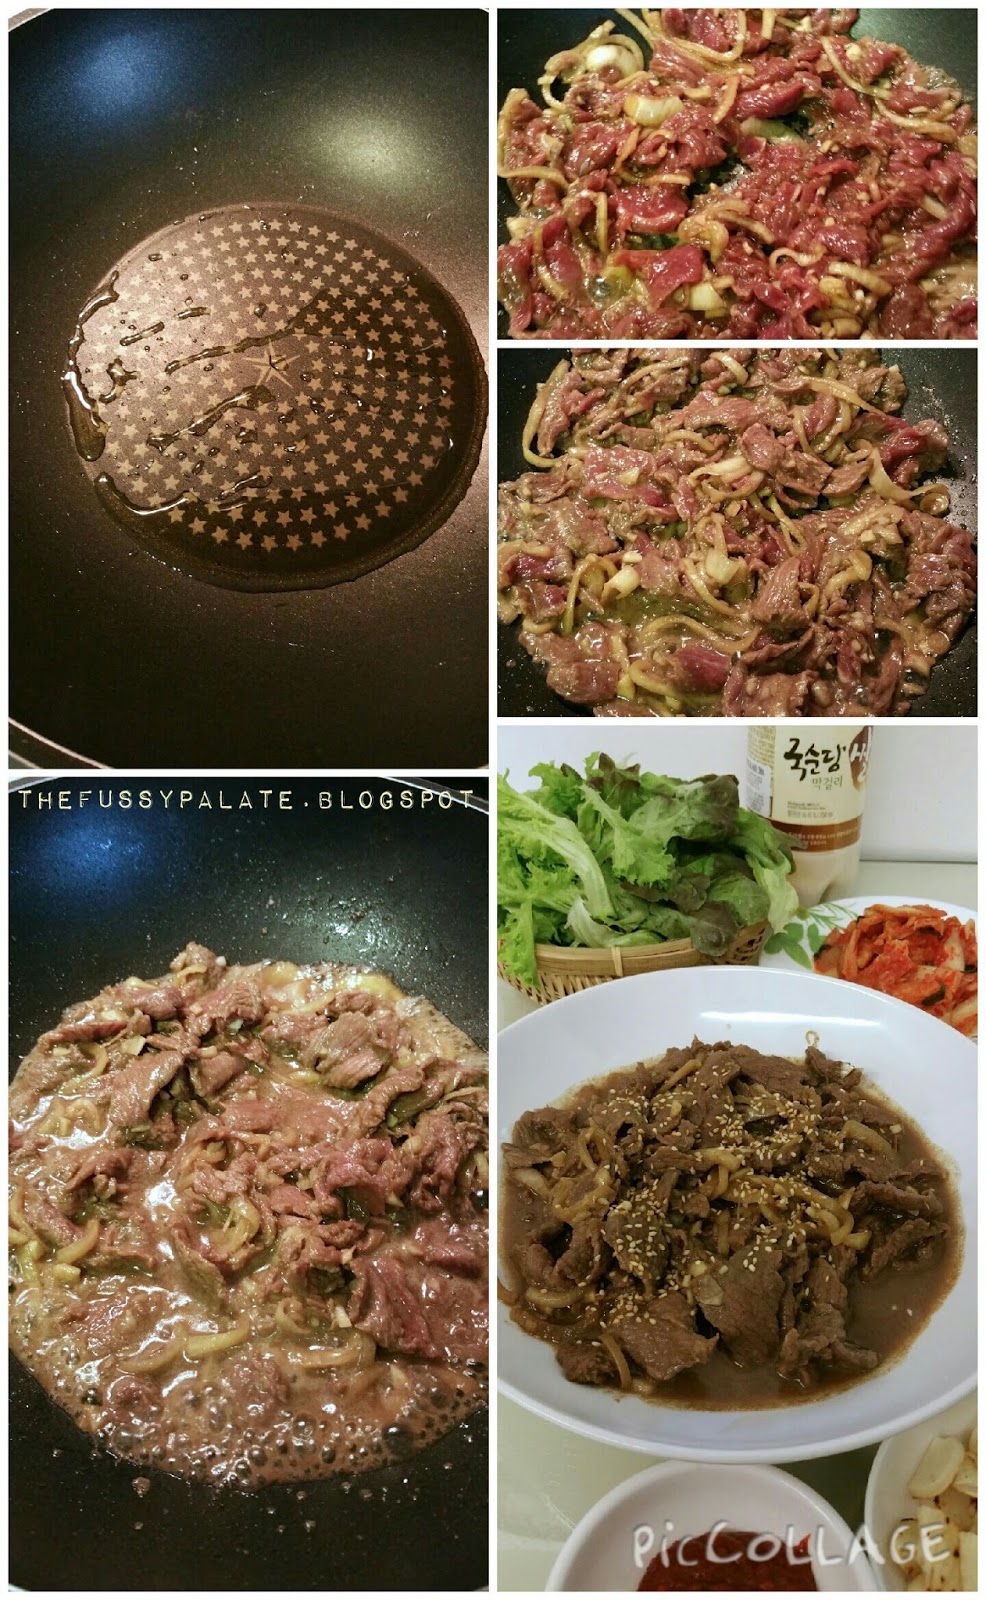
Beef Bulgogi


Another Korean meal for dinner, upon Hubby's request. Since I had a bottle of beef bulgogi sauce bought from Lotte Mart in Seoul from the last trip, I aceded to the Hubby's request.

Brought out the Makgeolli (Korean Rice Wine) and had it with the meat. Not quite a meat lover, but I thoroughly enjoyed that meal of meat and wraps, and drinks! Still can salivate at the thought of it. I wanna cook this soon again!


It would have been abit more work if I made the meat marinate from scratch for I would need pear puree, onion puree and many more ingredients for it. As usual, I took a short cut and used store bought beef bulgogi sauce! Easy peasy. No more lazy shortcuts when I finish up that little bottle.

We had bought more beef than we intended to cook and I marinated it all anyway, just store it in 2 tupperwares. You can freeze 1 portion of the marinated meat, and just bring out to thaw before cooking it. The other portion I merely refrigerated it and let the marinate does its job for like 20 hours before cooking it the next day.  Yummy!

And so with the remaining portion of frozen marinated beef, I cooked them and had it with rice. It was good!

Wrap style or with rice? Your choice :)

Beef bulgogi with a sunny side up.
*
*
*
I am hungry as I write.
:P


Beef Bulgogi
Serves 2 to 3


370g fresh chuck tender beef (you can use sirloin beef too)
6 to 7 tbsp store bought beef bulgogi marinade
2 garlic, minced
1 tsp sesame oil
1 yellow onion (or 2 if you like onions), de-skin, halved and cut into 4 pcs for each half
dashes of ground black pepper
1/2 tsp garlic powder (optional but I just wanted to add it hehe)

Garnishing
White sesame

1. Wash beef and dap dry with a kitchen towel. You may choose to slice it when frozen so that you get thin pcs from easier slicing, or be like me just slice it after drying and at room temp. If you are letting the meat be marinated in fridge overnight for more than 6 hours, not slicing it too thinly is okay. Longer hours of marinating tenderizes the meat.
2. Place sliced beef into a container. Add in all sauce, and ingredients and mix well to coat meat evenly. Cover and place in fridge to marinate for at least 2 hours, or better still, overnight.


3. When ready to cook meat, heat 2 tbsp of oil in frying pan, place in marinated meat, break up meat and stir fry till cooked, which takes less than 5 min. Beef slices get cooked fast.


4. Serve immediately with some white sesame sprinkled over. Eat with lettuce and ssamjang plus other sides that you like or enjoy it with plain rice.

Monday, June 8, 2015

Mango Honey Yoghurt Popsicle

The unusually hot and humid weather is making me crave for anything cold to cool my body. Very unlike me, for I am one who is not into icy cold stuff. It is the same with my hubby! And so I thought it was about time I put my popsicle mould (I bought some 1 year back!) into good use.  Make some healthy fruit and yoghurt popsicle, will you?


I have got 2 ripened mangoes, a tub of yummy honey yoghurt, a blender and a popsicle mould, so let's do it :)

I got this from Japan Home.

We love this thick and creamy yoghurt.
A must have in our fridge.


This is a super fast and easy popsicle recipe. Seriously, it couldn't get any easier than this! Best of it all was that these are yummy and healthy sweet treats for yourself, and your littles ones :)


Fret not if you do not have a popsicle mould, you can do good even with paper cups, plastic cups or shot glasses for dainty icy treats. Spoon blended mixture into paper cups, cover with clingwrap and stick in centre of clingwrapped cup with a short straw or a snipped wooden chopstick for support of the popsicle.

Wooden chopstick would have been the better support option but I did not have them, so I used straws. It was quite okay too just that you would have to held it with more care :)


Mango Honey Yoghurt Popsicle

220g mango puree (I used 2 Thai Honey Mangoes)
170g Greek Honey Yoghurt

1. Slice and place mango pieces into blender. Blend!


2. Spoon in Honey Yoghurt into mango puree and blend again.

I filled the moulds with half of the mango yogghurt puree, then spoon in half a tbsp of honey yoghurt and finally topped it off with the remaining mango yoghurt puree. Use a chopstick and loosely stir the puree to create a swirl pattern.

3. Spoon puree into popsicle moulds or paper cups. Do not fill to brim of mould as popsicle will "pop up" slightly when frozen.
4. Place into freezer.

I had extra puree and so the remaining were poured into paper cups.

5. When removing, wrap mould with a hot dish cloth and carefully dislodge popsicles. Enjoy!