Tuesday, September 29, 2015

Espresso Coffee Bread Loaf


Sunday mornings are mostly reserved for break making to "welcome" the coming working weekdays. Can say that it is a weekly habit, a therapy for me. Of cuz there are some Sundays meant for cake baking too, when I do not feel like munching bread come weekdays.

For the past weeks, I have the crave for anything espresso and I want them in my bakes! Even my milkshakes!  Hehe... I am a coffee lover alright :)


I did a bad job at trying to dislodge the bread from the loaf tin!!!


This round, I incorporated my Nespresso Espresso into my bread and had a lovely, fluffy and aromatic loaf bread.  The softness lasted for 3 days! It was good on its own, without the need for jam spreading.  Pair it with a cup of coffee and say yum :)


Espresso Coffee Bread Loaf (Pre-fermented dough method)
(makes 1 loaf)

Pre-fermented Dough
230g bread flour
1 tsp instant yeast
1/2 tsp salt
1/2 tbsp skimmed milk powder
135ml water


Dissolve yeast in water.  Add to rest of ingredients & knead until soft. Place dough in a big ziplock bag and refrigerate for at least 17 hours. The dough will expand in the bag, so make sure there is room for expansion.

Main Dough
100g bread flour
1 tbsp skimmed milk powder
1/2 tsp salt 
40g sugar 
1 small egg (lightly beaten)
40ml espresso coffee (no sugar added)
1 tsp instant yeast
30g butter (softened at room temperature)

1. Knead all main dough ingredients together (except butter), then add in pre-fermented dough piece by piece.

2. Knead as you add until the dough is soft and smooth (the dough is quite wet but should be acceptable after about 10-15 minutes of kneading) - I did the mixing of all ingredients by my bread machine.

3. Add butter and continue to knead until dough is soft, smooth and stretchable and does not stick to your fingers when pressed. - I left Step 1 to 3 to my trusty bread machine and only took over from here to knead it till window pane stage as I prefer to feel the dough and achieve windowpane stage with my own hands.  I hate mixing part as I do not like my hands getting all gooey.

4. Flour your hands before shaping dough into a ball and leave in mixing bowl.  Cover the bowl with a clean and moist tea towel cloth and let it proof for about 15-30 minutes or until double in size.

5. Punch down dough and roll dough flat into a long rectangular shape and roll dough up like swiss roll.  You may shape your dough according to your preference.

6. Grease your loaf tin with butter or oil.  Place rolled up dough in loaf tin and cover top loosely with a moist and clean tea towel cloth.  Let proof for 45 minutes or till dough has risen to 80-90% of tin. Brush top with fresh milk (room temp.).


7. Bake at 180 degree preheated oven for 25-30 minutes.  Unmould and let it cool on cooling rack.

8. Slice when cool. 

Sunday, September 27, 2015

Braised Chicken with Bittergourd


This is a way overdue dish that I found still stuck in my draft.  If you have been keeping up with my blog, you will know that I am a lazy wife and cook who churn up only simple, fast and easy dishes. No need for much of cooking skills, and there you are, one pot dishes to get you over 1 meal.

Hubby and I love this braised chicken with bittergourd and we could just eat it with rice alone! Feel free to use prime pork ribs in place of the chicken meat and it will taste equally yummy too.

I over-braised it quite abit and got soft bittergourd, where they were not that bitter anymore and suits Hubby's taste.  Gonna cook this again!

Now, it is coming to the end of my 4 days' long weekend break and tomorrow is back to work tomorrow!!! Monday blues will soon set in *sob* Good luck to all who are like me hehehe!

Braised Chicken with Bittergourd
Recipe by Patsie Cheong from One Day One Dish 365 Selected Home-Cooked Recipes

Ingredients A
600g chicken meat ( I used thigh meat)
1 tbsp light soy sauce
1 tbsp corn flour

Ingredients B
2 tsp bean paste
2 tsp sugar
1 tbsp minced garlic

Ingredients C
400g bittergourd
60g carrot ( I used 1 whole carrot)
2 stalks spring onion  (chopped)
some windmill flour solution (I left this out)

Seasonings
2 tbsp oyster sauce
1 tbsp Huadiao wine (chinese cooking wine)
1 tsp dark soy sauce
1 tsp sesame oil
1 1/2 cup water

1. Cut chicken meat into small pieces and marinate with light soy sauce and corn flour.
2. Remove seeds from bittergourd and cut it into sections. Peel and slice carrrot and set aside.
3. Heat up 2 tbsp of oil and stirfry Ingredients B till fragrant.


4. Add in marinated chicken and Ingredients C, and stirfry till well combined. Pour in Seasonings and simmer till the meat becomes tender and cooked.


5. Stir in flour solution and serve. (I left this out)

Tips: Chicken can be substituted with roast pork as well..

Thursday, September 24, 2015

Chinese Yam & Lotus Roots Soup


If you love soups like me, you have to cook this soup because this soup bears all the good and nutritious ingredients.  I did not have to add in salt towards the end because it was already sweet and wholesome enough.


Allowing at least 2 hours or more to slow cook my soups and then be rewarded with a pot of rich, sweet soup. 

I usually eat the ingredients added into my homecooked soups and so pairing it over a bowl of rice is more than good enough for me.

Return of the haze makes it an awful feel to stay out. So grab your ingredients and cook at home! Load yourswlf with more fluid during this hazy period ya.


Chinese Yam & Lotus Roots Soup

2 litre of water
400 lotus roots (remove soil, wash & scrub clean if not removing
skin or remove skin with peeler and cut 1cm thick)
250g pork ribs
Chinese yam (Huai shan), cut into bite sizes (I used 1 that was about 15cm long, did not weigh it)
A handful of red dates (pitted)
A handful of yuzu
2 to 3 dried figs
1 honey date (optional)


1. Place lotus roots, red dates, yuzu, honey date and dried figs into pot and add in 2l of water. Bring to boil.
2. In a small pot, blanch pork ribs in boiling water for about 2 minutes to remove scum and oil.  Drain and wash pork ribs in clean water and add into the main pot.


3. Let simmer for 2 hours.  Add in chinese yam and let it simmer for 30min. Serve.

Wednesday, September 23, 2015

Garlic Focaccia Bread


I finally cooked Hubby's favourite beef stew few days back and he requested for some western bread to go along with the stew. I chose focaccia over baguette and Hubby okayed it.


So I made garlic focaccia. Garlic. My favourite! Everything I cook must have garlic, if possible. Keke!

My first try at this garlic focaccia bread and it was a straight dough method. Soft on the first day, 2nd day was okay though not as soft as when eatenon the first.

A good match with the beef stew and I definitely enjoyed that meal.

Indeed, Carol's recipes are surely good keeps. So many bread recipes to try but so little time. If I could spend all my time baking away... *daydream mode*


Garlic Focaccia Bread
Recipe by Carol's Original Flavour Bread Recipe

A. Dough
250g bread flour
50g wholemeal flour
10g caster sugar
1/2 tsp instant yeast
20g olive oil
1/2 tsp salt
200ml water

B. Garnishing
Sufficient amount of olive oil for brushing
4 garlic, finely minced
Dried parsley, for sprinkling
Parmesan cheese (I left this out)

1. Set aside 30ml of water, theb place all of ingredients from A into mixing bowl and mox till a dough is form and not sticking to hands before adding the 30ml of water gradually.
2. Knead dough to window pane stage.
3. Place kneaded dough into a lightly greased mixing bowl and sprinkle some water on top of dough then cover with a clingwrap or moist cloth.
4. Set aside to proof for 60min or till double the size.
5. Place proofed dough on a lightly floured surface and knock out air from the dough. Dovide the dough into 4 equal portions (about 130g each), shape the 4 dough round and set aside to let it relax for 15min. Cover with a moist cloth.
6. Press down 1 of the dough and then rol it evenly round to about 1 cm thick with a rolling pin. Repeat the same for other 3 dough.
7. Place all 4 dough on a lined baking tray. Spray some water on top of the 4 dough and cover with a moist cloth, set aside to proof for 30min till about 1.5 time bigger.
8. Preheat oven to 200deg C.
9. Using a chopstick or your finger, make holes in the proofed dough, drizzle half teaspoon of olive oil on one dough and brush them all over evenly.
10. Spoon minced garlic over the top of dough evenly and sprinkle some dried parsley leaves and parmesan cheese over. Repeat the same for the other 3 dough.


11. Put into preheated oven to bake at 200deg C for 18 to 20 min or till dough top turn slightly golden brown.
12. Leave to cool on cooling rack.

Monday, September 21, 2015

Steamed Cod Fish with Minced Garlic

I love to eat fish cooked this way. I love garlic and love how it covers the fishy smell. A simple and easy way to have the fish prepped, cooked and eaten in no time!


Steamed Cod Fish with Minced Garlic

1 sliced of cod fish (roughly 250g)
garlic puree (I used minced garlic instead, from 4 garlic pcs)
10g spring onion (I used 2 pcs of spring onions, cut them thinly sideways and placed them in water with some ice cubes for 30min, the spring onions will curl to form some garnishings)


Seasonings
1 tbsp Oyster sauce
3 tsp water
1 tsp caster sugar

1. Put steamer to boil on high heat.
2. Combine oyster sauce, water and sugar in a bowl and mix well.


3. Wash cod fish and dry with a kitchen towel, then place on a plate for steaming.
4. Spoon minced garlic over cod fish and drizzle seasoning sauce over. Top with spring onion curls.
5. Place cod fish to steam for 7 min on high heat ot till cooked. Serve immediately.


Tuesday, September 15, 2015

Wholemeal Rye Rolled Oat & Honey Bread with Chia Seeds

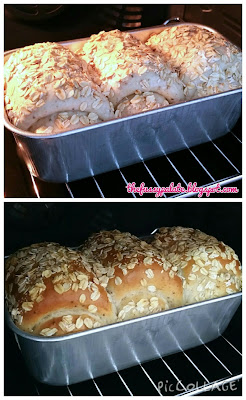
How long has it been since I last made loaf bread???  Too long back. And so... it is time to make it again. Buns aside. And yes, this loaf bread was good. So soft and fluffy, with a nice bite to it from the little chia seed bits.


Array of photos up for display as I am keeping this post short.  Have been busy since I started my new job and when I get home each day, it is just bathe, dinner and laze on the couch not wanting to do anything else!


I wanna gradually pick back the momentum soon and get back my life and then keep up with my blog postings.  Give me time. :)


Wholemeal Rye Rolled Oat & Honey Bread with Chia Seeds

A
50g bread flour
35g boiling water

B
150g bread flour
40g wholemeal flour
20g rye flour
1.5 tbsp chia seeds
40g honey
3g salt
5g instant yeast
87g water
30g egg
30g butter (room temp)

C
1 tbsp fresh milk
3 tbsp rolled oat

1. Add the boiling water from A into flour and mix until well blended to form a dough. Cover and set aside to cool. Keep it into refrigerator for at least 12 hours.
2. Break up gelatinized dough from A into bread machine, place liquid ingredients from B (egg and water) into bread machine followed by remaining dry ingredients (except butter) and set it to mix and form a smooth dough. (For my Kenwood BM250, I put it to mix on Function 8 to mix for 10min)
3. Add in butter when a smooth dough has been form and let it mix to form a smooth shiny dough. (I reset my BM and added in butter, set it to mix again on Function 8 for 15min)
4. Remove dough and knead to window pane stage. You may flour your work top to ease the sticky kneading stage but not too much. I used about 1 tbsp of bread flour.
5. Place dough into a mixing bowl, cover with cling wrap or clean moist dish cloth and set aside to proof for 40min or till double the size.
6. Punch out air from proofed dough and divide into 3 equal round portions. Cover with moist cloth and let it relax for 5min.
7. Flatt dough and roll up swiss roll way, place into greased loaf pan. Repeat for remaining dough.
8. Cover with moist cloth and set aside to proof for 50min or till double the size.


9. Brush dough top with fresh milk and sprinkle rolled oat over.


10. Set to bake at 160deg C for 20min, then 170deg C for 8min to form golden brown crust. Remove from oven and let cool before slicing. Store in airtight container to retain softness for longer.

(Above temperature and baking time was based on my Rowenta oven. I used the convection mode.)

Friday, September 11, 2015

Avocado Espresso Shake


Want some avocado smoothie?


How about some espresso?


Or why not mix both avocado and espresso together to form a shake and get the best of both worlds???

You'll be surprised by how good this avocado espresso shake is!  I had always wanted to try it and finally got down to making this yummy shake this very morning.

I told hubby about my plan to try out this shake last night and he was kinda skeptical about this combi. This morning, he was won over. I was too. It was filling and it lasted me till noon time!

I wanna make this yummilicious avocado espresso shake again real soon!!!

*slurp*


Avocado Espresso Shake

Recipe by INeedCoffee by Michael Allen Smith

  • 1 medium sized avocado (ripe)
  • 1/2 cup of milk (or coconut milk)
  • 1/3 cup of sweetened condensed milk
  • 1/2 cup of ice cubes
  • 2 shots of espresso or about 3 ounces of brewed coffee

  1. Slice the avocado open. Remove the seed and peel.
  2. Place the avocado (minus the seeds and peel) into a jar.

  1. Add the rest of the ingredients to the jar (ice cubes, coffee, sweetened condensed milk, other milk).

  1. Blend everything together. I use an immersion blender, but whatever you have will work fine.
  2. Taste and Adjust. Do you like it or does it need to be improved? If the shake is too thick, add some more milk. If the shake is too sweet, add some more coffee. If the shake is not sweet enough, add a little more sweetened condensed milk. The Coffee Avocado Shake is more art than science.
  3. Serve.

Thursday, September 3, 2015

Pandan Buns with Red Bean Paste filling


These are pull-apart buns that seems so old school to me. I think nowadays very few people enjoy eating these red bean buns since there are so many fanciful bread and buns sold outside.

With the amount of fresh pandan juice in my fridge, I thought why not make some pandan buns since we have not had it for some time. No artificial green colourings. I got a batch of nice pandan smelling buns. No guilt cuz it was made with all natural pandan juice!


Made them mini sized so that I can get more little buns.


Homemade buns can be soft and fluffy too.


I made more so I can pack and give them to my Dad and sister. Dad loves red bean buns.

Cooled, packed and ready to be delivered!


Pandan Buns with Red Bean Paste filling

A.
100g bread flour
70g boiling water

B.
300g bread flour
100g plain flour
80g sugar
5g salt
20g milk powder
8g instant yeast

C.
175g fresh pandan juice extract
(Blend 10 pandan leaves with 190g water, squeeze out juice and run through sieve to rid pandan leave bits)
55g egg

D.
60g butter, room temperature

1. Add the boiling water from A into flour, mix until well blended to form a dough. Cover and set aside to cool. Keep in refrigerator for at least 12 hours.
2. Break up A dough inti smaller pieces anf mix with B till well blended. Add in C and knead to form rough dough. OR if using bread machine, follow BM instructions by placing in all wet Ingredients first from B followed by broken up A dough, flour, milk powder, sugar and salt in opp corners, make a hole in centre of flour mixture, place in instant yeast and cover with flour, set to mix till rough dough is formed.


3. Add in D and knead to form an elastic dough OR if using BM, add in D and allow BM to mix and form smooth shiny dough. For me, I then remove it and hand knead it till it reaches the window pane elastic stage.
4. Place dough in a big mixing bowl and cover with a moist clean kitchen towel and let it proof for roughly 40min or till double its size.
5. While waiting for dough to be proofed, prepare the red bean paste filling by weighing each filling to be 20g and rolling it round, make 24 balls.
6. Punch out air from proofed dough, then divide dough into 40g each, 24 pieces. Cover and let rest for 5min for easier handling.
7. Flatten ball dough and wrap in red bean paste filling. Set it on a greased baking tray. Cover with a moist kitchen towel and set aside for 2nd round proofing for 30min.


8. Brush milk over bun tops and set to bake in a preheated oven at 175deg C for 18min or till golden brown (this is based on my Rowenta oven temp and time.).


8. Remove tray of buns and set buns to cool on a cooling rack. Store in airtight container when cooled.

Wednesday, September 2, 2015

Air Fried Salmon in Black Pepper Sauce


Told you we are into salmon nowadays ya! :P I even bought a book on seafood just for the fish recipes!

Starting to like eating fish meat now as compared to before. I guess my hubby has a little influence to me on that because he loves to eat fish.

Short short post here as I am hurrying for dinner. A hungry woman is an angry woman :P


Air Fried Salmon in Black Pepper Sauce

2 Salmon Fillets
SingLong black pepper sauce
Spring onions, sliced thinly

1. Wash and pat dry salmon fillets with a kitchen towel.
2. Preheat airfryer to 180deg C for 5min.


3. Put salmon fillets to airfry for 5min at 180deg C.
4. Open and brush on a thick layer of black pepper sauce onto front and black of salmon fish and continue to airfry for further 4min or till done.
5. Carefully remove salmon fillets and garnish with spring onions. Serve immediately.