I can't wait for my next trip back to Korea again, for their food! Not that I am flying again anytime soon, that is just me daydreaming. Hehe!
Everything Korean is kinda part of my lifestyle now. From food to variety shows to dramas, songs, facial products, make up and so many more. It is why more Korean food is popping up here in this space.
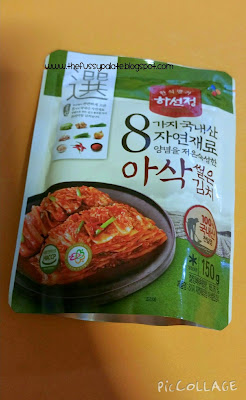
We had just one serving of kimchi rice in Seoul and that left me craving for more I just had to cook them at home. Might not be the authentic Kimchi Fried Rice but at least it could fill a void in me. Hey at least the kimchi was from Lotte mart okay!
Do you love kimchi like I do?
Okay, I tried to take a shortcut here with a heat-up-and-ready-to-consume soondubu jjigae (spicy tofu stew) which I also lugged back with me from Korea. I just threw in more ingredients of my own and voila, a meal of rice and soup.
Aren't jotting down how I cooked the soup because it was just cutting up side ingredients, emptying soup contents into my
Korean ddukbaegi, an earthernware that is traditionally used to cook guk (soup) and jjigae (stew). It was worth the while buying this ddukbaegi back here. I love how it keeps my soup and stew hot till we finish our meal. Nice!
Hubby said he thought he was back in Korea when he sipped one spoonful of the stew.
Now, on to my kimchi rice cooking experience.

Kimchi Fried Rice (Kimchi Bokkeumbap) 김치볶음밥
175g Kimchi
2 cups cooked rice
2 tbsp butter
3 tbsp Kimchi juice
2 eggs
1 tsp salt
½ tsp black pepper
I also used:
1 garlic, minced
1 spring onion (green onion) – sliced side, thinly (leave sliced white parts for frying, and green part for garnishing)
Drizzle some sesame oil over once Kimchi rice is fried and done
1. Make rice
Cook rice if you don’t have any. Use Korean rice, also known as short grain rice, sticky rice or Japanese rice. See cooking white rice in a pot andcooking white rice in a rice cooker. For fried rice, make the rice a little drier than usual by adding a little less water. This prevents your Kimchi Fried Rice from becoming too soggy. White rice is usually used for Kimchi Fried Rice, but multigrain or brown rice is okay too.
2. Chop kimchi
Chop kimchi into ¼” pieces (about 1 cm) to yield 1½ cup of chopped kimchi (about ⅛ of a whole nappa cabbage kimchi). It’s ideal to use over-fermented (sour) kimchi. You can also add meat or vegetables you like (see tips above). Chop them into the same size as kimchi.
3. Butter
In a large pan or wok melt 2 tablespoons of butter on medium heat. (You can add one more spoon if you love butter.) If you are not using butter, you can use vegetable oil but adding some sort of meat to the dish is recommended to enhance the flavor. (Add in minced garlic and white part of spring onion / green onion and fry for awhile)
4. Saute kimchi
Add chopped kimchi to pan and saute for 5-10 min on medium heat or until kimchi is cooked completely. Add 3 tablespoons of kimchi juice (optional) while cooking. If kimchi starts to stick to the bottom but not cooked through yet, add a little bit of water or more kimchi juice. You can add more kimchi juice if you like it spicy. If you don’t have kimchi juice, you can also add some gochugaru for more spiciness and red color.
5. Add rice
Reduce heat to low. Add 2 cups of cooked rice and mix thoroughly. If you are using cold leftover rice, make sure you mix it until there are no cold lumps of rice and all the rice is warmed up. Let it sit on low heat for about 5 min. If you like it crispy on the bottom, you can spread the fried rice thinly over the pan and cook on low heat until the crispy bottoms if formed.
6. Season
Taste and season with salt only if necessary. The amount of salt depends on the saltiness of kimchi and how much kimchi juice is used. Add a pinch of black pepper.
7. Fry eggs (optional)
In a pan, add a little bit of vegetable oil and fry eggs on medium heat. Season with salt and pepper. You can cook one egg for each serving. Sunny side up is great for presentation but you can cook to your preference.
8. Serve
Serve Kimchi Fried Rice on a plate. Top it with a fried egg. Enjoy!


No comments:
Post a Comment
Welcome All to my little food blog & utmost thanks for your effort in leaving me a comment. Regardless of whether or not you have tried and tested my recipes shared here, do drop me a note - I definitely would like to hear from you :)
I would appreciate if you DO NOT SPAM here. Spams will be removed upon my review.
All images and contents within this site are the sole copyright of The Fussy Palate © 2014 - 2015
No images may be reproduced or used without prior consent.