The big box sale by Marshall Cavendish some 2 months back or so got me crazy and I lugged back a huge amount of recipe books, and I have got no reasons to not try out recipes from the stack of books lying in my study room. So yeah, start of the recipe book cooking from now.
Cod Fish with Ginger-Garlic Sauce
Recipe adapted from the asian oven book by Jo Marion Seow
*Original recipe snapper fillet but I replaced it with cod fish
1 thumb-size knob ginger
2 large garlic cloves, peeled
1, spring onion (scallion), diced
2 tbsp cooking oil (I used 1.5 tbsp)
2 tbsp light soy sauce (I used 1.5 tbsp)
4 Snapper fillets, about 150g each (I used 1 cod fish fillet, roughly 300g)
1. Scrape the skin off the ginger using a spoon. The rounded edge of the spoon is able to navigate the curved surfaces of the ginger and remove just the skin.
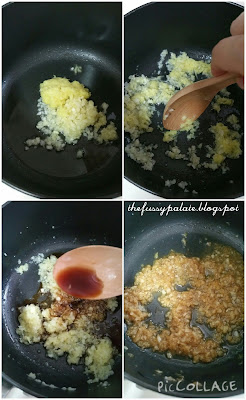
2. Finely grate the ginger and the garlic. Put the grated ingredients and spring onion into a small bowl.
3. Heat oil in a small saucepan until it is smoking hot. Pour the oil onto the ingredients in the bowl and give everything a stir. Now add light soy sauce and stir to combine. The sauce is done.
4. Preheat the oven to 200deg C. (I put the cod fish to steam instead of baking it)
5. Place fish in a casserole dish. Cover tightly with foil and bake for 6-8min. (Put a steamer to boil, place cod fish on a steam plate and put to steam for about 8min, or till done.)
6.. Remove the cooked fish from the oven. Discard the foil.
7. Spoon the ginger-garlic sauce over the steamed cod fish and serve immediately.
Note:
I did not add the diced spring onions with the ginger-garlic.
I sliced the spring onions sideways, thinly and about 2-inches long and placed them into a bowl of iced water. Let it stay in for about 45min and the spring onions will curl.
Remove spring onions and drip off remaining water. Spring onion garnish is ready for use!


No comments:
Post a Comment
Welcome All to my little food blog & utmost thanks for your effort in leaving me a comment. Regardless of whether or not you have tried and tested my recipes shared here, do drop me a note - I definitely would like to hear from you :)
I would appreciate if you DO NOT SPAM here. Spams will be removed upon my review.
All images and contents within this site are the sole copyright of The Fussy Palate © 2014 - 2015
No images may be reproduced or used without prior consent.